“`html
What a Worn Cassette Actually Looks Like
I’ve been wrenching for fourteen years, and spotting a dying cassette from across the shop has become second nature. But here’s what catches most riders off guard — you won’t notice it while riding. Not until things fall apart.
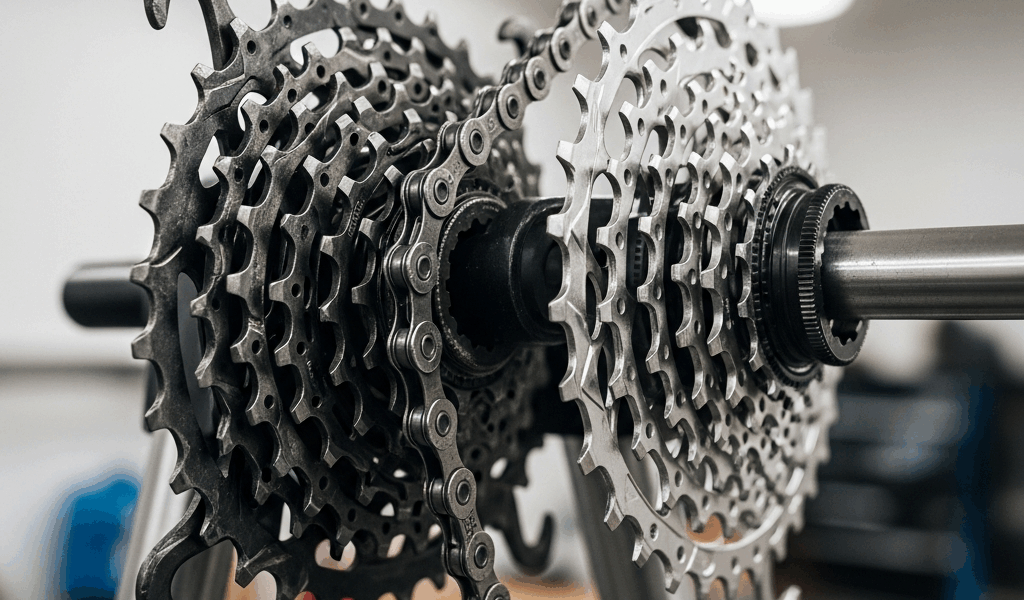
The signature wear pattern looks like shark teeth. The smaller cogs develop a hook shape, especially on the two or three sprockets you use most often. The leading edge slopes backward at an angle instead of standing vertical. This happens because your chain stretches from the inside out, which makes it sit higher on the teeth. The contact point shifts, and the tooth profile follows suit.
Run your finger across a new cassette cog, then touch a worn one. A worn tooth feels pointed, almost hooked. New ones are blunt. That difference tells you everything.
Rust staining is another diagnostic clue. Salt air, road spray, cheap lube breaking down — all of it settles between the sprockets. You’ll see orange or brown discoloration between cogs, sometimes with a gritty texture. Not always a sign of imminent failure, but it points to either moisture exposure or someone who’s neglecting drivetrain cleaning.
On the smaller cogs — the ones you use in high gear — look for actual metal missing. Spalling happens when the tooth surface just delaminates. Probably should have opened with this section, honestly. Most riders don’t get close enough to their cassette to see this until the damage is catastrophic.
Some wear is invisible unless you remove the cassette. The center of each tooth wears down uniformly, but the hook develops on the trailing face. From the side, the cassette looks fine. Spin it slowly and look straight at the teeth profile, not from the side. That’s where the damage lives.
Early Warning Signs Before It Gets Expensive
The physical signs come first. Listen for them.
Chain skipping under power is the most obvious one. You’re mashing up a climb, and suddenly the chain jumps off the tooth. Your leg shoots forward, the pedal feels loose, then catches again. This happens because worn teeth can’t hold the stretched chain properly. The chain sits too high and slips under load.
It won’t skip on easy pedaling. It skips under power. That distinction matters — it tells you the wear is advanced enough that friction alone can’t grip the chain anymore.
Soft clicks while pedaling in specific cogs. Not a grinding sound. Clicks. Your chain is micro-slipping as it engages and disengages worn teeth. Some riders mistake this for minor derailleur issues. It’s not. The derailleur is positioned correctly, but the tooth profile is wrong.
Shifting hesitation on particular cogs — usually the smallest three sprockets. The derailleur moves to position, but the chain takes a half-second to actually seat on the tooth. Under power, this gets worse. This is your cassette telling you it’s done.
Noise pattern changes are subtle but real. A worn drivetrain develops a higher-pitched whine instead of the normal droning hum. It’s caused by the chain bouncing slightly on worn teeth instead of meshing smoothly. Long rides, you notice it. Quick trips, maybe not.
A stretched chain on a new cassette is silent. A stretched chain on a worn cassette is noisy. The interaction changes the way the chain engages every single tooth.
How to Check Cassette Wear Without Tools
Grab the cassette with your hand and try to move it side to side on the freehub. New cassettes have zero play. Worn ones? You’ll feel slight movement — maybe a millimeter. But it’s there. This tells you the splines on the freehub are wearing too, which matters for replacement.
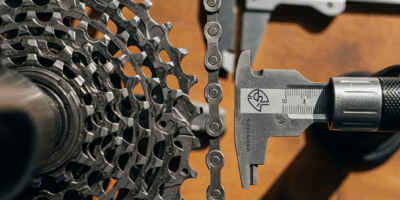
The chain-pull test works without any tools except what you’re already holding. Shift to the smallest cog. Pull the chain away from the cassette using your index finger — pull straight out, perpendicular to the cog face. A new cassette, the chain snaps back down and seats firmly. A worn cassette, the chain hangs loose or takes a moment to seat. Worn chains do this too, but a chain plus a cassette both showing this symptom means replacement time.
Visual inspection under light is your best move. Shine a bike light perpendicular to the cassette face and look at the teeth profile on the three smallest sprockets. Anything that looks like a hook or a fish-hook shape means wear is obvious. You’re looking at the trailing edge of each tooth — new teeth look like a vertical wall. Worn teeth slope backward.
Listen while pedaling. Stand over the bike indoors. Single speed or fixie riders will hear this loudest, but any drivetrain will noise-signal cassette wear. Pedal slowly in various cogs and listen for clicks or grinding. No fancy stethoscope needed. Your ear knows the difference between smooth and damaged.
Step-by-Step Cassette Removal and Replacement
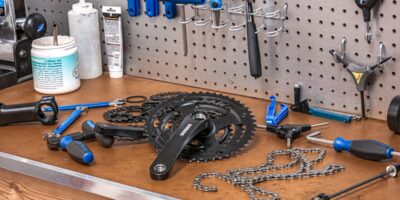
You need three things: a cassette lockring tool that matches your hub type, a chain whip, and a wrench that fits your lockring tool. The cassette lockring is tight — usually 40+ Nm. Don’t skip the chain whip or you’ll round the lockring.
First error most people make: using the wrong lockring tool. Shimano HG cogs use one spline pattern. SRAM XD uses a totally different spline. Microshift uses yet another. Check your cassette marking before buying a tool. I learned this the hard way, bought the wrong tool for a gravel bike repair, and felt like an idiot walking back in the shop.
Step one: remove the rear wheel from the bike. Support it in a work stand or bench vise using the axle, not the rim.
Step two: fit the chain whip around the largest cog. You’re using this as leverage against the lockring. The chain whip grips the cog teeth with its chain, and the handle extends backward. Hold this firmly — your non-dominant hand grips the chain whip.
Step three: insert the lockring tool into the lockring. Make sure it’s seated all the way — partial engagement strips the splines instantly. Fit your wrench onto the lockring tool. Turn counterclockwise. The chain whip resists rotation. You’re fighting this leverage. Don’t jerk — smooth pressure will win. If it won’t budge, you might have the wrong tool, so double-check the fit first.
Once the lockring is loose, unscrew it by hand. The cassette comes off as you remove the lockring. Some cassettes are single-piece units; others have spacers between cogs. Keep spacers in order if they’re separate.
Step four: inspect the freehub. Look for pitting, corrosion, or visible wear on the splines. Minor surface wear is normal. Deep pitting means the freehub is also damaged and should be rebuilt or replaced. Usually this costs $30–80 depending on the hub.
Step five: install the new cassette. If your old cassette had spacers, use the new ones from your replacement. Slide the cassette onto the freehub. Make sure it seats fully — you’ll feel it settle into the splines.
Step six: thread the lockring by hand until it’s hand-tight. This prevents cross-threading. Once hand-tight, use your wrench and lockring tool to torque it down. For Shimano HG, about 40 Nm. For SRAM XD, about 43 Nm. Don’t over-torque or you’ll damage the lockring. A simple click-style torque wrench ($25–50) removes guesswork.
Why Replacing Just the Chain Isn’t Enough
Here’s the hard truth: a new chain on a worn cassette is an expensive waste.
A stretched chain is married to a worn cassette. They’ve worn together. You can’t replace one without replacing the other. Install a new chain on worn cogs, and the new chain will skip immediately. The tooth profile won’t match the chain’s pitch. Within 50 miles, you’ll destroy the new chain and still need the cassette replacement.
Cost math: a mid-range cassette runs $60–150. A decent chain costs $30–60. Replace both at the same time: $90–210. Delay the cassette replacement and replace the chain twice: $60 for the chain, then $150 later for the cassette, then another $60 for a second chain. You’ve spent $270.
Most bike shops will refuse to sell you a chain without checking cassette wear. Good ones will explain this. Bad ones just do it anyway and let you learn the hard way.
The moment you notice any of the wear signs I mentioned — skipping, clicking, shifting hesitation — budget for both a new chain and cassette. That’s the real conversation. Not “my chain is worn,” but “my drivetrain is worn.” They’re a system.
The replacement itself takes thirty minutes once you’ve done it once. Most of that time is the lockring battle on your first attempt. After that, your hands know the motion. But the decision to replace both parts simultaneously saves hundreds in the long run and keeps your derailleur from getting caught in the crossfire.
“`

Stay in the loop
Get the latest bike maintenance pros updates delivered to your inbox.