What a Loose Stem Actually Feels Like
Bike stem maintenance has changed quite a bit thanks to the conflicting advice flying around. As someone who rebuilt a Trek after a genuinely scary braking incident last spring, I dug into the practical details of loose stems and creaking handlebars. Today, I will share it all with you.
It was 6 a.m. I’d just come off a ride where my front end felt wrong — sloppy under hard braking, with this metallic clunk traveling up through my hands every time I grabbed the levers hard. I typed “bike handlebar stem loose creaking how to fix” into Google and spent the next four hours going down a rabbit hole I could’ve avoided with the right information upfront.
But what is stem looseness, exactly? In essence, it’s mechanical play between components that should be clamped together rigidly. But it’s much more than that — because the symptom feels completely different depending on which interface is failing, and diagnosing the wrong one wastes hours.
A loose steerer clamp produces a clunk under hard braking. You feel it in your palms. The fork and bars seem to move independently — like steering through wet sand. A creak under pedaling load, especially climbing, usually comes from somewhere else entirely. I blamed my headset for three full hours. Chased that noise through the fork crown, the bearings, the crown race. It was the stem-to-bar faceplate the whole time. Side-step the error I made.
Here’s the actual diagnostic. Stand over the bike, both feet flat on the ground. Grip the front wheel between your knees and try to twist the handlebars left and right without moving the wheel. Bars rotating independently from the wheel? Your stem is loose at either the steerer clamp or the faceplate. Both moving together but still creaking under pressure? That’s contamination at the bar clamp — dried grease, oxidation, debris.
The pen-tap test also works — at least if you know what you’re listening for. Tap different sections of the stem, bars, and fork with a ballpoint pen. Solid metal sounds crisp. A creak-prone connection sounds dull or hollow, like two surfaces that aren’t quite touching properly. That hollow sound is your answer.
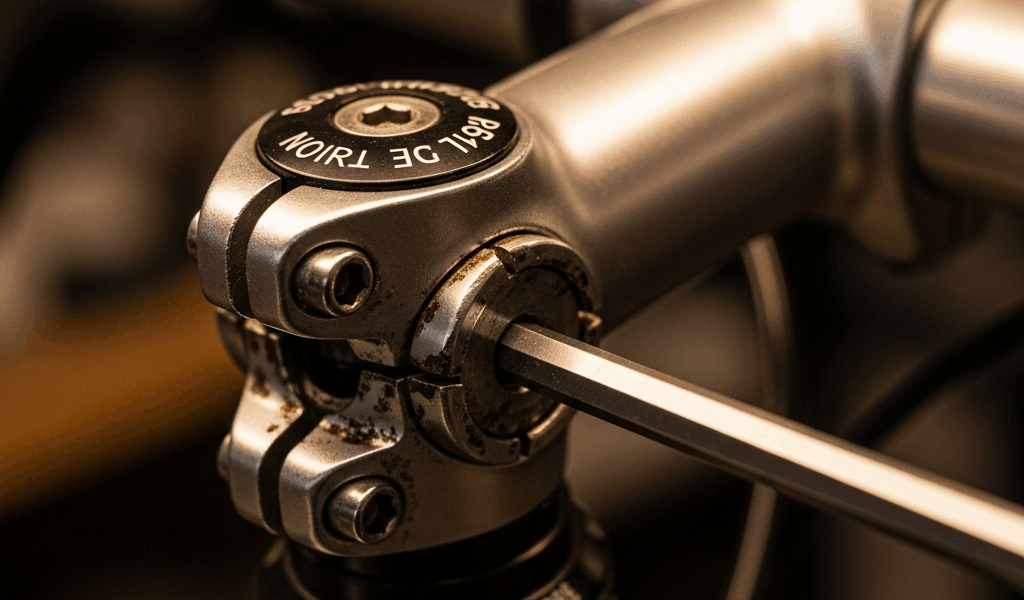
Check the Faceplate Bolts First
Here’s the part worth saying first. The four faceplate bolts are the most common failure point by a wide margin — and the fix is simple once you know the one thing most guides skip entirely: sequence matters enormously.
I used to tighten bolts randomly. Grabbed whatever my 4mm hex key landed on first. Turns out that’s precisely how you create uneven clamp pressure, which is precisely how you create creaking bars.
The faceplate on most stems — your Ritchey WCS, your Bontrager, your generic Shimano-style unit — arranges four bolts in a square pattern. Tighten them like car wheel lugs: top, bottom, left, right. Then again: top, bottom, left, right. Two complete passes, each pass slightly snugger than the last. Even pressure across both clamp halves.
Torque specs. Aluminum bars on aluminum stems: 5 Nm. That’s about as firm as gripping a marker pen — snug, not brutal. Carbon bars on aluminum stems: drop to 4 Nm. Carbon is brittle. Over-torque it and you’ll crack the bar inside the clamp where you absolutely cannot see the damage until the bar fails under load.
Here’s what separates someone who tightens bolts from someone who actually solves the problem. Carbon bars need anti-slip compound — not grease, not nothing, specifically anti-slip compound. Specialized, Lizard Skins, and Park Tool all make versions of it. It’s essentially ultra-fine grit suspended in a paste. I’m apparently a Park Tool person and their version works for me while the generic stuff never quite applies evenly. Brush a thin coat on the bar surface and the inside of the faceplate before assembly. It prevents the micro-rotation that causes creaking at lower torque values.
Do not use regular grease on carbon bars. Grease is slippery by design. Your bars will rotate inside the clamp within a week and you’ll be back at square one.
After tightening, look at the gap on both sides of the faceplate. Both gaps should be equal — same width top and bottom. One side tighter than the other means uneven compression. Loosen everything. Start the sequence again.
Check the Steerer Clamp and Top Cap
Most riders misunderstand the top cap bolt completely. I was no exception. That bolt at the crown of the stem doesn’t actually clamp anything to anything. It sets preload on the headset bearings. That distinction matters more than most guides acknowledge.
Preload is the bearing compression that eliminates play without creating drag. Too little: the fork rocks forward and back. Too much: the wheel turns stiffly, sometimes creaks on its own. You need zero play and zero binding simultaneously. That’s the target.
Correct sequence: loosen all four faceplate bolts completely — fully backed out, not just loosened. This releases clamping pressure from the steerer tube so the top cap can actually do its job. Then tighten the top cap bolt by hand until you feel the first hint of resistance. Stop there. A quarter turn past that point is usually enough.
The finger-squeeze test confirms your preload. Grab the fork crown with one hand, the frame with the other. Squeeze firmly. Any rocking movement means another quarter turn on the top cap. Stiff, resistant steering means you went too far — back off half a turn. Goal: a fork that swings freely under its own weight with absolutely no detectable play at the crown.
Once preload is dialed, tighten the four faceplate bolts in your star pattern at the torque specs above. These bolts lock the stem position on the steerer tube. Snug. Not gorilla-tight.
That’s what makes correct preload procedure endearing to us cyclists — it costs nothing and takes four minutes, but skipping it means chasing play forever. A common mistake worth naming: cranking the top cap harder to eliminate wobble when the faceplate bolts are already torqued. Won’t work. The top cap has no mechanical authority once those bolts are tight. If play persists after faceplate torque, the steerer clamp bolts are the issue, not the cap.
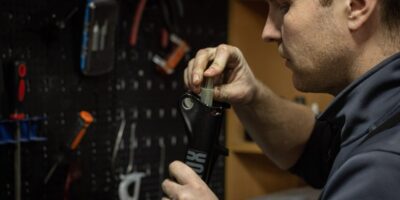
Clean and Re-Grease the Stem-Bar Interface
So you’ve torqued everything correctly — proper sequence, correct specs, even faceplate gaps — and the creak is still there. Contamination is the answer.
Remove the faceplate entirely. Pull the bar straight out. Inspect the clamping surfaces on both the faceplate and the bar itself. Look for discoloration, hardened grease, surface oxidation, grit. On bikes over three years old, this is almost always what you find. The factory assembly grease — applied once, never refreshed — dries out and hardens. It stops damping vibration. The creak is two dry surfaces moving fractionally against each other under load.
Clean everything with isopropyl alcohol and a clean rag. Get it completely dry — no residue, no moisture. For alloy bars, apply a fresh thin coat of waterproof bearing grease. Park Tool Polylube 1000 is the standard choice at around $8 for a tub that lasts years. For carbon bars, use anti-slip compound again. Reassemble in the correct sequence.
The creak vanishes. Usually immediately. That’s the payoff for the diagnosis work up front.
When the Stem Itself Is the Problem
Cracks around the steerer clamp are real — rare, but real, particularly on older alloy stems. Stress lines radiating outward from the clamp bolt holes are what you’re looking for. They’re usually subtle. Easy to miss on a dirty bike.
The pen-tap test reveals them. Tap near each bolt hole. Solid metal returns a clean, consistent sound. A hairline crack returns something slightly different — duller, with a faint resonance. If anything sounds off, mark the area with a paint pen and replace the stem before your next ride. A cracked stem under load can fail without warning. Not worth risking over a $40 replacement part — or a $65 Ritchey Comp if you want something that’ll outlast the bike.
Carbon stems don’t typically develop this failure mode. Alloy stems on bikes manufactured before 2010 are the at-risk category, especially if previous owners over-torqued the clamp bolts repeatedly over years of ownership. This new failure pattern emerged over several years of wider adoption of aluminum alloy stems and eventually evolved into the known failure mode that experienced mechanics recognize and test for today.
Replace the stem. Don’t attempt repair. Welding introduces stress concentration at the repair site — it will not hold under the dynamic loads of real riding.


Stay in the loop
Get the latest bike maintenance pros updates delivered to your inbox.