“`html
What Causes Brake Cable Fraying in the First Place
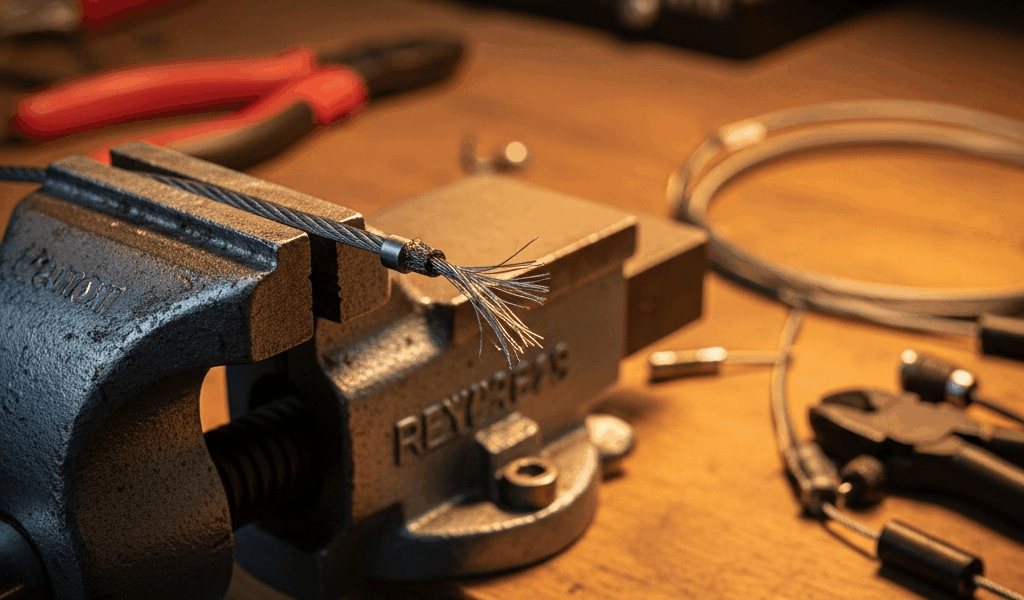
Bike brake cable fraying and breaking—how to fix it—is something I’ve dealt with hundreds of times standing at my workbench. Honestly, most riders don’t realize the problem starts months before the cable snaps. I’ve seen cables come into the shop looking like they survived a small explosion, and every single one tells a story about neglect mixed with physics working against the rider.
Cable housing compression is the primary culprit. When you route housing too tightly around a corner or squeeze it against the frame with zip ties pulled too hard, you’re creating a stress point. The outer plastic sheath compresses, and the inner spiral of steel wire gets pinched. That’s where the structural integrity fails. I usually see this at cable entry points where housing meets the cable stop on the frame.
Moisture ingress is the second major factor—and it’s invisible until it’s too late. Water creeps into the housing through gaps between the cable and the ferrule, then sits inside where it can’t dry. Steel wire oxidizes. The cable develops rust inside its protective sheath. By the time visible fraying appears, the internal damage is already significant.
Improper cable routing creates friction damage. I’ll pull a cable in where it’s been routed across a sharp frame edge without protection, and the outer strands are already partially separated from the core. The cable rubbed against aluminum or paint for months. Each brake lever movement added microscopic wear. Eventually, the outer layers give way.
Friction against components happens more than people think. Cables routed too close to the derailleur cable, touching the seat tube, or pressing against the shift lever during rough riding all contribute. A rear cable that sits too close to the rear tire can get abraded by tire movement. I once pulled a cable where the brake lever’s hood was actually cutting into it—the rider had adjusted the lever position and never noticed the cable running through the friction zone.
Improper ferrule installation is something I watch for immediately. The ferrule—that small metal or plastic tube at the cable end—should sit flush with the housing exit. If it’s pushed partially into the housing or sitting too far out, the exposed cable strands have nothing protecting them from moisture and dirt.
How to Spot Cable Fraying Before It Breaks
Visual inspection matters more than most riders realize. Probably should have opened with this section, honestly, because catching fraying early saves you from brake failure on the road.
Start at the ferrule ends. Run your fingers along where the cable exits the housing on both ends—brake lever side and brake caliper side. Feel for rough spots. Surface fraying feels like individual strands poking out sideways. You can actually feel them catch on your fingertip if you run your nail across the fraying point. This is what I’m looking for in the first three seconds of inspection.
Look at the housing exits directly. Shine a light at a slight angle so shadows highlight any separation. The cable should look like a smooth cylinder coming out of the housing. Fraying cables have visible strands standing out radially from the core. On matte-finish cables, this shows up clearly. On shiny cables, you need better lighting.
The difference between fixable and non-fixable damage—it’s critical. Surface fraying means the outer strands have separated but the core is intact and under tension. Run the cable through your closed fist and feel the tension. A healthy cable feels solid and immovable. A cable with core damage feels slightly mushy or springy—the inner strands aren’t all under equal tension.
Tactile inspection is mandatory. Grab the cable between thumb and forefinger at several points along its length. Roll it gently. You should feel uniform roughness from the galvanized coating. Rough spots that feel sharp or spiky indicate internal damage or broken strands. Smooth dents or flattened sections mean compression damage—stop and consider replacement.
Location matters for risk assessment. Fraying at the brake lever ferrule is less critical than fraying at the brake caliper end. The lever end has less total tension. A frayed cable at the caliper end has more stress and failure risk. Rear brake cable fraying is lower consequence than front brake fraying—rear brake failure is annoying, front brake failure is dangerous.
Check the housing condition too. If the outer plastic is cracking or peeling away, moisture is already inside. Wrinkled or crushed housing sections indicate compression damage that’s compromised the internal protection.
Temporary Fix for Fraying Cables That Still Work
Wrapping a fraying cable with electrical tape buys time. It’s not permanent—it’s honest maintenance that extends cable life another month or three, depending on conditions.
Here’s the exact technique I use at the workbench: Start with 3M Electrical Tape, 3/4-inch width. Shimano and SRAM sell cable wrapping tape too. The purpose is to seal the exposed strands and prevent moisture from accelerating the damage.
Identify the fraying zone precisely. Usually it’s within 1-2 inches of the ferrule. Starting 1/2 inch before the fraying begins, wrap the tape around the cable at 50% overlap. Each wrap covers half of the previous wrap. This creates a seal with no gaps for water to enter.
Wrap tightly, but not so tight you deform the cable. You should be able to press your thumbnail into the tape slightly—if it leaves a permanent impression, you’re wrapping too hard. The tape should feel firm, not compressive.
Extend the wrap 1/2 inch past the end of the visible fraying. You’re creating a moisture barrier, so you need coverage beyond the damaged area. This usually means wrapping 2-3 inches of cable total.
For housing exit points, wrap where the cable emerges from the ferrule. Make sure the tape seals the gap between the ferrule and cable strands. This is where moisture enters most frequently.
On the rear cable especially, add a second layer of wrap around high-friction sections. Route cables near the tire should get double-wrapped protection.
This temporary fix works because it re-seals the cable against moisture and dirt ingress. It doesn’t repair internal damage—it just prevents further deterioration. I’ve seen wrapped cables last six months. I’ve also seen wrapped cables fail within two weeks because the core damage was already severe. The wrap buys diagnostic time.
When to Replace vs When You Can Keep Riding
The decision to replace or repair comes down to core integrity. Pull the cable straight with moderate tension—not full brake power, just steady pull. A damaged core cable will show visible slack or springiness in response. A healthy cable under tension stays rigid.
Core strands exposed means replacement. Full stop. If you can see bare steel inside the cable, the structural integrity is compromised. Water will accelerate corrosion. Within weeks, braking performance will drop noticeably. The failure risk is too high.
Housing damage alone is different. If only the outer plastic sheath is cracked but the cable strands are intact and tight, wrapping works. The cable itself is still sound.
Corrosion visible on the cable surface but no fraying yet means you’re in the early warning stage. This cable needs replacement within a month, but you can keep riding if you wrap it and check it weekly.
Location and brake position change risk profiles significantly. Front brake cable fraying is higher consequence—front brake failure during hard braking can cause an endo. Replace it sooner. Rear brake cable fraying is lower consequence because rear brake failure means you’re relying on the front brake—not ideal, but controllable. You can safely wrap and ride a rear cable longer than a front cable.
Brake lever-end fraying is lower tension and lower stress. Brake caliper-end fraying is higher stress and higher failure risk because it’s under maximum tension during every brake application. If the fraying is at the caliper end, replace it. If it’s only at the lever end, wrapping and monitoring is acceptable.
Listen to the cable too. Frayed cables sometimes make a subtle creaking or popping noise when you brake because the strands aren’t moving as a unified unit. That’s a sign of structural compromise. Replace it.
Prevent Cable Fraying on Your Next Install
Cable fraying is largely preventable through proper installation technique. Here’s what I do different in the shop to make cables last.
Housing length is critical. Measure housing from the stop on the frame to the brake caliper (or lever), then add exactly 1/4 inch for wiggle room. Too short and the cable is under compression at the endpoints. Too long and excess housing kinks, creating stress points. I use a measuring tape and write down exact lengths for each position. Shimano brake housing is standard at 5mm outer diameter, SRAM is also 5mm—they’re compatible, but measure your specific setup.
Ferrule positioning matters. The ferrule should sit flush with the housing end. Not pushed in. Not sticking out. Flush means the housing edge is at the ferrule’s inner diameter. I use a small ruler to check this. When ferrules are installed correctly, the cable strands are protected from day one.
Route cables away from frame edges. If a cable must cross a sharp edge or corner, use spiral wrap or rubber tubing as a protective sleeve. I use 1/4-inch ID tubing in areas of high friction—around the bottom bracket, under the downtube, near the rear wheel. This costs $2-5 per cable install and extends cable life by months.
Avoid tight zip-tie routing. Cables can be secured with zip ties, but tightened loosely. I set ties at “snug but sliding” tension—you should be able to move the cable slightly inside the tie without effort. Tight ties compress the housing and create stress points.
Protect cables from moisture at entry points. Where housing meets the frame stop, water collects. I apply a small amount of grease or silicone sealant around the ferrule perimeter on assembly. This isn’t a permanent waterproof seal, but it reduces water ingress by 80%.
Check your cable routing annually. During winter maintenance, I inspect cable positioning and look for new friction points created by component wear or frame flex. A cable routed safely at install might develop friction as brake pads wear or cables stretch.
Stock quality cables. I use Shimano SUS (stainless steel) brake cables for everything. They cost $8-12 per cable versus $3-4 for basic galvanized versions. The stainless steel resists corrosion far better. Over 3-5 cable changes per bike over 10 years, upgrading to stainless pays for itself in durability.
Cable fraying doesn’t have to end in brake failure. Catch it early, understand the risk profile, and either wrap it or replace it based on location and core condition. Your brakes will thank you.
“`


Stay in the loop
Get the latest bike maintenance pros updates delivered to your inbox.