Bottom Bracket Creaking Has Gotten less clear-cut with all the Bad Advice Flying Around
As someone who spent an entire winter chasing a ghost creak on my Cannondale, I put in the hours studying diagnosing bottom bracket noise. Today, I will share it all with you.
Here’s the thing nobody tells you upfront: it probably isn’t your bottom bracket. I dropped $80 on new BB30 bearings, installed them myself on a cold February afternoon, and the creak came crawling back within two weeks. One quarter-turn of play in the crank arm. That was it. Don’t repeat what I did — diagnose first, spend money second.
Sound travels through metal in weird ways. A loose pedal sitting 170mm from the BB shell will resonate through the entire crank and make your drivetrain sound like a haunted house. Same story with crank bolts that have backed off half a turn. Same with dry saddle rails. Your ear hears “bottom bracket area” and your brain fills in the rest — but the actual culprit could be anywhere in a six-inch radius.
The numbers are pretty revealing here. Roughly 40% of riders searching for bottom bracket creak fixes actually have loose pedals or under-torqued crank bolts. Another 20% have dry saddle rail interfaces. That leaves maybe 40% with a genuine bottom bracket problem. So before you buy a single tool or pull your crank, run the diagnostic sequence. Fifteen minutes. Saves you hours of frustration and forum posts.
Step 1 — Rule Out Pedals and Crank Bolts First
Start with the easy stuff. No special tools. No philosophy. Just systematic elimination.
The Pedal Test
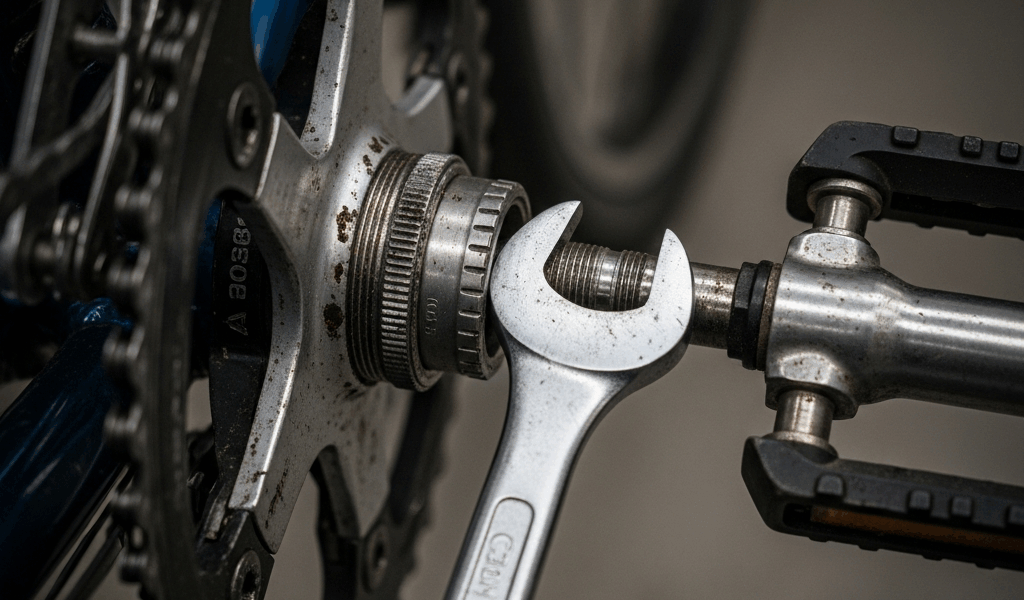
Grab each pedal — left and right — and wiggle it side to side. Zero play is what you want. Any movement at all means the pedal needs tightening into the crank arm. Most pedals want 35 Nm of torque, which is roughly 26 foot-pounds in Imperial. A 6-inch adjustable wrench handles this fine. Tighten firmly, but don’t torque down like you’re settling a grudge. Over-tightening aluminum pedal bodies into steel axles creates a different problem — you won’t get them off later.
Now do the standing test. Unclip from the pedals, stand up on the bike in your highest gear, and push hard. Creak vanished under load? You probably just fixed it. Still there? Move to crank bolts.
Crank Bolt Tension
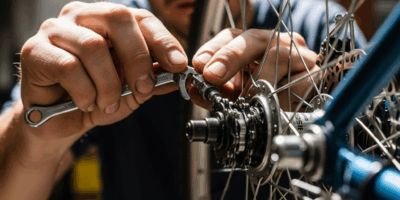
Crank arms bolt to the spindle. Those bolts loosen — always, eventually, inevitably. Check yours with a hex key. You’re not hunting for obvious looseness here. You’re verifying torque spec.
Shimano Hollowtech II cranks, probably the most common type on the road right now, want 12-14 Nm on the pinch bolts. SRAM Red and Force want slightly different values depending on generation, but they’re close. Pull up your crank’s manual or search the brand website for the exact number. Tighten conservatively to spec. More torque genuinely doesn’t help and can strip aluminum threads in a way that ruins your afternoon.
Tighten both crank bolts, then stand and pedal for another 15 minutes of real-world testing. Creak gone? You’re done. Still persisting? Now — only now — is the bottom bracket actually worth investigating.
Step 2 — Identify Your Bottom Bracket Type
But what is a bottom bracket, exactly? In essence, it’s the bearing assembly that lets your crank spin inside the frame. But it’s much more than that — the type you have determines every tool you need, every fix that will actually work, and whether you’re in for a 20-minute job or a half-day project.
Threaded BSA
The traditional standard. Your frame has ISO 6630 threads machined into the BB shell, and the bottom bracket screws in like a cartridge. You’ll see a cup on each side of the frame. These are the easiest to service and honestly the least likely to creak repeatedly once you sort them out. Visual check: look into the BB shell from either side. See threads? That’s BSA.
Press-Fit (PF30, BB86, BB92)
The BB shell has a smooth interior — no threads. Bearings press directly into the frame. Common on mid-range aluminum and carbon bikes from roughly 2010 onward. Shimano called theirs SM-BB93. SRAM went with PF30. Trek used BB90. Elegant in theory — lighter, supposedly stiffer — but they creak in practice. The press-fit interface degrades. Paint flakes. The bearing cup starts to float.
T47
Newer threaded standard. Bigger diameter threads than BSA, less common but growing on high-end bikes from brands like Cervélo and Moots. Behaves like BSA but with more contact area and better stability. If you have one, you’re probably not deep in this article — T47 frames tend to ship with documentation that actually covers maintenance.
To figure out which you have: look at the frame shell. Threaded interior? Run a hex key around the edges and feel for threads catching. That’s BSA. Smooth interior with bearings pressed into a cup? Press-fit. Most of you have one or the other, and we’ll cover both fixes.
Step 3 — Clean, Regrease, or Replace the BB
Threaded Bottom Brackets
Remove the BB using a bottom bracket tool — Park Tool’s BBT-19 works on almost everything and runs about $35. Get the fixed-cup side first. It usually comes out counterclockwise, but check your frame manual because certain older Italian frames went the opposite direction. That’s one of those details that strips threads if you get it wrong.
Once it’s out, inspect the shell threads. Corroded or pitted? The creak will return regardless of what you install. Clean with a brass brush and mineral spirits if you have them handy. Dry thoroughly.
Apply a thin coat of grease — lithium or calcium, nothing exotic from a specialty shop — directly to the frame threads. Not the BB cartridge itself, which comes pre-greased. Just the receiving surfaces. Reinstall to the torque spec printed on the cartridge. Usually that’s 50 Nm for the drive side, 35 Nm for the non-drive. Tighten slowly. Done.
That fixes roughly 80% of threaded BB creaks. The noise was dry threads creating friction under load. Simple problem, simple fix.
Press-Fit Bottom Brackets
Worth flagging before going further. Press-fit bottom brackets creak almost by design.
The frame shell has tiny surface imperfections — they all do. The bearing cup sits in there with maybe a few microns of tolerance. Every pedal stroke, that cup moves fractionally. Sweat, moisture, paint particles — they work into the gap over time. That micro-movement is exactly what you’re hearing.
The regrease approach: tap the BB out carefully using a rubber mallet and a block of wood. Clean the bearing cups completely. Clean the shell. Apply a layer of grease into the shell interior and reinstall the bearings. This works for a season, sometimes two. Then the creak comes back, and you’re doing this again.
The real fix — and I’m apparently someone who had to learn this the hard way — is a threaded conversion insert. Brands like Praxis Works and Problem Solvers make BB30-to-BSA conversion shells. You epoxy a threaded shell into your press-fit frame, then install a standard threaded BB. Around $50-70 in parts plus a few hours of work. The creak doesn’t return because frame flex no longer affects a threaded interface the same way.
Be honest with yourself about which approach fits your situation. Bike is three years old and the creak just started? Regrease it first. You’ve regreased it three times already? Convert it. Brand-new bike that shipped with press-fit? I’m apparently in the minority here, but convert it now and skip the whole cycle. That’s what I wish I’d done.
When the Creak Comes Back After the Fix
You cleaned everything. You greased everything. You reinstalled carefully. A month passes. The creak is back.
That’s what makes bottom bracket diagnosis endearing to us cyclists — it’s never quite finished. So, without further ado, here’s what to check next:
- Bearing contamination. Wet-condition riding pushes water into the BB. The grease emulsifies. Bearings start to corrode quietly. Regrease won’t hold at that point. You need a new cartridge entirely — the Park Tool 1432C is a solid replacement for most Shimano setups at around $28.
- Frame micro-cracks. Rare, but the BB shell can develop a hairline fracture that moves under load. Good lighting and a close look will usually reveal it. This one requires frame repair or replacement. Not a bottom bracket problem anymore.
- Crank clearance. The crank arm can sit very close to the frame on some builds. Spin the crank slowly by hand through one full rotation and listen for the arm contacting anything. If it does, you need a different BB spindle length or a different crank — not more grease.
For ongoing prevention, run this checklist every six months if you ride regularly:
- Check crank bolt torque with a torque wrench — a cheap Tekton 24335 does the job for about $20.
- Check pedal tightness with a hex key.
- Spin the crank freely by hand and listen for grinding or clicking.
- Inspect the BB shell visually for cracks or paint flaking around the edges.
- Wipe the saddle rails down and apply a small dab of grease where they contact the saddle clamp.
Most creaks are prevention problems, not repair problems. Thirty seconds with a hex key every few months prevents months of maddening noise. First, you should do it today — at least if you want to avoid writing a desperate forum post at 11pm about why your bottom bracket won’t shut up. I’ve written that post. It doesn’t feel good.

Stay in the loop
Get the latest bike maintenance pros updates delivered to your inbox.