
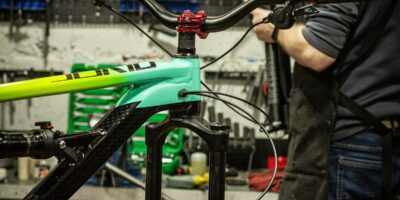
How to Tell If Your Wheel Bearings Are Actually the Problem
Wheel bearing diagnosis has grown more complex with the bad advice flying around. As someone who has rebuilt more hubs than I care to count — including one particularly stubborn rear Shimano on the side of a gravel road in 40-degree weather — I taught myself the working side of chasing down bearing noise. Today, I will share it all with you.
But before you grab a wrench, spend 60 seconds actually confirming the bearing is the problem. I’ve watched riders completely disassemble a hub when the noise was a loose cassette. Or a skewer that wasn’t fully tightened. Skip past the mistake I made.
Lift the wheel off the ground and spin it by hand. Listen. A bad bearing feels grainy — like the wheel is rolling through damp sand. You’ll hear it too. Not a rattle. A low, consistent rasp that shifts with wheel speed. Let it coast to a stop and pay attention to the texture under your fingertips on the rim. Rough. Hesitant. Wrong.
Now grab the rim at 3 and 9 o’clock — dead horizontal — and try to move it side to side. Real bearing play is lateral slop you can feel. Push gently. A properly adjusted bearing has zero play but still spins freely under its own weight. Wobbles in your hands but spins smooth and quiet? That’s not a bearing. That’s usually a bent rim or spoke tension issue.
Here’s the most-missed distinction: a loose quick-release skewer or a rattled-loose cassette will produce noise and feel sloppy, but only at the axle — not throughout the wheel. Grab the axle itself at the hub. Does it move? Tighten the skewer first. If the noise disappears, you just saved yourself an hour of unnecessary work.
True lateral play, rough spin, grinding noise. All three together. Now you have a bearing problem. Now we fix it.
Cup-and-Cone Hubs — Adjusting the Cone Nut Step by Step
Most bike wheels, especially older or mid-range models, use cup-and-cone bearings. These are adjustable — at least if you have the right tools and some patience. Sealed cartridge bearings are not adjustable, but we’ll get to that.
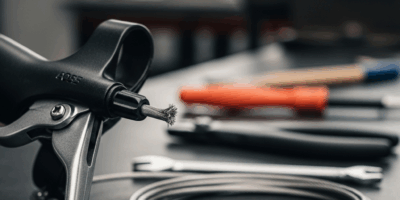
While you won’t need a full machine shop, you will need a handful of specific tools. Two cone wrenches, not regular wrenches. Cone wrenches are thin because they have to fit into the narrow gap between the locknut and cone. A 15mm and 17mm set covers most road and mountain bikes — I use the Park Tool TW-1.2 set, runs about $28, and it’s never let me down. You’ll also want a clean rag and some solvent.
So, without further ado, let’s dive in.
First, remove the wheel from the bike. Flip it so the non-drive side faces you. Loosen the locknut — the outer nut — counterclockwise. Don’t remove it entirely. Just break it free.
Now the cone nut beneath the locknut. Back it off slightly. Maybe a quarter turn. You’re not adjusting yet — just relieving pressure so the cone can re-seat properly.
Spin the wheel. Should feel free. Now, starting from full tightness, slowly tighten the cone nut clockwise until you just barely feel resistance. Not binding. Just resistance. That’s the critical feel — you’re looking for the moment the cone contacts the bearing balls without crushing them.
Back the cone off half a turn. This leaves a tiny bit of play, which is intentional. Hold the cone nut still with one wrench and tighten the locknut against it with the other. That locks the cone position in place.
The piece that matters most here. The most common mistake I see is riders tightening the locknut too aggressively, which shifts the cone position and either introduces binding or fails to remove the play entirely. The locknut is not a clamp. It’s a lock. Hold the cone still while you tighten it — that’s the whole game.
Spin the wheel again after. Silent. Smooth. Grab the rim at 3 and 9 o’clock. No play. If the wheel binds, you over-tightened — loosen the locknut, back the cone off another quarter turn, re-tighten. A properly adjusted wheel should spin for 10 or more seconds after a hand-spin and coast to a gentle stop, not drag to a halt.
Sealed Cartridge Bearings — When to Replace, Not Adjust
But what is a sealed cartridge bearing? In essence, it’s a small cylindrical unit pressed directly into the hub shell. But it’s much more than that — it’s also a dead end when it comes to adjustment. Play or grinding means replacement. Full stop.
Identifying your bearing type is straightforward. Cup-and-cone hubs have visible cone nuts on the axle ends. Cartridge hubs have the axle running clean through without external nuts. Cartridge bearings show up on newer wheels, lighter builds, and most high-end hubs from the last decade or so.
Removing a cartridge bearing usually requires a bearing press. You can improvise with a socket and a bolt — at least if the bearing isn’t pressed in too tight. But honestly, a $45–$60 press tool from online saves your sanity. I tried the bolt-and-washer method once on a rear drive-side bearing. That was a Tuesday. It took 45 minutes, nearly stripped the hub shell, and I ended up taking it to the shop anyway.
Rear drive-side bearings might be the fastest-wearing component on the whole wheel, as constant riding requires them to absorb chain load and drivetrain stress simultaneously. That is because the force from pedaling transfers directly through that bearing on every single stroke. Replace rear bearings more frequently than front — I check mine every 1,500 miles or so.
New sealed bearings for road bikes run $8–$20 per side depending on the hub. Cheap insurance against a seized wheel mid-ride.
Repacking Cup-and-Cone Bearings When Adjustment Isn’t Enough
Adjustment fixed the play, but grinding persists. The grease is dried out or contaminated — or the bearing balls themselves show pitting. That’s what makes this stage of the process endearing to us home mechanics. You get to see exactly what went wrong.
Remove the axle completely. Unscrew both the locknut and cone nut with your cone wrenches, then slide the axle free. Count the bearing balls as you remove them. Seriously. They roll everywhere and vanish into floor cracks — I’ve lost three to a heating vent I didn’t even know existed. If you lose count, you’ll have to guess during reassembly, and that causes play or binding. Most rear hubs run 9 balls per side. Front hubs typically run 10.
Inspect the races — the smooth metal cups inside the hub shell. Pitting looks like tiny corrosion pockets scattered across the surface. Visible pitting means the whole hub needs replacement, not just a repack. No point filling a cracked cup with fresh grease.
If the races look clean, soak them and the bearing balls in solvent. I use Finish Line Speed Degreaser, about $9 a can, works fast. For grease, use marine-grade or a dedicated bearing grease — not regular lithium grease. I’m apparently sensitive about this, and Phil Wood Waterproof Grease works for me while generic lithium never stays put in wet conditions.
Pack the race full of fresh grease, nestle the bearing balls into it, reinstall the cone nut, adjust for play as described above, and lock it in place with the locknut. That’s it.
Preventing Wheel Bearing Failure Before the Next Ride
Check bearing play every three months if you ride dry conditions. Every month if you’re riding wet, muddy, or salted winter roads. Moisture destroys grease faster than anything else — what took a year to wear out in summer takes six weeks in a wet January.
Quick-release skewer tension affects how bearings feel under load. A loose skewer can mask real play or create false binding sensations — two problems that send you chasing ghosts for an hour. Tighten it properly. Firm resistance when you flip the lever closed. Not cranked down with full force, just firm and consistent.
A bearing job done right at the workbench takes 20 minutes and costs nothing but grease. A seized hub costs a new wheel. That’s a $60 component versus a $300 wheel. The math writes itself.


Stay in the loop
Get the latest bike maintenance pros updates delivered to your inbox.