How to Tell if Your Derailleur Hanger Is Actually Bent
Bike repair has shifted noticeably with all the conflicting advice flying around. As someone who spent three humiliating hours adjusting barrel screws on a derailleur that was never the problem, I picked up the practical knowledge of bent derailleur hanger diagnosis. Today, I will share it all with you.
Start with the two-second visual check. Stand behind your bike — at least if you want a quick answer before touching anything. Look at how the rear derailleur hangs relative to the cassette. A healthy hanger sits perfectly parallel to the cogs. A bent one angles inward toward the wheel. Sometimes it’s obvious. Sometimes it’s so subtle you’ll walk right past it.
The symptoms tell the real story. Shifting works fine in the middle gears but completely falls apart at the extremes — either the big cog or the small one. The chain rubs the derailleur cage in specific positions. You crashed on the drive side recently, dropped the bike, or hit a pothole that sent the rear wheel sideways. Any of those boxes check? Keep reading.
But what separates a bent hanger from a cable tension or limit screw problem? In essence, it’s geometry. But it’s much more than that. A bent hanger makes the derailleur sit at the wrong angle relative to the cogs entirely — no barrel adjuster in the world fixes a geometry problem. Cable tension issues affect the entire cable pull uniformly. Limit screws stop you reaching one end or the other. These are different failure signatures. Learn them.
Grab a straight edge — a level, a ruler, anything with a true flat edge works. Hold it against the derailleur body from behind. Visible gap between hanger and edge? You found your culprit. Worth saying out loud. It’s the fastest confirmation before anything gets disassembled.
What You Need Before You Start
While you won’t need a full workshop setup, you will need a handful of specific items. Stop and gather these before touching the bike:
- A Derailleur Alignment Gauge — the Park Tool DAG-2 runs about forty dollars and earns every cent if you work on bikes with any regularity.
- A quality 5mm hex key. Not the stubby Allen wrench buried in your multi-tool. A proper, full-length one with a decent handle.
- A replacement hanger specific to your exact bike model. This part cannot be improvised or swapped from another brand.
That last point matters more than most people realize. Derailleur hangers are not universal — not even close. A Giant hanger doesn’t fit a Trek. A 2019 model doesn’t swap cleanly with a 2023 version of the same frame. You need the exact part. Check your manual or search “[your bike brand and model] rear derailleur hanger” before ordering anything.
The DAG-2 might be the best option, as hanger alignment requires a precise reference point. That is because eyeballing alone — while useful — leaves real margin for error on subtle bends. Worth the forty dollars if you’re doing this more than once a year.
While you’re sourcing the correct hanger, order a spare. These run five to fifteen dollars depending on the brand. I’m apparently someone who learned this lesson twice — driving to two different shops on a Sunday trying to find a replacement hanger for a Trek Marlin 7 is not how anyone wants to spend an afternoon. Don’t repeat what I did. One spare hanger in the toolbox costs almost nothing.
How to Straighten a Bent Derailleur Hanger Step by Step
So, without further ado, let’s dive in. The DAG method is your gold standard here.
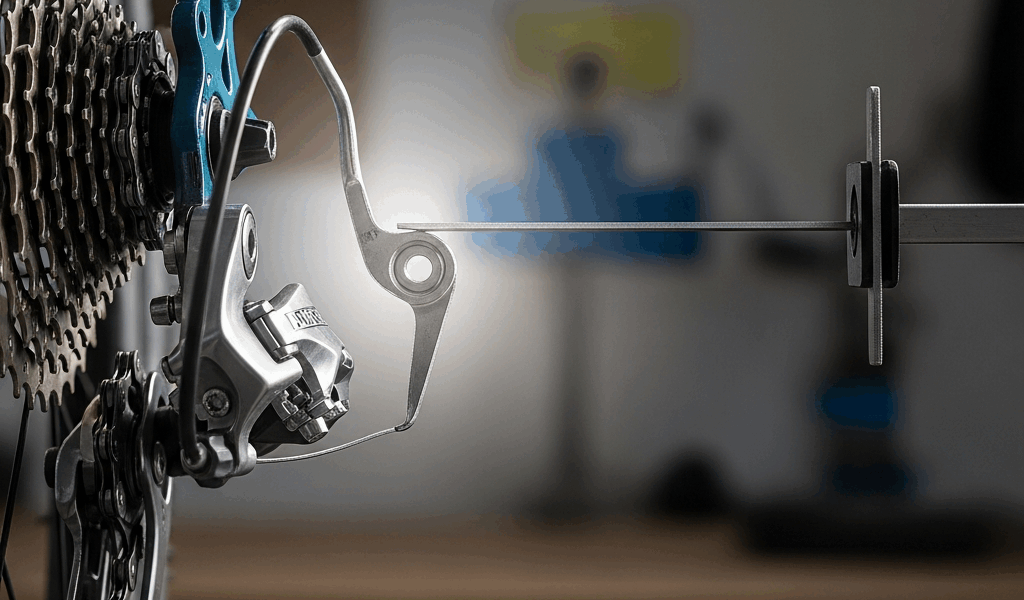
Attach the alignment gauge to your rear derailleur following the tool’s instructions — the DAG-2 manual is straightforward. The gauge gives you a reference arm that shows exactly where the hanger sits relative to true. Rotate through different cassette positions with the bike on a stand so the wheel spins freely. Watch where the gap between the gauge tip and the cog is largest. That’s your worst bend point.
Apply gentle corrective pressure with your hand. Five pounds of force. Not fifty. Aluminum fatigues and cracks without warning — there’s no visible sign before it goes. Small movements. Check the gauge. Nudge slightly more if needed. Check again. This is patient work.
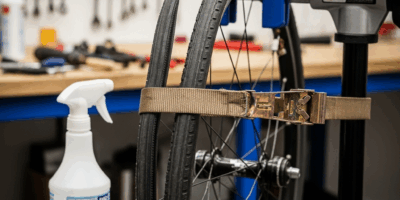
The eyeball method works without a DAG, though it’s less accurate. Remove the rear wheel completely. Stand behind the frame and sight down the hanger. You’re looking for that inward angle toward where the wheel sits. Apply gentle hand pressure and nudge the hanger back into plane with the frame. It feels strange — you’re deliberately bending metal on your bike. But the aluminum hanger exists specifically to absorb impact instead of the frame. Bent by design. That’s the point.
Stop the moment it looks straight. Reinstall the wheel. Eyeball it one more time from behind before moving forward.
When to Replace the Hanger Instead of Straightening It
Some hangers should not be straightened. Full stop.
Bent more than a few degrees? The DAG will show this clearly. Skip straightening entirely and replace it. If the hanger has been bent back before, the metal is already work-hardened and sitting closer to its failure point than you’d like. One more straightening cycle and it snaps inside the dropout — leaving you with a broken stub you cannot remove without drilling it out. That’s a bad afternoon.
Frustrated by watching someone destroy an expensive bike over ten dollars, I started telling everyone I know: carbon frame owners, just replace the hanger after any crash. Most quality carbon bikes come with replaceable hangers specifically because the hanger is the sacrificial part — it bends so the frame doesn’t. I watched someone try to salvage a bent hanger on a five-thousand-dollar Specialized and crack the dropout trying to straighten it. The hanger cost twelve dollars. The dropout repair was a different conversation entirely.
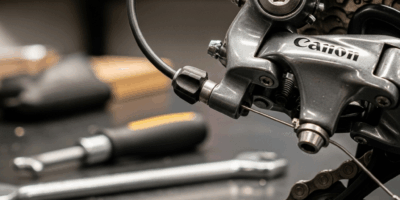
Hanger swaps themselves are simple. Most hangers bolt to the dropout with two or four bolts — 5mm hex key, two minutes. Some higher-end frames run integrated hangers requiring full dropout replacement, which is a different job. If your manual says integrated, get a shop involved. That’s not a driveway repair.
Test Ride and Tune After the Fix
The straightened hanger resets geometry. It does not guarantee perfect shifting on the first try.
Run a stationary gear check before riding anywhere. Shift through the entire cassette — small cog to large and back again. Listen for clean clicks. Feel for chain rub against the derailleur cage at any position. Watch upshifts for hesitation. This takes about ninety seconds and tells you a lot.
Some barrel adjuster tweaking is normal after straightening. The geometry is correct now, but cable tension sometimes needs a small correction — a quarter turn, maybe less. I’m apparently someone who always starts at the shifter-end barrel adjuster and works in one-eighth turn increments from there. Park Tool’s barrel adjuster works for me while random internet advice about limit screws never actually solves anything until the hanger geometry is right first.
First, you should confirm the hanger is genuinely straight — at least if you want the rest of the tuning to actually stick. Cable tension and limit screws build on that foundation. If you chase them first, you’re adjusting on top of a problem that will keep moving on you.
Take a short test ride. Real shifting under load is different from stationary checks. Listen for chain rub at the extremes. Feel for hesitation on upshifts when you’re actually putting power through the pedals. The bike should feel solid — snappy shifts, no noise, no drama across the full cassette. That’s what makes a well-aligned drivetrain endearing to us cyclists who spend way too much time on this stuff. When it’s right, it’s just right.


Stay in the loop
Get the latest bike maintenance pros updates delivered to your inbox.