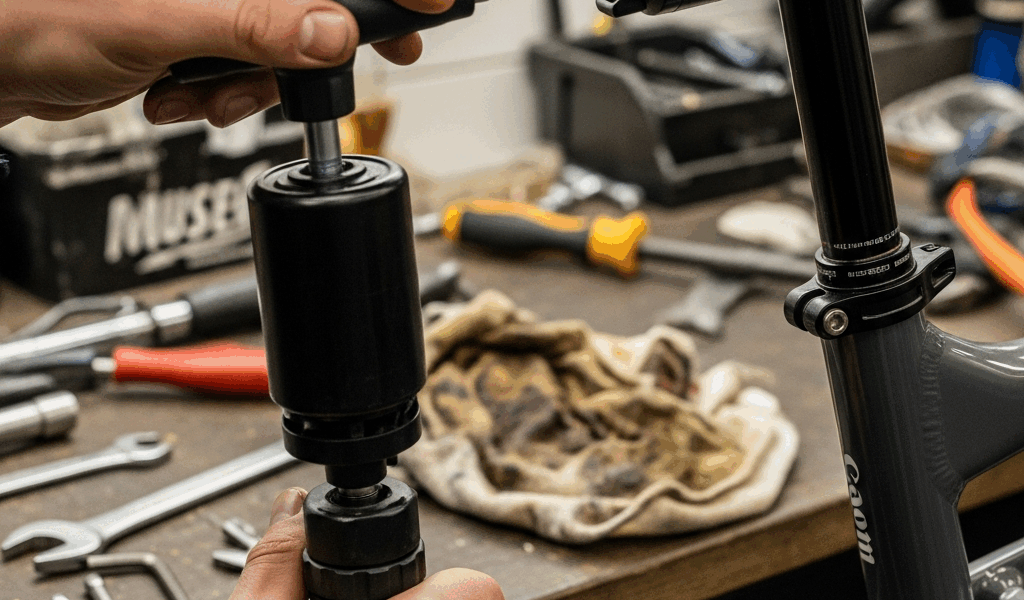
A dropper post that will not return is not automatically low on air. Slow extension can come from cable friction, excessive seat-collar compression, dirt at the wiper, cold weather, an incorrect model-specific pressure, or an internal cartridge fault. The right repair depends on the exact post, year, and symptom.
Start here: extend the post if possible, identify the brand and model from its markings or serial number, and find that model’s official manual. Do not copy a pressure number from a different dropper. Some posts have a user-adjustable air spring; others use a sealed cartridge that should never be inflated or opened.
Match the symptom before changing anything
- The lever moves but the post stays down: suspect cable slack, a kinked housing, a disconnected actuator, a discharged wireless battery, or insufficient return force.
- The lever is stiff or will not move: stop forcing it. Look for a seized cable, contaminated actuator, routing problem, or a post that needs service.
- The post rises slowly: check dirt, temperature, collar torque, cable travel, and only then any manufacturer-approved air setting.
- The post sags when you sit on it: first rule out a cable that is too tight and holding the valve open. Persistent sag or a spongy top can indicate air and oil mixing or cartridge wear.
- Oil is leaking, the shaft is scratched, or the post has severe play: skip pressure experiments and arrange the correct rebuild, cartridge replacement, or professional service.
Do not ride if the post or saddle rotates, slips in the frame, has structural damage, or cannot be retained at the frame manufacturer’s specified torque. A moving saddle can cause a crash.
Dropper post troubleshooting in the safest order
1. Clean the exposed stanchion and wiper
Wipe the post’s upper tube with a clean, lint-free cloth. Remove dried mud from the wiper without pushing grit into the seal. Use only the lubricant and cleaning procedure named by the post manufacturer; general-purpose grease can be too thick or incompatible with seals.
Cycle the post several times. If it returns normally after cleaning, the post may simply be due for its routine clean-and-lubricate service. Check the manufacturer’s interval rather than inventing one.
2. Test the remote and cable
For a cable-operated post, watch and feel the remote while operating it. The lever should move smoothly and return without sticking. Inspect exposed cable for fraying and housing for sharp bends, crushed sections, corrosion, or a loose ferrule. Too little cable tension may not open the post’s valve fully; too much can hold the valve open and make the post sag.
Use the barrel adjuster only in small increments and return it to the starting position if the symptom worsens. If the cable is damaged, follow the post and remote instructions for replacement. Internal routing often requires withdrawing the post carefully while feeding cable or housing into the frame—pulling it out abruptly can damage the actuator or connection.
A hydraulically actuated Reverb remote needs its specified bleed procedure and fluid; it is not repaired with ordinary cable adjustment. On a wireless post, confirm the battery is charged, installed correctly, paired, and running current firmware before disassembling the post.
3. Rule out seat-collar binding
An over-tightened frame seat collar can squeeze the post’s lower tube and slow or stop its movement. This is a diagnostic check, not permission to leave the post loose.
- Mark the current insertion height.
- Support the bike securely and loosen the frame collar only enough to remove its clamping load.
- Operate the dropper. If it immediately returns normally, binding is likely.
- Re-tighten with a calibrated torque wrench to the lower of the frame maker’s and post maker’s limits. Never guess a universal value.
If the post slips at the approved torque, verify the frame and post diameters, minimum insertion, reducer-shim compatibility, and required assembly compound. Do not solve slipping by exceeding either manufacturer’s limit.
4. Check pressure only when the exact manual allows it
Use a high-pressure shock pump, not a tire pump or compressor. The post normally must be fully extended before connecting the pump. Follow the exact model/year procedure and never exceed its stated range.
- OneUp V2: OneUp specifies 250–300 PSI at full extension for its adjustable versions. Its 27.2 mm V2 uses a sealed cartridge and does not require inflation.
- OneUp V3: it uses a sealed cartridge and OneUp says there is no need to adjust or top up air pressure.
- FOX Transfer, 2025–2027: FOX specifies 275–325 PSI for this generation. FOX also warns that reconnecting a pump merely to “check” pressure can reduce chamber pressure significantly as air fills the pump hose.
- PNW: only certain models have adjustable cartridges. PNW’s service guidance limits the applicable Loam V1 and Bachelor V2 procedure to 300 PSI; other models require their own manual.
- RockShox Reverb: Reverb generations differ substantially. Use the serial number or model code in SRAM’s service resources. Do not apply Reverb AXS XPLR pressure formulas to a standard Reverb AXS or an older hydraulic Reverb.
If the pump connection is awkward, the valve leaks, or the manual does not expose a user pressure procedure, stop. A damaged high-pressure valve or incorrectly pressurized cartridge is a service job, not a trial-and-error adjustment.
When a vent procedure is the right fix
A vent or reset is different from adding air. For example, the 2020–2022 RockShox Reverb AXS has a Vent Valve procedure for abnormal squish when fully extended. SRAM says it is for a post that compresses more than 5 mm during normal seated use; it is not regular maintenance and must not be performed while the post is compressed.
Other brands may use a different reset system, and many have none. Follow the service manual for the exact model. A generic “cycle it upside down” trick can move air where it does not belong and make diagnosis harder.
Does a hydraulic dropper cartridge need repair?
If cleaning, correct actuation, approved collar torque, and an applicable pressure or reset procedure do not restore the post, the internal system may need service. Common signs include recurring sag, oil leakage, rough travel, a return that deteriorates again quickly, or a post that will not hold position with the remote disconnected.
There are two broad designs:
- Replaceable sealed cartridge: replace the cartridge with the exact compatible part. Do not drill, puncture, heat, or open a pressurized sealed unit.
- Serviceable hydraulic system: rebuild it only with the manufacturer’s current manual, correct seal kit, specified fluid, specialty tools, and safety steps. Some procedures are intended for qualified service technicians.
Keep all oil and grease away from brake rotors and pads. If contamination reaches a rotor, follow the brake manufacturer’s cleaning procedure; contaminated pads often require replacement.
Quick decision guide
| What you find | Best next step |
|---|---|
| Dirty stanchion or dry wiper | Clean and perform the maker’s routine lower service |
| Sticky lever, slack cable, or kinked housing | Correct routing/tension or replace the cable and housing |
| Post works with collar loosened | Reinstall at the approved torque and check fit |
| User-adjustable model below its specified setting | Inflate at full extension using its official procedure |
| Sealed cartridge or no documented valve | Do not add air; service or replace the cartridge as specified |
| Oil leak, damage, or persistent sag | Stop riding and arrange model-specific service |
Official service references
Before working on a post, use its serial number where available and consult the current source:
- OneUp V2 installation and pressure instructions
- OneUp V3 specifications and service information
- FOX 2025–2027 Transfer owner’s guide
- SRAM/RockShox Reverb AXS service documents
- PNW model manuals and service guides
The useful “air pressure fix” is therefore narrow: it applies only when your exact dropper has a user-adjustable air spring and its manual says the pressure is low. For every other post, the fastest repair starts with correct identification and diagnosis.

Stay in the loop
Get the latest bike maintenance pros updates delivered to your inbox.