Shimano Nexus 8-Speed Hub Not Shifting — How to Fix It
If your Shimano Nexus 8-speed hub is not shifting properly, the fix is almost always one of three things: misaligned yellow indicator lines, a cable tension problem, or internal wear that needs hands-on service. I’ve been working on hub gears at a small bike shop in the Pacific Northwest for going on six years now, and the Nexus 8 comes across my bench more than any other internally geared hub. Commuters love it. The SG-8R20 and the newer SG-C6001 are both solid pieces of engineering — when they’re set up right. When they’re not, riders usually assume something catastrophic has happened inside the hub. It almost never has.
Before you do anything else, shift into fourth gear. Not third. Not fifth. Fourth. That single step is the starting point for every Nexus 8 diagnosis I’ve ever done, and skipping it wastes time.
The Yellow Line Alignment Check
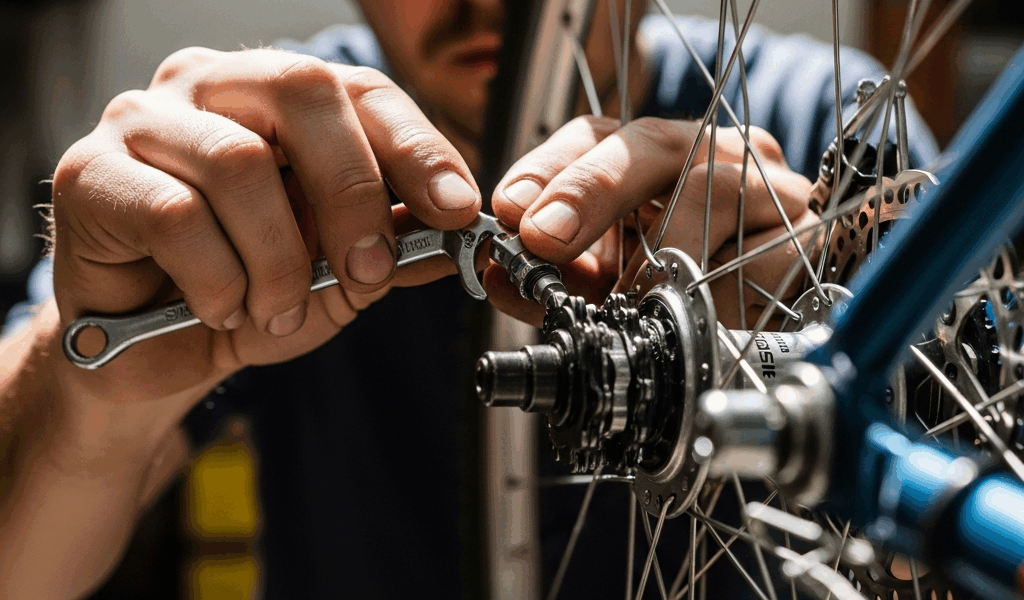
Set your shifter to gear 4 and flip the bike or prop it so you can see the right-hand dropout clearly. On the Nexus 8, there’s a cassette joint — a small silver cup-shaped piece that sits just inside the dropout where the shift cable attaches. Look at it directly. You’re looking for two yellow markings: one line on the cassette joint itself, and one on the inner part of the axle assembly behind it. On the SG-C6001, these are bright yellow and hard to miss in decent light. On the older SG-8R20, they’re a little more faded from the factory and can look almost orange after a season of road grime.
Those two lines need to be perfectly aligned — flush, edge to edge. If the outer yellow mark sits above the inner one, your cable is too tight. If it sits below, the cable is too slack. That’s the entire diagnostic in one visual check. I’ve watched customers spend forty-five minutes adjusting derailleurs on a completely unrelated bike while their Nexus 8 sat on the floor with a 30-second fix waiting at the dropout.
Adjusting With the Barrel Adjuster
The barrel adjuster on a Nexus 8 setup is usually found in one of two places: inline near the shifter on the handlebars, or at the cable stop just before the cassette joint at the dropout. Loosen the lockring first — finger tight is enough, don’t reach for a tool. Then rotate the barrel adjuster counterclockwise (threading it out) to add tension and pull that outer yellow line upward. Clockwise to release tension and let it drop.
Make tiny adjustments. A quarter turn at a time. Check the alignment after each one. When both lines are flush, click through all eight gears to make sure the hub is indexing cleanly — you should feel a distinct, mechanical click at each position with no slipping or grinding between gears. If you have alignment but still get hesitation between gears 6, 7, and 8, skip ahead to the cable tension section because there’s more going on.
What Misalignment Actually Does to Shifting
When the cassette joint sits even slightly out of position, the internal driver pawls inside the hub engage at the wrong point in their travel. On the SG-8R20, this typically shows up as gears 1 through 3 feeling fine while 5 through 8 slip or refuse to engage cleanly. The geometry of the internal gear cluster means the top gears are most sensitive to cable position errors. On the SG-C6001, the failure mode tends to be different — mid-range gears (4 and 5) feel mushy while the extremes work. Same root cause, slightly different symptom profile.
Cable Tension — The Most Common Cause
Probably should have opened with this section, honestly. Cable tension issues cause more Nexus 8 non-shifting complaints than anything else, and they’re not always about the barrel adjuster being out of position. The cable itself degrades. It stretches. Water gets into the housing and creates friction drag that mimics low tension even when your barrel adjuster looks correct.
Here’s the process I walk through on every Nexus 8 that comes in with shifting complaints.
Full Cable Inspection — Step by Step
- Shift to gear 1 and let all tension out of the cable at the dropout. On the SG-C6001, there’s a quick-release cam on the cable anchor — push it to the unlocked position. On older SG-8R20 setups, you’ll loosen the 10mm cable pinch bolt at the anchor.
- Pull the cable housing away from its stops one section at a time and run your fingers along the inner cable. Feel for kinks, fraying, or rough spots. A kinked inner cable creates uneven tension that no amount of barrel adjusting will fix. Replace it. A quality Shimano inner cable (SP41 housing, SIL-TEC coated inner) runs about $8–12 and is worth every cent on a hub gear setup where cable friction is amplified.
- Check the housing end caps. Crushed or missing end caps are a silent killer of precise shifting. The housing should seat fully into each cable stop with no gap. A 1mm gap at a housing stop can translate to 2–3mm of lost cable movement at the cassette joint — enough to throw your yellow lines out of alignment entirely.
- Route the cable back in, anchor it at the dropout with the hub in gear 4, and do your yellow line alignment check again from scratch.
Water Ingress and Cable Drag
Riding in rain or through puddles forces water up into the cable housing from the bottom end near the dropout. The water sits there. It rusts the inner cable and leaves mineral deposits inside the housing that create sticky, inconsistent cable pull. I see this constantly on bikes used for winter commuting without full fenders.
The test is simple: unhook the cable from the cassette joint, hold the housing vertically with the lower end up, and pull the inner cable through by hand. It should move freely with almost no resistance. If it catches, stutters, or feels gritty, the housing needs replacing. Don’t try to flush it with lubricant — it’s a temporary fix that attracts more grit. New SP41 housing is the answer. Cut it to length with a proper cable cutter (not wire cutters — the housing will crush and restrict movement), and use a housing reamer to open the cut end before capping it.
A Mistake I Made Early On
Early in my shop days, I’d replace the inner cable and reuse old housing if it looked okay externally. Spent 20 minutes on a customer’s SG-8R20 once, new cable installed, yellow lines perfect, handed it back — and they were back two days later with the same complaint. Pulled the housing off and found the internal lining had collapsed near a bend. The new cable was binding inside intact-looking housing. Now I replace both together, every time, on any hub gear with shifting issues. The combined cost is under $15. The time saved on callbacks is worth far more.
When the Hub Needs Internal Service
If the yellow lines align, the cable is new and runs freely, and the hub still won’t shift cleanly through all eight gears — the problem is inside. This is less common than cable issues, but it happens, especially on hubs that have never been serviced or that have clocked serious mileage. I’ve opened SG-8R20 hubs with 15,000 kilometers on them that looked like the oil had been replaced with brown paste.
Lateral Play Test and Bearing Preload
With the wheel in the frame, grip the rim at the 3 and 9 o’clock positions and try to wiggle it laterally — side to side, not rotationally. There should be zero play. Any lateral movement means the cone nuts on the axle have loosened. On the Nexus 8, the right-side cone nut sits behind the cable anchor assembly. You’ll need a 17mm cone wrench and a 15mm open-end spanner for the locknut. Adjust the cone until the lateral play disappears but the wheel still spins freely without binding. Too tight causes bearing wear. Too loose causes play that affects how the internal driver seats against the gear ring.
Oil Bath Service — The SG-8R20 and SG-C6001 Procedure
Shimano recommends oiling the Nexus 8 every 1,000 kilometers or once a year, whichever comes first. Most owners never do it. The oil port is on the left side of the hub shell — a small rubber plug you can pop out with a 2mm hex key or a thin flathead. With the wheel upright, inject Shimano internally geared hub oil (part number Y04120100, sold in 100ml bottles for around $10) slowly until it starts to weep back out of the port. That’s full. Replace the plug immediately.
For a full oil bath service — which is what you need if the hub has visible contamination or very high mileage — the hub needs to come apart. This is a legitimate shop job unless you’ve done it before. The Nexus 8 internals involve a precisely ordered stack of planetary gears, clutch springs, and pawl assemblies that must go back in a specific sequence. I’ve seen well-meaning home mechanics reassemble them with one pawl spring reversed and wonder why the hub freewheels in both directions. If you’re not confident, a local shop that works with hub gears will typically charge $40–80 for a full internal service, depending on parts needed. That’s money well spent on a hub that could otherwise last another decade.
When to Stop Diagnosing and Just Bring It In
Three scenarios tell me a hub is beyond roadside or at-home diagnosis: the hub skips under load in a specific gear even after full cable replacement and alignment, the hub makes a grinding or clicking sound that changes with pedal pressure rather than wheel rotation, or the hub locks up completely in one direction. These symptoms point to a broken pawl, a cracked gear ring, or a damaged sun gear — all parts that require full disassembly and, on the older SG-8R20, can be tricky to source. Shimano still supports the SG-C6001 with spare parts as of this writing. The SG-8R20 is officially discontinued, though third-party suppliers still carry most wear components.
The Nexus 8 is a genuinely good hub. Treated right — cables replaced on schedule, oil topped annually, yellow lines checked after any cable adjustment — it runs quietly and reliably for years. Most shifting problems I see are fixable in under 30 minutes with an $8 cable kit and a barrel adjuster. Start there. The hub almost certainly isn’t broken. It’s just been neglected.


Stay in the loop
Get the latest bike maintenance pros updates delivered to your inbox.