Bicycle Repair and Care
I got my first real bike when I was thirteen — a hand-me-down mountain bike with sticky brakes and a chain that popped off every time I shifted too fast. My dad handed me a wrench and said, “Figure it out.” And somehow, over a lot of trial and error (and a few skinned knuckles), I did. That experience stuck with me. Knowing how to fix your own bike isn’t just about saving money at the shop — it’s about understanding the machine you’re riding and trusting it when it matters.
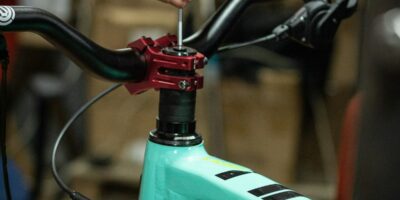
Essential Tools for Bicycle Repair
You don’t need a wall full of specialty tools to handle the basics. A small, solid toolkit covers most of what’ll come up. Here’s what I’d grab first:
- Tire levers
- Patch kit or spare tubes
- Bike pump
- Allen wrenches
- Screwdrivers
- Chain tool
- Lubricant
That’s really it for starters. You can always add more as you take on bigger jobs, but this kit handles flat repairs, brake adjustments, chain maintenance, and basic bolt tightening. Which, let’s be honest, is like 90% of what most of us need.
Tire Care and Repair
Keeping your tires in good shape is one of those things that’s easy to ignore but makes a huge difference. Check them for wear regularly — look for bald patches, cracks in the sidewall, or embedded debris. And check your pressure often. There’s a recommended range printed right on the tire sidewall, and riding outside that range makes everything worse: more flats, worse handling, slower rolling.
Flat tire? No big deal. Remove the wheel, use tire levers to pry the tire off the rim, and pull the inner tube out. Inflate it a bit and listen for the hiss to find the hole. Patch it up or swap in a fresh tube — your call. Before you put everything back together, run your fingers along the inside of the tire to check for whatever caused the flat in the first place. Little piece of glass hiding in there? Get it out now or you’ll be doing this again real soon.
Cleaning and Lubricating the Chain
The chain is one of those parts that needs regular love or it’ll punish you for ignoring it. A dirty chain leads to sloppy shifting and extra wear on your drivetrain components. That adds up fast.
Probably should have led with this — chain cleaning is maybe the single best-bang-for-your-buck maintenance task you can do. Use a degreaser, apply it while turning the pedals to work it into all the links. Wipe everything down with a rag until it’s clean. Then apply a bike-specific lube while spinning the pedals slowly, and wipe off the excess. You want lube in the rollers, not sitting on the outside collecting dirt.
Brake Maintenance
Your brakes are the one system on the bike where “good enough” really isn’t. Check the pads regularly — if they’re worn thin, replace them. It’s cheap insurance. While you’re at it, inspect the cables and housing for fraying or any signs of damage. A brake cable that snaps on a descent is nobody’s idea of a good time.
Adjusting brake tension is simpler than it sounds. For rim brakes, you want the pads hitting the rim evenly on both sides. For disc brakes, make sure the rotor is centered between the pads. If things feel mushy or you’re pulling the lever too far before anything happens, tighten up the cable tension with the barrel adjuster. Test, ride around the block, adjust again if needed.
Gear Shifting Adjustments
When your gears are working right, shifting feels smooth and you barely think about it. When they’re off, it’s all you can think about — clicking, skipping, refusing to go into the gear you want. Sound familiar?
Start by checking the derailleur hanger. If it’s bent, that’s often the whole problem. Straighten it or replace it. Then check the limit screws — these stop the chain from shifting off the top or bottom of the cassette. Finally, fine-tune cable tension with the barrel adjuster. Go for a short test ride and make small tweaks until the shifts are crisp and quiet. It’s one of those jobs that feels intimidating at first but gets easier fast with practice.
Wheel Truing
An out-of-true wheel wobbles side to side, which messes with your braking and just feels wrong. Here’s how to check: spin the wheel and watch it pass a fixed point — like your brake pad. See it waving back and forth? Time to break out the spoke wrench.
Tighten spokes on the opposite side of the wobble, working in small increments. Quarter turns. Check your progress constantly. Overcorrecting is easy to do and then you’re chasing the wobble all over the rim. If it’s really bad or you’re not confident, no shame in taking it to a shop. That’s what makes wheel truing endearing to the nerdy mechanic types — there’s a real art to getting it dialed in perfectly.
Common Troubleshooting Tips
Weird noises, sloppy shifting, or brake issues can usually be diagnosed with some basic detective work. Pay attention while you ride — your bike is trying to tell you something.
- Creaks and clicks often mean something needs lube or something’s come loose.
- Poor shifting usually points to cable tension or a bent derailleur hanger.
- Brake problems are almost always pad wear or cable tension. Sometimes both.
Catching small issues early saves you from bigger (and more expensive) ones later. A five-minute check after every few rides goes a long way.
Storage and Protection
Where and how you store your bike has a real impact on how long it lasts. Keep it somewhere dry if you can. A wall mount or floor stand in the garage or apartment works great and keeps it off the ground. If you have to store it outside, use a weatherproof cover — but make sure the bike’s dry first, or you’re just trapping moisture against the frame.
After any long storage period, do a quick once-over before riding. Check the tires for dry rot or low pressure, lube the chain, and make sure everything spins and moves freely. Bikes that sit unused for months can develop issues from just sitting there.
Regular Inspection and Maintenance Schedule
Having a routine makes everything easier. You don’t have to be obsessive about it — just consistent. Here’s a simple framework:
- Weekly: Check tire pressure, test the brakes, and make sure the chain is lubed.
- Monthly: Inspect tires for wear, check for loose bolts, and clean the drivetrain.
- Annually: Take it to a shop for a professional tune-up, especially if you’re riding hard and often.
You can adapt this based on how much you ride. Someone logging 200 miles a week is going to need more frequent checks than a weekend cruiser.
Riding Tips for Bike Longevity
How you ride affects how long your bike stays healthy. Try to avoid plowing through deep puddles or mud when you can — water and grit getting into bearings and cables speeds up wear. Shift gears before you need to, not while you’re grinding up a hill under heavy load. Your chain and derailleur will thank you.
And listen to your bike. Seriously. Unusual sounds, a shift that suddenly feels different, brakes that grab funny — those are all early warnings. Deal with them when they’re small and they stay small. Ignore them and, well, you can probably guess how that goes.