Maintaining Your Bike at Home
Home bike maintenance has gotten complicated with all the specialty tools and conflicting opinions flying around. Should you use wet lube or dry lube? Is a torque wrench really necessary? Do you actually need a truing stand? I spent my first year of wrenching over-thinking every little thing, and you know what? Most of this stuff is pretty straightforward once you just start doing it. You don’t need to be a professional mechanic. You just need some basic tools, a willingness to get your hands dirty, and maybe a towel you don’t mind ruining.
Essential Tools for Bike Maintenance
Before you touch anything, make sure you’ve got the right tools. Here’s what I’d consider the starter kit:
- Allen wrenches (metric sizes — pretty much every bike bolt is metric)
- Screwdrivers (both Phillips and flathead)
- Chain tool
- Bike pump with a pressure gauge
- Tire levers
- Tire patch kit
- Lubricant
- Cleaning rags
- Degreaser
Checking Tire Pressure
This is the single easiest thing you can do, and it makes a massive difference. Your tires have a recommended pressure range printed right on the sidewall. Use a pump with a gauge and keep things within that range. Check before every ride — yes, every ride. Tires lose air slowly even without a puncture. Properly inflated tires roll better, corner better, and flat less. It’s a thirty-second habit that pays off constantly.
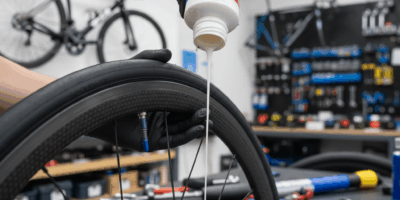
Inspecting and Lubricating the Chain
Your chain is what transfers every bit of power from your legs to the rear wheel. A dirty or dry chain wastes energy and wears out your drivetrain faster. Check it for dirt and gunk buildup. If it looks nasty, clean it with a degreaser and a brush. Once it’s clean and dry, apply lubricant sparingly and evenly across the whole chain. Wipe off any excess — I can’t stress this enough. A wet, gunky chain collects dirt like crazy.
Brakes Inspection and Adjustment
Probably should have led with this, because brakes are literally what stops you. Check your pads for wear. If they’re getting thin, swap them out. Make sure the pads hit the rims evenly on both sides. If they’re off, use the adjustment screws or barrel adjusters to straighten things out. Squeeze the levers and make sure they give you solid stopping power without pulling all the way to the bars. If they do, something needs adjusting.
Tightening Bolts and Screws
Bikes vibrate. A lot. And that vibration loosens things over time. Get in the habit of checking bolts on the handlebars, stem, seat post, and pedals every few weeks. Use the right size Allen wrench or screwdriver — forcing the wrong size strips bolt heads, and then you’ve got a real problem on your hands.
Cleaning Your Bike
A clean bike isn’t just about looks, though it does feel nice rolling out on a sparkling frame. Cleaning helps you spot problems — cracks, worn cables, loose parts — that you’d miss under a layer of mud. Bucket of soapy water, sponge, gentle scrub. Skip the high-pressure hose because it pushes water into bearings and other places where moisture causes damage. Rinse with clean water and dry with a soft cloth.
Wheel Truing
Wheels need to be round and wobble-free. If you’ve got a truing stand, great — use it. If not, you can flip your bike upside down and spin the wheels while watching the gap between the brake pads and rim. See the rim moving side to side? That’s a wobble. Tighten or loosen spokes with a spoke wrench to straighten it out. Go slow and make small adjustments. This one takes practice, but it’s deeply satisfying when you get it right.
Bottom Bracket and Crankset
If you hear creaking when you pedal, your bottom bracket might be loose or worn. That’s what makes this particular maintenance task endearing to experienced home mechanics — tracking down a creak and actually fixing it feels like detective work. Use the right tool to snug up the bottom bracket. Check the crankset for any play or wobble and make sure the bolts are properly tightened. Creaking that won’t quit might mean the bearings need replacement.
Gears and Derailleurs
Smooth shifting makes riding so much more enjoyable. Check your derailleurs for dirt and damage. Clean them if they’re gunked up. Shift through all the gears — do they click cleanly into each one, or do you get skipping and hesitation? Adjust the limit screws and cable tension until everything moves through the range without drama. A well-tuned drivetrain is a beautiful thing.
Inspecting Cables and Housing
Cables stretch, fray, and corrode over time. The housing can split too. Check your brake and shift cables regularly for any signs of wear. Frayed cables are a safety issue — they can snap when you need them most. Replacing cables is inexpensive and makes everything feel crisp again. It’s one of the best bang-for-your-buck maintenance jobs you can do.
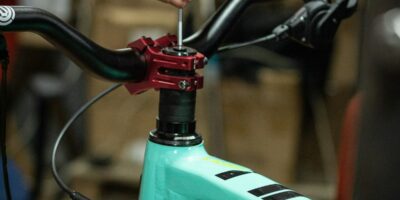
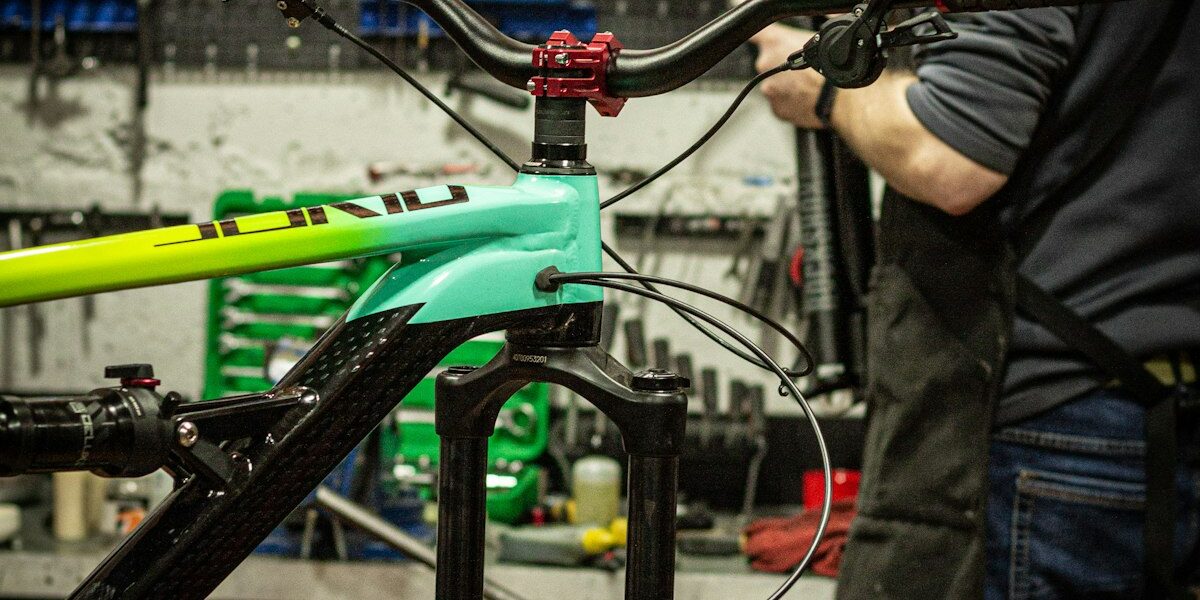
Headset Adjustment
The headset connects your fork to the frame and lets you steer. Lift the front wheel and turn the handlebars side to side. Feel any resistance or grinding? The headset needs attention. Loosen the stem bolts, adjust the top cap until the movement is smooth but without play, then retighten everything. A properly adjusted headset makes steering feel precise and predictable.
Saddle and Seat Post
Saddle height and angle affect everything — comfort, power, knee health. Set the height so your leg has a slight bend at the bottom of the pedal stroke. Keep the saddle level or tilted just slightly forward. Check the seat post for damage and apply grease to prevent it from bonding to the frame over time. A seized seatpost is one of the most frustrating problems in bike maintenance.
Pedals and Cleats
Pedals should spin freely and feel solid. Check them every few weeks and tighten if needed. If you ride clipless, inspect the cleats on your cycling shoes. Worn cleats don’t release properly, which can be dangerous. Replace them when they’re worn down — they’re cheap compared to the alternative of not being able to unclip when you need to.
Regular Ride Checks
Before every ride, do a quick once-over. Tires inflated? Brakes working? Any weird noises? This takes less than a minute and can save you from a breakdown that turns a fun ride into a long walk home. Make it a habit and you’ll catch small issues before they snowball.
Maintaining Suspension Components
If your bike has suspension, it needs care too. Wipe down the stanchions after every ride to keep dirt from getting past the seals. Look for any oil leaks around the seals. Follow the manufacturer’s recommended service intervals for oil and seal changes — skipping this leads to poor performance and expensive rebuilds down the line.
Replacing Worn Parts
Tires, brake pads, cables, chains — they all wear out. Keep an eye on their condition and replace them before they fail completely. A chain that snaps mid-ride can damage your derailleur and leave you stranded. Replacing parts proactively is always cheaper and safer than dealing with a failure on the road.
Storing Your Bike
How you store your bike matters. Keep it in a dry spot, away from rain, snow, and direct sunlight. If outside storage is your only option, throw a bike cover over it. Moisture and UV light are your bike’s two biggest enemies when it’s just sitting there. A wall hook or floor stand keeps it upright and out of the way.
Documentation and Records
Keep a simple log of what you’ve done. Dates, parts replaced, adjustments made. It sounds nerdy, but it helps you stay on schedule and spot patterns. When did you last replace that chain? How many miles on those brake pads? Your log will tell you. A notes app on your phone works fine for this.
Learning and Improvement
Nobody starts out knowing how to do all of this. I definitely didn’t. Read your bike’s manual, watch tutorials, ask other riders for tips. Every task you tackle builds your skills and confidence. Before long, you’ll be the person in your riding group that everyone asks for help. And honestly? That feels pretty good.