“`html
What Chain Skipping Actually Tells You
Bike chain skipping under load has gotten complicated with all the half-baked advice flying around. You’re pedaling hard, especially in lower gears climbing a hill, and suddenly the chain slips off the teeth—that unsettling moment where your foot almost shoots forward and you lose power mid-stroke. As someone who spent two seasons ignoring mine until I actually learned how to diagnose it properly, I can tell you the worst part isn’t the skipping itself. It’s the assumption that a new chain fixes everything. Today, I’m going to share what actually separates a proper diagnostic from guesswork.
Here’s what’s actually happening mechanically: your chain, cassette, derailleur, or some combination of those components has worn unevenly or misaligned enough that the chain can’t grip the teeth under load. The chain is essentially slipping across the top of the cog teeth instead of catching in the valleys between them. But what is chain skipping, really? In essence, it’s mechanical slippage. But it’s much more than that—it’s your drivetrain telling you something specific is broken.
The most common culprit? A worn chain combined with a worn cassette working together. I learned this the hard way when I replaced just the chain on my old road bike and the skipping got worse within three weeks. The new chain, with its slightly different pitch, didn’t mesh properly with the already-hooked cassette teeth. I’m apparently the type who needs to learn everything twice before it sticks.
Here’s what separates a proper diagnostic from guesswork: you need to check four things in a specific order. Each test eliminates possibilities or confirms what needs replacing. This is the exact sequence a shop mechanic uses, and it takes maybe 15 minutes once you know what you’re looking for. So, without further ado, let’s dive in.
The Chain Checker Test—First Step
Start here. Always.
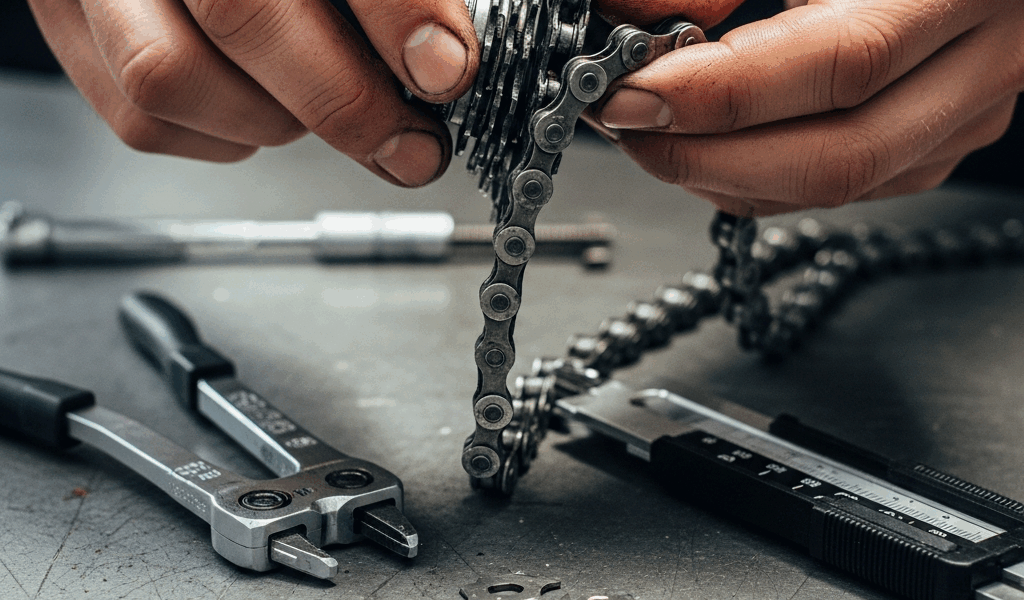
A worn chain is the easiest thing to measure and the quickest diagnostic win. You need a chain wear tool — they cost $8 to $15 and are worth owning if you maintain your own bike. Park Tool’s CC-3.2 is the standard at $11.99. You hook it over the chain, and if it drops fully into the 0.75mm slots without resistance, your chain is fine. If it seats in the 1.0mm slots, replace it.
Don’t have a tool? Use the ruler trick, though it’s less precise. Measure from the center of one pin to the center of the pin exactly 24 links away. A new chain measures 12.00 inches across those 24 links. At 12.03 inches, it’s worn and should be replaced. At 12.15 inches, it’s seriously worn and probably damaged your cassette already.
I measured my chain last month on an old Specialized hybrid I hadn’t ridden since March — 12.08 inches. That’s the sweet spot where replacement was urgent but I hadn’t destroyed the cassette yet. Probably should have opened with this section, honestly. So many riders wait until 12.2+ inches, which guarantees cassette damage.
Why this order? Because if your chain measures within range, the skipping isn’t wear-related in most cases — it’s derailleur alignment or cassette damage, which is a totally different repair path. You just saved yourself $30 to $60 by knowing this test eliminates half the diagnosis.
Check Your Cassette Teeth for Shark Fins
Once you know the chain condition, look at the cassette. You need to get close here. Remove the wheel or just rotate the crank to get different gears visible. Spin slowly and inspect each cog.
Healthy cogs have teeth that look like evenly-spaced triangles, relatively symmetrical. Wear shows up as “hooked” teeth — the leading edge of each tooth is rounded or curved upward, like a shark fin. Advanced wear also shows “shiny spots” where the chain has been polishing the tooth because it’s not engaging properly.
Here’s the workbench reality: cogs 3 and 4 (counting from the smallest, fastest gear) wear fastest because that’s where most riders spend time. Cog 1 and 2 see moderate use in sprints, and the larger cogs (5 onwards) wear more slowly because people shift down to them strategically, not by habit. That’s what makes cassette wear patterns so revealing to anyone who knows what to look for.
If cogs 3 and 4 look hooked and shiny but cog 7 looks pristine, that confirms uneven wear from a stretched chain. Frustrated by a stretched chain that’s been rocking side-to-side, the teeth on those middle cogs bear witness to the problem — they’re polished where a healthy chain never would be.
New cassette teeth are sharp and distinct. Hold the wheel at an angle to catch light on them. Worn cogs just won’t have that definition — they’ll look dull and rounded. If you’re seeing hooks on three or more cogs, replacement is non-negotiable. If it’s just one cog, you sometimes have options, but generally cassettes come as complete units, not individual replacements (except on high-end setups).
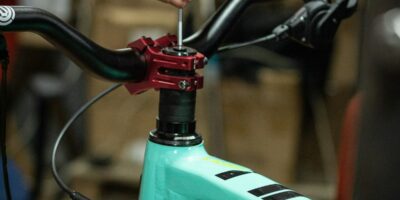
Derailleur Alignment and Limit Screw Check
Now assume your chain measures fine and your cassette looks okay. The skipping might be derailleur misalignment or limit screw tension. This is the diagnosis that stops people from unnecessarily replacing parts.
First, visual inspection: look at the derailleur cage from behind while someone slowly pedals (or rotate the crank by hand). The cage should stay centered, parallel to the cassette. If it’s bent — twisted or offset — no adjustment fixes it. A bent derailleur cage requires replacement, usually $40 to $120 depending on the groupset.
If the cage looks straight, check the limit screws. These are the small adjustment screws (usually labeled H for high gear, L for low gear) on the back of the derailleur. Tight limit screws prevent the derailleur from moving fully across the cassette. If the high limit screw is too tight, the chain might not sit deep enough on the smallest cogs — it rides on top and skips under load.
Here’s a quick test: shift to the smallest cog (highest gear). The derailleur cage should sit maybe 1-2mm away from the cog without touching. If there’s more space, loosen the H limit screw by half a turn and retry. Shift back and forth. If skipping stops, you found it. First, you should do this slowly — at least if you want to avoid over-adjusting and creating a new problem.
For low gear, do the opposite. Shift to the largest cog and check clearance. The chain should sit centered in the cage with maybe 1-2mm from the cage arm to the cog. Too tight, and you’ll skip under heavy load in low gear — exactly what happens on climbs.
Most importantly: derailleur misalignment is a 5-minute fix or a $120 part replacement. Finding this before you replace the chain saves you money and frustration.
Chainring Damage—The Less Common Culprit
This one’s rarer, but checking it takes 30 seconds and matters. Look at your front chainring teeth the same way you looked at the cassette. Worn chainring teeth hook forward (toward the direction of pedal rotation). Shiny spots indicate the chain hasn’t been sitting properly there either.
Chainring damage usually only happens if you’ve been riding a severely stretched chain for months. The chain was rocking side-to-side, and over time it wore down the leading edges of the chainring teeth too. If this is present with wear marks on multiple cassette cogs, you need to replace the chainring as well — probably $30 to $80 depending on whether it’s a budget or premium crankset. Most skipping problems ignore the chainring entirely because it’s usually fine, but if you’re doing a full drivetrain overhaul, checking it takes seconds and prevents the mistake of installing a new chain on worn everything else.
When You Need New Chain vs Chain and Cassette
This is the decision tree that saves money and time.
Chain measures good, cassette looks new, derailleur aligned: You don’t have a wear problem. Adjustment or replacement of the derailleur fixes it. Done.
Chain is worn (12.03+), cassette cogs 3-4 look slightly hooked, other cogs are fine: This is the rare case where you replace just the chain. The cassette hasn’t deteriorated enough to warrant replacement, and a new chain with proper tension will mesh cleanly. New chain only — usually $25 to $60 depending on quality. Sram vs Shimano don’t matter as much as people think here; get the same speed as your groupset. That’s because compatibility is about tooth count and spacing, not brand loyalty.
Chain is worn AND cassette shows hooked teeth on multiple cogs: Replace both. This is 70% of the problem cases I’ve seen. The chain wore the cassette, and a new chain won’t sit right on hooked teeth. You’re looking at chain ($25-60) plus cassette ($40-150). Skip this combination, and you’re replacing the chain again in six weeks because the cassette will destroy it.
Chain is fine, cassette is damaged, derailleur is bent: Cassette and derailleur go. This usually happens after an impact — a hard crash or dropping the bike — rather than gradual wear. Chain stays.
Multiple components show wear (chain, cassette, chainring): Replace all three. You’re doing a drivetrain refresh. $100-250 total depending on your groupset tier. This is actually cheaper than replacing them sequentially over the next two years. Don’t make my mistake of trying to salvage one component when the whole system’s compromised.
The honest reality: most people discover chain wear too late and have to replace chain and cassette together. Next time you replace them, start monitoring chain length every month during peak riding season. Catching wear at 12.05 inches instead of 12.15 inches saves you $40 on cassette replacement. That new habit might be the best option, as drivetrain maintenance requires regular attention. That is because prevention costs nothing compared to component replacement.
“`

Stay in the loop
Get the latest bike maintenance pros updates delivered to your inbox.