Bike Chain Skipping Under Load? Here’s Why It’s Happening and How to Actually Fix It
Bike chain skipping under load has gotten less clear-cut with all the bad advice flying around — “just lube it,” “buy a new derailleur,” “probably your shifters.” None of that. I was grinding up a 12% grade outside Asheville a few years back, standing on the pedals, full gas, and my chain skipped so violently I nearly went over the bars. Not a polite little slip. A full-body lurch that sent my knee straight into the stem. I walked the rest of that climb. After fifteen years wrenching on bikes — starting as a mechanic at a small Trek dealer in western North Carolina, then on my own bikes with increasing obsessiveness — I’ve seen this exact problem more times than I can count. The under-load skip isn’t random. It’s telling you something specific. And it almost always comes down to one of four things.
This article includes affiliate links. We may earn a commission at no extra cost to you.
Check Chain Wear First — The Most Common Cause
This is where I start every single time. Not because it’s interesting — it isn’t — but because it’s the right answer about 70% of the time. A worn chain is the single most common reason a drivetrain skips under load specifically. Not while coasting. Not during lazy spinning. But when you’re actually pushing real power through the system.
But what is chain wear, exactly? In essence, it’s pin erosion that causes the chain to elongate slightly over time. But it’s much more than that. A new chain has a precise half-inch pitch per link — 12 links measure exactly 12 inches. As miles accumulate, the pins and inner plates erode. The chain gets longer. We call it “chain stretch,” though the metal itself isn’t stretching — the pins are just getting smaller. That small elongation changes how the chain seats on your cassette teeth. Under light pedaling, the teeth still catch it. Under real load, when tension is high, those worn links climb up the cassette teeth instead of dropping cleanly into the valleys. Then they slip. That’s your skip.
How to Measure Chain Wear
You need a chain wear indicator tool. I use the Park Tool CC-4 — costs about $15, been rattling around in my kit for years. You can use a standard ruler, but the dedicated tool is faster and you won’t mess it up. Hook the tool into the chain at the .75 side first. If it drops in, stop right there. You need both a new chain and a new cassette. If it doesn’t drop in at .75, try the .5 side. Drops in at .5 but not .75? Replace the chain now and your cassette probably survives.
The numbers matter more than people realize. At 0.5% wear, replace the chain — do it here and your cassette usually lives. At 0.75% and beyond, the cassette teeth have already conformed to the worn chain’s geometry. A new chain won’t mesh with those deformed teeth. You’ll skip worse than before. More on that in a second.
What Chain to Buy
Match the chain to your drivetrain’s speed count. An 11-speed chain is narrower than a 10-speed — not interchangeable, full stop. Running Shimano 105? The HG-601 or HG-701 are both solid choices. SRAM drivetrain? Use a SRAM chain. Mixing brands works sometimes, but I’ve watched it cause noise and accelerated wear often enough that I don’t recommend it. Decent replacement chains run $25 to $45 for most non-electronic groupsets. The KMC X11 is a reliable third-party option that’s widely available.
One more thing — lube the chain after installation. Probably sounds obvious. I forgot once on a 60-mile ride in the rain and destroyed a brand-new chain in a single outing. Learn from what tripped me up. The factory coating wears off fast. Apply your lube, let it sit a few minutes, wipe the excess. Done.
New Chain on an Old Cassette — The Classic Mistake
Worth saying out loud. I see it constantly. Someone’s chain is skipping. They replace just the chain. The skipping gets worse. They come back to the shop furious, convinced they got a defective chain. They didn’t. They made one of the most common drivetrain mistakes in all of cycling.
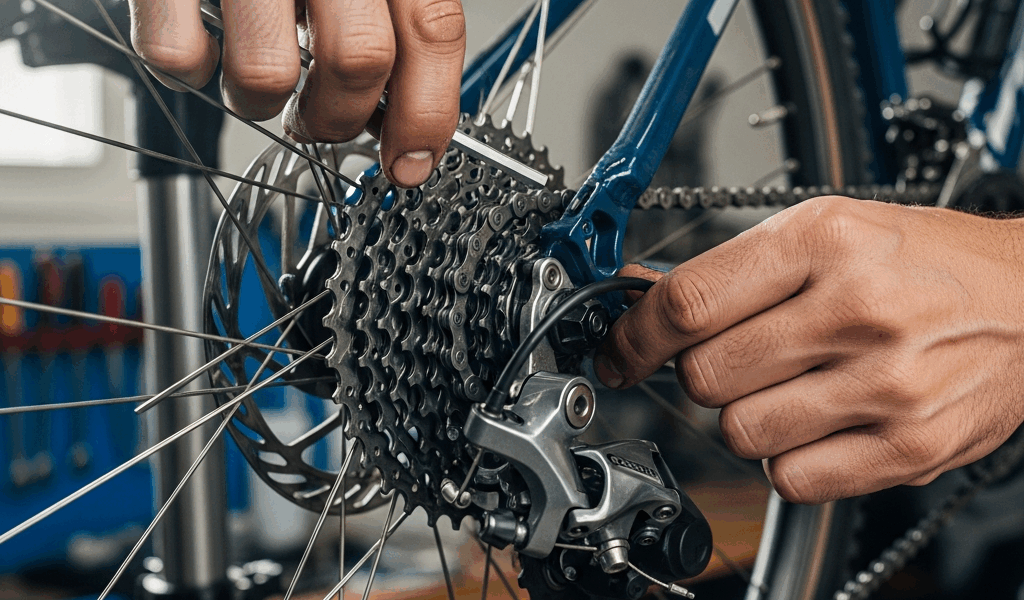
Cassette teeth aren’t flat geometric shapes — they’re closer to shark fins, machined with angled ramps and specific profiles designed to interact with a chain of precise geometry. Run a worn chain for thousands of miles and those teeth wear too. They erode on one side, developing a hooked profile that matches the elongated chain perfectly. The worn chain and the worn cassette break in together. They function as a matched pair.
Install a new chain on that worn cassette and you’ve introduced a mismatch. The new chain’s links have a shorter effective pitch than what those hooked teeth expect. Under light load, everything might seem fine. The moment you push hard — a climb, a sprint, a hard acceleration out of a corner — the new chain can’t seat into those hooks properly. It climbs the hook and skips off. Every single time.
How to Tell If Your Cassette Needs Replacing
Visual inspection works if you know the signs. Pull the cassette — you’ll need a cassette lockring tool and a chain whip, or just take it to a shop and have them pull it. Look at the teeth on your most-used cogs. On a typical road bike, that’s usually the 17t, 19t, or 21t. Healthy teeth look symmetrical, relatively square at the top. Worn teeth look like shark fins — one side undercut, the other steep and hooked. That profile means it’s done.
There’s also a quick test you can do before pulling anything apart. Install the new chain. Put the bike in a moderate gear, hold the rear brake firmly while standing over it, and push the pedal forward with real force. If the chain skips or clicks over the teeth during that static test, the cassette is worn past its useful life. Replace both together. A new Shimano 105 cassette runs $40 to $60. A SRAM PG-1130 is in that same range. Skipping that expense and repeating this whole process two months from now costs more — in money and in frustration.
Derailleur Cable Tension — The 2-Minute Fix
Not every under-load skip comes from a worn drivetrain. Sometimes it’s embarrassingly simple. Cable tension in the rear derailleur controls how precisely the derailleur positions the chain over each cog. Too little tension and the derailleur sits slightly inboard of where it belongs — the chain rides up between cogs under load and skips. This shows up a lot after cable replacements, after riding in wet conditions, or after a bike sits unused long enough for the cable housing to compress slightly.
The fix is a half-turn of the barrel adjuster. That’s the cylindrical knob where the cable housing enters the rear derailleur body — right there at the back of the derailleur on most setups. To add tension, turn it counterclockwise. Half a turn. Shift through the gears and test.
How to Test After Adjustment
Get on the bike or throw it in a stand. Pedal at moderate cadence and shift from a small cog to a larger one. The shift should be crisp — immediate, no hesitation. If the chain pauses before dropping onto the larger cog, you need more tension. Another half-turn counterclockwise. If it overshoots and tries to jump past the intended cog, you’ve gone too far — a quarter-turn clockwise to back off.
Under load, low cable tension tends to show up in the middle of the cassette — around the 4th through 7th cogs on an 11-speed setup. That’s where most riders spend their time, and that’s where a small tension error becomes obvious when you’re pushing hard. If the adjustment fixes it, great. If it keeps coming back after a few rides, the housing has a crack or the cable is fraying at the clamp bolt. At that point you’re replacing cable and housing, not just tweaking the adjuster.
Bent Derailleur Hanger — The Hidden Cause
This one gets missed constantly. I spent about three months chasing a ghost skip on my own gravel bike before I finally caught it. The derailleur hanger is a small aluminum tab connecting the rear derailleur to the frame — designed to be sacrificial, so it bends in a crash before the derailleur or the frame does. That’s intentional. The problem is hangers bend in incidents that barely register as incidents. A slow tip-over in a parking lot. Dropping the bike while loading it onto a car rack. Leaning it against a brick wall at the wrong angle on a Tuesday afternoon.
A bent hanger changes the angle of the entire derailleur relative to the cassette. The derailleur cage is no longer parallel to the cogs — it’s toed in or out slightly, and the chain runs at an angle as it passes through the pulleys and onto the cassette. Under light loads, the drivetrain compensates. Under real pedaling effort, that angular misalignment causes skipping — often in specific gears, usually somewhere in the middle of the cassette range.
How to Check Hanger Alignment
The right tool here is a Park Tool DAG-2.2 or similar derailleur alignment gauge — about $70 new, but most shops will check this for free or for a small bench fee. The gauge threads into the hanger and has an arm with a pointer that you rotate around the wheel, measuring the distance from the pointer tip to the rim at multiple clock positions. A straight hanger holds that distance constant all the way around. A bent one shows variation — sometimes dramatic, sometimes just a millimeter or two.
Without a gauge, you can do a rough visual. Stand directly behind the bike at wheel level. Look at the derailleur cage from behind — the two pulleys should form a perfectly straight vertical plane, parallel to the wheel. Any angle, any lean, and the hanger is bent. Bent hangers can often be straightened in place using the alignment gauge as a lever. Hangers that are badly bent — or aluminum ones that have been bent and straightened more than once — should just be replaced. They’re frame-specific and run $10 to $20. Keep a spare. Tape one inside your seatbag or leave one in your car. I learned that particular lesson in the middle of a gravel race in Georgia with 40 miles left and no spare hanger in sight. That’s what makes carrying a spare hanger endearing to us gravel riders who’ve been burned before.
Working Through the Diagnosis in Order
When a skipping bike lands in my workspace, I run through these four checks in the same order every time. Chain wear first — 30 seconds with the CC-4, and it’s the right answer most of the time. Then cassette condition, especially if the chain is worn past 0.75%. Then cable tension, because sometimes the fix really is one half-turn of a barrel adjuster and nothing else. Then hanger alignment — particularly if there’s been any kind of impact or tip-over, even a minor one from six months ago that’s been completely forgotten.
While you won’t need a full professional tool kit for this, you will need a handful of basic items — a chain wear indicator, a cassette lockring tool, a chain whip, and ideally a derailleur alignment gauge or access to one. That’s it. The under-load skip is specific enough that it usually isn’t a mystery for long. Something in the drivetrain can’t cleanly handle the force being asked of it — worn components, positioning error, disrupted mechanical interface. None of these fixes are expensive. None of them require a shop visit if you’re comfortable with basic tools.
Fix them and you stop bleeding power on every hard pedal stroke. Stop bracing yourself on every climb. Start actually enjoying the ride again. That’s the whole point.


Stay in the loop
Get the latest bike maintenance pros updates delivered to your inbox.