Crank removal should take two minutes. Instead, I’ve seen riders spend hours wrestling with seized components, strip threads, and damage cranks beyond use. The difference between success and disaster is knowing which extraction method your crank requires—and executing it correctly.
The Two Categories
Self-extracting cranks have the extraction mechanism built into the crank bolt assembly. When you loosen the bolt, an internal system pushes the crank off the spindle simultaneously. Shimano Hollowtech II, SRAM GXP, most modern two-piece cranks use this system.
Puller-required cranks need a separate crank puller tool threaded into the crank arm after the bolt is removed. Square taper, ISIS, and Octalink systems typically fall here, as do some older two-piece systems and certain designs where the self-extracting cap has been removed.
Getting this wrong causes damage. Using a puller on a self-extracting crank can crack the arm. Trying to pry off a puller-required crank without the proper tool strips threads or bends components.
Identifying Your System
Look at the crank bolt area: Self-extracting systems typically have a large plastic preload cap or an expanding compression ring. When you remove the cap, the spindle bolt is visible inside a larger housing.
Puller-required systems have a single bolt (8mm hex is common) that threads directly into the spindle. Removing this bolt leaves a threaded hole in the crank arm where the puller will thread in.
When uncertain: Look up your crank model. Manufacturer documentation specifies the removal method. Getting this wrong is expensive.
Self-Extracting Removal
For Shimano Hollowtech II and similar systems:
Step 1: Remove the preload cap. This plastic cap threads into the left crank arm. Use the appropriate tool (usually a plastic ring tool, sometimes a 10mm hex or similar). Loosen it completely and remove.
Step 2: Loosen pinch bolts. Two small hex bolts (4mm or 5mm) on the left crank arm pinch the arm onto the spindle. Loosen both by several turns but don’t remove them completely.
Step 3: Extract the left arm. With pinch bolts loose, the left crank should slide off the spindle. If stuck, tap the end of the spindle with a plastic mallet while pulling the crank arm outward. Never use metal hammers on spindle ends.
Step 4: Remove the drive-side crank. With the left arm off, the drive-side crank (with chainring attached) pulls through from the drive side. It slides out through the bottom bracket bearings.
Reassembly note: The preload cap sets bearing preload—don’t skip it or over-tighten. Snug until play is eliminated, then secure pinch bolts to spec (12-14 Nm typical).
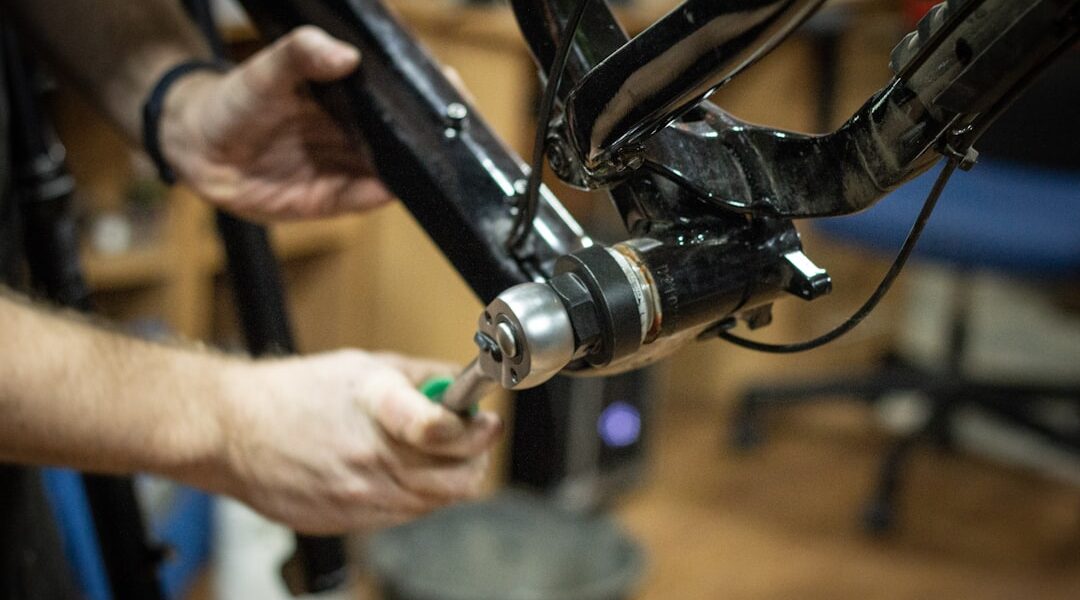
Puller-Required Removal
For square taper, ISIS, Octalink, and some others:
Step 1: Remove the crank bolt. Usually an 8mm hex bolt (or 14mm socket on older systems). Remove completely. Some bolts have attached washers; don’t lose them.
Step 2: Thread in the crank puller. The outer sleeve of a crank puller has threads that match the internal threads in the crank arm. Thread it in fully by hand—never use tools for this step. Bottoming out the threads ensures proper engagement.
Step 3: Engage the spindle. The inner portion of the puller has a tip that contacts the spindle end. Thread this in until it contacts the spindle firmly.
Step 4: Extract. Continue turning the inner handle. The puller pushes against the spindle while pulling the crank arm off. Resistance is normal; sudden motion means the crank has released.
Step 5: Remove the puller and repeat on the other side.
Critical points: Always thread the puller fully into the crank. Partial engagement strips threads—the most common cause of crank arm destruction. If the puller feels like it’s slipping, stop, check thread engagement, and start over.
Dealing With Stuck Cranks
Seized cranks happen, especially on older or poorly maintained bikes:
Penetrating lubricant: Apply PB Blaster, Kroil, or similar to the spindle interface. Let it soak for hours or overnight. Reapply several times.
Heat: Moderate heat from a heat gun on the crank arm (not the frame) can break corrosion bonds. Be cautious with aluminum—it doesn’t take much.
Impact: For stubborn self-extracting cranks, sharp taps with a plastic mallet while pulling can break adhesion. For puller systems, the puller itself provides the force—just keep turning.
The nuclear option: Extremely seized square taper cranks sometimes require a gear puller or automotive puller with modified tips. This is frame shop territory.
Preventing Future Issues
Anti-seize on spindle interfaces: A thin coat prevents corrosion bonding.
Proper torque on crank bolts: Under-torqued bolts allow movement that wears the interface. Over-torqued bolts make future removal difficult. Follow manufacturer specs.
Regular removal and inspection: Taking cranks off annually for cleaning and re-greasing prevents seizing.
The Two-Tool Investment
A self-extracting crank requires only hex wrenches and the preload cap tool—often included with the crankset. A crank puller costs $15-30 and works for most puller-required systems. Together, these tools cover nearly every crankset on the market.
Identify your system before starting. Use the correct method. Apply proper torque. And you’ll never be that rider in the shop with stripped threads and a damaged crank.

Stay in the loop
Get the latest bike maintenance pros updates delivered to your inbox.