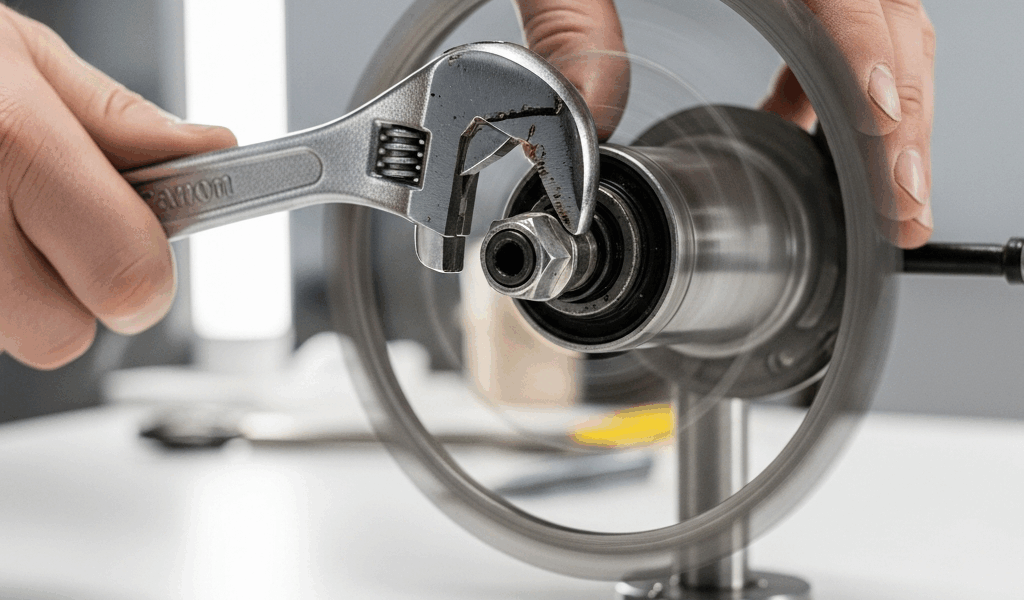
What Grinding Hub Bearings Sound and Feel Like
Hub bearing grinding has gotten complicated with all the noise flying around—customers throw around “clicking,” “creaking,” and actual grinding like they’re all the same thing. But what is grinding, exactly? In essence, it’s a rough, continuous scraping noise as the wheel spins. It’s much more than that, though.
Not a click. Not a creak. A sustained raspy texture that shifts depending on how much weight you’re putting on that wheel. When I’m diagnosing this, I spin the wheel freely in the air first. A healthy hub spins smooth, nearly silent except for tire noise. A grinding hub? You get that gritty, almost sandy sensation through your hand if you touch the rim. It’s unsettling once you know what to listen for.
Here’s what makes grinding different from the rest: clicking happens once per wheel rotation (spoke tension issue or brake rub). Creaking typically occurs under load and travels around (bottom bracket, seat tube, seatpost). Grinding is constant, rough, and isolated to the hub itself — that’s the key distinction.
To isolate which hub, lift the bike on a stand. Front wheel first. Spin it freely and listen directly above the axle. Then get the rear wheel spinning. The grinding will be dramatically louder on the affected side. Front hub bearing issues are more common than rear simply because that’s where water sneaks in first, but I’ve had equally bad rear hubs from riding through salt slush. That winter last year was brutal.
Under load, the grinding intensifies. This matters diagnostically because grinding that only appears when you’re pedaling hard or cornering usually points to play in the bearing itself rather than actual bearing damage. Constant grinding at any speed? That means the bearing races are already pitted. You’re looking at a different problem.
How to Diagnose Before You Tear Into It
Probably should have opened with this section, honestly. Unnecessary bearing adjustments are something I see constantly in home shops — people making things worse.
Here’s the field-proven method I use weekly. It’s straightforward:
- Lift the wheel completely off the ground using a bike stand or your body weight. The wheel must spin freely with zero resistance from brakes or drivetrain — this step matters more than people realize.
- Spin the wheel hard and listen. Let it coast to a stop. Does it decelerate smoothly or does the grinding noise intensify as it slows? Grinding that gets worse as rotational speed drops suggests internal pitting — the bearing is actually deteriorating in real-time.
- Grab the rim at 3 o’clock and 9 o’clock. Rock it side to side gently. You should feel nothing. Zero play. If the wheel moves laterally, that’s axle play — different problem, usually solvable with cone adjustment.
- While holding the rim, apply backward pressure like you’re testing brake feel. Now forward pressure. Any knocking sensation? That’s vertical play, which also suggests loose cones rather than bearing damage. This distinction matters.
- Spin the wheel again and gradually apply light braking pressure with your hand. Does the grinding change in character? If it gets smoother briefly then rough again, the bearing races are likely pitted but the grinding is being temporarily masked by friction.
This five-step process takes 90 seconds and tells you almost everything. Play means adjustment might work. Constant grinding with no play — well, that means the bearing is compromised internally and you’re probably looking at replacement.
I learned this the hard way by spending two hours adjusting a bearing that should have gone straight to the bin. The grinding I was hearing was actually metal-on-metal contact from a pitted cup. Tightening the cone made it worse, not better. I was just pressing damaged surfaces together harder. Don’t make my mistake.
Adjusting Cup-and-Cone Bearings the Right Way
Cup-and-cone bearings are still the standard on most bikes under $800 and any vintage or mid-range road bike. The actual technique that works is simpler than you’d think, but it requires patience.
You need a cone wrench — usually a 13mm, 14mm, or 15mm depending on your hub model. Park Tool and Unior both make quality ones, and they’re not expensive. Remove the quick-release or thru-axle completely. On the non-drive side (left on rear hubs), you’ll see a locknut, then a cone wrench, then the bearing cup deeper inside.
The locknut holds the cone in position. Loosen it about one-quarter turn — just enough to break it free. Now the cone wrench is your adjustment tool. This is where patience matters.
Turn the cone counterclockwise (when facing the non-drive side) in tiny increments. We’re talking one-eighth turn at a time. Spin the wheel between each adjustment. You’re looking for the point where the wheel spins freely but with zero lateral play. It’s a narrow window. Most people miss it by going too far and creating play or going too far the other way and creating resistance.
The quarter-turn rule I use: once you feel the cone beginning to tighten the bearing (wheel resistance increases), back off exactly one-quarter turn and stop. That’s your sweet spot nine times out of ten. Tighten the locknut against the cone to lock your adjustment. Don’t over-torque — you’ll just have to fight it again when you adjust the other side.
Over-tightening is the single most common mistake, and I see the consequences constantly. Overly tight bearings create grinding even in healthy hubs because you’re forcing balls through a race under pressure. The bearing will feel tight, spin roughly, and someone will assume it’s damaged when really it just needs a quarter turn of relief. Apparently I’m the person shops call at this point.
After adjusting, put the wheel back on and spin it in the frame. No brakes, no tension. It should be buttery smooth. The moment you feel resistance or hear that grinding sound again while adjusting a previously healthy bearing, you’ve gone too tight. You’re back to step one.
Adjustment buys you time if the bearing feels healthy during diagnosis but loose. Adjustment is your only move on a budget. But if grinding persists after correct adjustment, or if you hit that sweet spot and the grinding returns within a month, the bearing is damaged. Replacement is inevitable at that point.
When Bearings Are Shot and Replacement Is Your Only Move
Not all bearings can be adjusted back to life. Here’s how to know if you’ve hit terminal damage.
Visually inspect the bearing cup on the non-drive side. Remove it by gently tapping a small punch against the edge to pop it out. Look at the inner race — the surface where the balls roll. Pitting looks like tiny corrosion pits, usually in a circular pattern. Scratches, scoring, or visible damage to the cup itself means replacement is mandatory. Adjust-and-hope doesn’t work here.
Feel inside the bearing cup with a clean finger. A healthy bearing cup is smooth, almost polished. Pitted surfaces feel gritty or rough to the touch. That’s your confirmation.
You have two replacement paths: cartridge bearings or loose-ball rebuild. Cartridge bearings are sealed units that press directly into the hub. They’re faster to install — 15 minutes for someone experienced — more reliable, and last longer because the sealing keeps water out. Cost is higher. A quality cartridge bearing like Enduro ABEC-3 runs $35–60 per side. Loose-ball rebuilds cost $8–15 in parts (bearing balls, cones, cups) but require skill and time (45 minutes minimum). The labor math usually favors cartridges unless you’re comfortable with the rebuild process.
Most customers I work with go cartridge route once they understand that sealed bearings prevent the problem from recurring. It’s better preventive spend than another rebuild in 18 months. Works for me, and the warranty peace of mind is worth it.
Prevent Grinding Hubs From Coming Back
Bearing inspection should happen every 12–18 months if you ride in wet conditions, or every two years if you’re mostly dry climate. Annual spin-and-listen takes 30 seconds and catches play before it becomes grinding.
Water ingress is the actual killer. Cup-and-cone hubs have minimal sealing — basically just the bearing cup sitting in the hub shell with no real barrier against moisture. That’s why grinding hubs are so common on bikes ridden through salt slush or heavy rain. Corrosion starts inside the cup, creates pitting, and grinding follows within weeks.
If you’re rebuilding a hub with loose bearings, upgrade the seals if possible. Some hubs accommodate snap-ring seals or cartridge-style shields that aren’t factory original. They’re cheap — $3–8 per side — and extend bearing life significantly. While you won’t need extreme upgrades, you will need a handful of these small improvements.
The real preventive move is switching to sealed cartridge hubs as a long-term upgrade. Brands like Chris King and DT Swiss make cartridge bearing hubs that don’t grind because the bearings are actually protected. Yes, you’re replacing the entire hub assembly, not just the bearings. But if your current wheel set is five years old and showing signs of bearing wear, a new set with sealed hubs is often the better economic decision than repeated loose-bearing maintenance.
Keep your drivetrain clean and dry. Grit that settles on the brake rotor or rim can work its way into the hub cavity. I’ve had customers whose hub bearings went bad because they were riding in muddy conditions without fenders and spray was constantly washing bearing surfaces. Fenders aren’t just for keeping your chamois dry — they protect your bearings too.
If your bike sits outside for weeks at a time, the bearing play will worsen. Temperature cycling and moisture exposure accelerate corrosion. Store it inside or under cover. It makes a real difference over months and years.

Stay in the loop
Get the latest bike maintenance pros updates delivered to your inbox.