How to Tell if Your Headset Is Actually Loose
A clicking noise coming from your headset has gotten complicated with all the misleading advice flying around. I spent three years as a shop mechanic before I learned this the hard way—I must have adjusted stem bolts a hundred times on bikes that actually had headset play. The clicking you hear might not be the headset at all. It could be your stem creaking against the steerer tube. They sound similar. They feel similar when you’re riding. But they’re completely different problems with completely different fixes.
Here’s the diagnostic test I use every single time, and honestly, it takes maybe 30 seconds.
Stand over the bike. Squeeze the front brake lever hard—lock it down. Now grab the top of the fork with one hand and rock the entire bike forward and back by pushing on the seat with your other hand. Rock it firmly but not violently. Feel for movement at the headset.
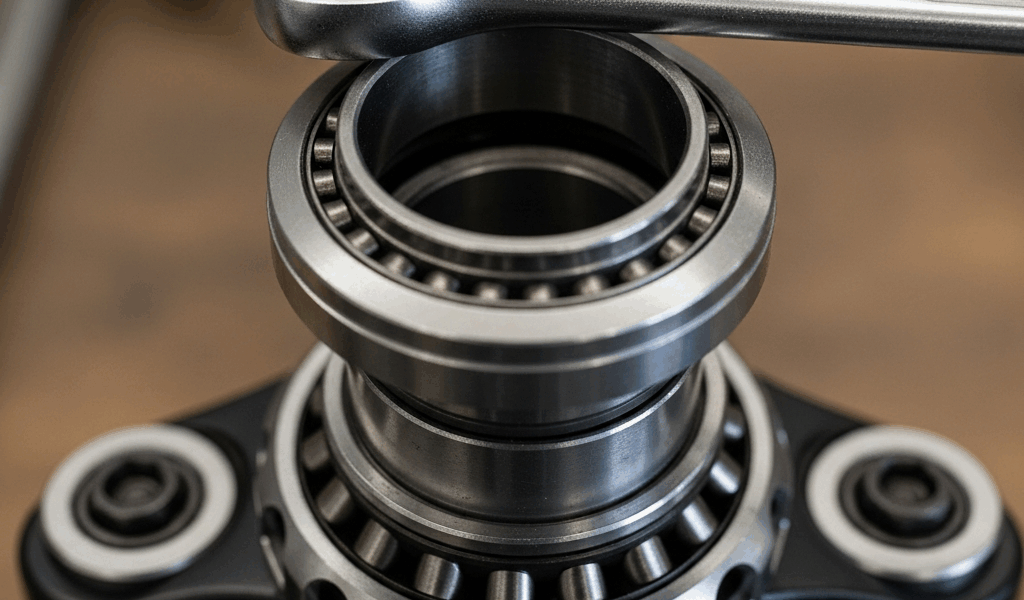
If you feel distinct clicking, knocking, or play in the headset itself — that’s your answer. The fork actually moves in the cups. You’ll notice the click happens right at the junction where the fork steerer enters the frame. It’s a sharp, mechanical sound. Loose headset play feels like looseness. Actually loose.
Now try this: with the brake still locked, hold the top cap and twist the bars left and right. Push hard. Real hard. If you hear creaking instead of clicking — if the noise is more of a groaning than a sharp knock — that’s stem creaking. That’s a different bolt entirely (the stem faceplate bolts or the stem wedge, depending on your fork type). Stem creaking happens because there’s movement between the stem and steerer tube, not at the headset cups themselves.
A loose headset has perceptible play. You can actually move the fork up and down in the frame slightly when the brake is locked. A creaking stem has zero play — everything feels tight, but friction between surfaces is creating noise under load.
Probably should have opened with this section, honestly. Most riders I’ve helped figured out their actual problem within the first minute once they knew what to feel for.
Tools and Parts You Need
While you won’t need an entire workbench setup, you will need a handful of basics. I’ve seen people buy complete headset overhaul kits when all they actually needed was a torque wrench and a hex key.
- Torque wrench — This is non-negotiable. Get a beam-style or digital wrench that reads down to 1 Nm. Cheap ones are fine. I use a Park Tool TW-6.2, runs about $60. You’ll use this more than once.
- Hex keys — Typically 4mm, 5mm, or 6mm depending on your top cap bolt. Check what your fork needs. Most modern forks use 6mm.
- Compression ring wrench — Only if you have a threadless headset with an external compression ring. Some headsets use a special wrench; some use a standard wrench. Check your headset brand first. Many riders skip this and just tighten the top cap, which works fine for adjustment purposes.
- Allen wrench or wrench set — For holding the compression ring while you work, if applicable.
- Grease — Headset-specific grease like Finish Line Cross Country or Park Tool Polylube 1000. Not necessary for tightening, but you’ll want it if you pull the fork apart. Don’t use waterproof lube here — it builds up and creates drag.
You may not need to remove the fork. Most headset tightening happens with the fork in the frame. Over-engineering this job is how people end up creating new problems.
Step-by-Step Tightening Process
Start with the brake locked and repeat that fork-twist test. You’re establishing a baseline.
Locate your top cap bolt — it’s the single bolt on top of the headset, right where the steerer tube comes up through the frame. Most are recessed under a rubber or plastic cap.
Loosen it completely first. Yes, completely. This breaks the friction and lets you start fresh.
Now hand-tighten the bolt until you feel resistance. Not until it’s hard. Until you feel it make contact. This is roughly 2-3 Nm of force — just finger pressure with your palm.
Repeat the fork-twist test. Squeeze the brake, rock the bike. You’ll probably still feel play. That’s normal. You’re eliminating play now, not tightening everything down.
Give the bolt a quarter turn. Maybe a half turn if there was a lot of play. Tighten with a hex key, not your fingers. Test again. Rock the fork. You should feel less clicking each time.
Keep doing quarter-turn increments. Test between each turn. This takes five minutes total. It’s not a race.
When the clicking disappears, stop. Don’t keep tightening. This is where people ruin headset bearings. Tight doesn’t mean problem-solved. The bearing races can handle only so much preload. Too much creates friction, which causes grinding, which creates heat, which kills the bearing balls.
Once the clicking is gone, set your torque wrench to your headset’s spec. Most modern headsets specify 5-8 Nm for the top cap bolt. Check your fork manual or headset documentation. That specification exists for a reason. Tighten to that exact number. Your torque wrench will click when you’ve reached the target.
Repeat the brake-locked fork-twist test one more time. You should feel zero play now. No clicking. No movement in the headset cups. If the brake is locked hard and you push the fork and feel nothing at the headset — you’re done.
Ride it. A loose headset usually fixes immediately. The clicking vanishes. If you still hear clicking after adjusting the headset, that’s when you know it’s something else (stem creaking, loose seat tube binder, loose derailleur cable).
When You Need to Pull the Fork and Clean Bearings
Sometimes tightening doesn’t work. You tighten the top cap. The clicking is still there. Or worse — there’s clicking AND a grinding sound underneath.
If you tighten the top cap correctly and the clicking persists, the bearings are probably dirty or pitted. Dirt inside the bearing races creates friction. Pitting happens from impact (hard crashes, big hits) or riding with a loose headset for months.
Pitted bearings can’t be fixed with adjustment. They need to be replaced. A dirty bearing might be salvageable with cleaning, but that requires pulling the fork out of the frame, removing the cups, cleaning them properly, and reassembling with new grease.
This involves more than just tightening, but here’s the flag: if you hear grinding plus clicking, stop. Take it to a shop. A headset overhaul involves press-fitting cups and understanding bearing preload. Do it wrong and you’ve got a bike you can’t ride until the headset works again.
I’ve seen people mess with headset bearings, create binding, and then decide they need to replace the entire headset. That’s a $150 mistake that started as a $0 adjustment.
Prevention and Maintenance Schedule
Headsets loosen. Vibration, road shock, and the simple fact that bolt tension relaxes over time — these all combine. I check headset play every three months, especially after rough rides or crashes. The fork-twist test takes 30 seconds. Do it on a schedule.
If you ride in wet conditions, reapply headset-specific grease annually. This is preventive. You’re not pulling anything apart — just applying a small amount of grease around the cups where the water might creep in. Wet conditions create corrosion. Corrosion creates grinding. Grease prevents that.
A loose headset is one of those issues that creeps up slowly. The clicking gets worse over months because looseness gets worse. Riders often don’t notice until it’s bad. Checking it quarterly prevents the situation entirely. Quarter-turn adjustment every few months is infinitely easier than diagnosing a stuck headset that’s been loose for a year.
The prevention win here is simple: check it regularly, tighten it incrementally, and use a torque wrench to finish the job properly. That’s the whole system. A clicking headset is one of the most solvable problems in bike maintenance. You just have to diagnose it correctly first.

Stay in the loop
Get the latest bike maintenance pros updates delivered to your inbox.