Guide to Bike Care and Repair
Guide to Bike Care and Repair
Last summer I was about ten miles from home when my rear derailleur started making a noise that sounded like a blender full of gravel. Turned out the cable had frayed and the derailleur was trying to shift on its own. I limped home in one gear, covered in chain grease, and immediately ordered a repair stand. That experience taught me something: a little preventive maintenance goes a really long way. So here’s what I’ve learned about keeping a bike running well, without needing a shop for every little thing.
Basic Maintenance
Keeping your bike in decent shape starts with three things: cleaning, tire pressure, and chain lube. That’s it. If you do nothing else, do these three. Use a soft brush to get dirt off the frame — skip the abrasive scrubbers unless you want your paint looking like it went through a sandstorm.
Check tire pressure frequently. Under-inflated tires feel sluggish and they’re way more prone to pinch flats. Use a pump with a gauge and follow what the manufacturer recommends on the sidewall.
Lubricate the chain. A lubed chain reduces friction and saves your cassette and chainrings from premature wear. Apply a few drops of bike-specific lube while spinning the pedals backward. Don’t drown it — just enough to coat the rollers.
Brake Inspection and Adjustment
Probably should have led with this, because nothing matters more than being able to stop. Check your brake pads. If they’re worn thinner than a quarter inch, replace them. It’s a five-minute job that could save your life.
Inspect the cables too. Frayed or rusty cables can snap without warning, and that’s a scenario you really don’t want to experience on a downhill. Replace damaged cables right away. Adjust the cable tension so the brakes bite firmly when you squeeze the lever.
Make sure the pads align properly with the rims. Misaligned pads chew up your rims and wear unevenly. Loosen the bolts, reposition the pads, retighten. Simple fix, big payoff.
Gear Tuning
Getting your gears dialed in is one of those jobs that seems intimidating but really isn’t, once you understand what the barrel adjusters and limit screws do. If your derailleurs aren’t shifting cleanly, start with the barrel adjuster — a quarter turn at a time. That fixes most cable tension issues.
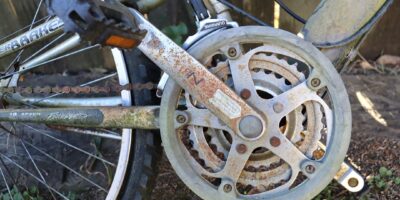
Check the cassette and chainrings for wear. If the teeth look like shark fins instead of nice rounded peaks, they’re done. Invest in a chain wear tool (they’re like ten bucks) and replace the chain before it stretches enough to chew up your other drivetrain parts. That’s what makes regular chain checks endearing to budget-conscious riders — a new chain is way cheaper than a new cassette.
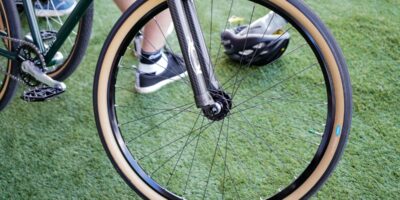
Wheel Maintenance
Inspect your spokes every now and then. Grab pairs of them and squeeze — they should all feel roughly the same tension. Loose or broken spokes cause wobble and weaken the wheel. A spoke wrench is cheap and worth having.
Check your rims for wear too. Deep grooves or cracks mean it’s replacement time. True the wheels regularly by adjusting spoke tension so they spin straight. And don’t forget the hub bearings — if they feel rough or gritty, clean and regrease them. Smooth hubs make everything feel better.
Frame Inspection
Look over your frame for cracks or dents, especially after a crash or if you’ve been riding hard terrain. Pay attention to the welds and joints — that’s where stress builds up. Small cracks can turn into big problems fast.
Check the headset for play by squeezing the front brake and rocking the bike forward and back. Feel a clunk? The headset needs tightening. Adjust the top cap and stem bolts.
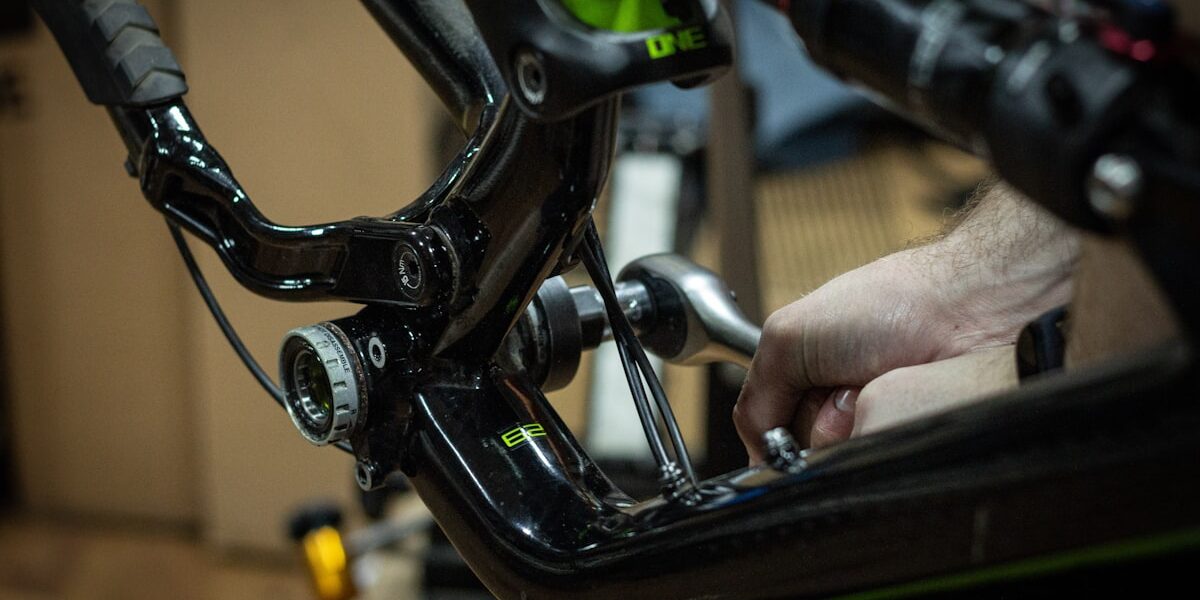
Give the bottom bracket a check too. If it feels gritty or has side-to-side play, the bearings are on their way out. Replace them before they start making noise and damaging the frame interface.
Handlebars and Saddle
Make sure your handlebars are straight and secure. A loose bar is terrifying at speed. Check the stem bolts regularly and use a torque wrench if you have one.
Saddle height matters more than people think. Set it so your knee has a slight bend at the bottom of the pedal stroke. Too high and you’re rocking your hips. Too low and you’re losing power and stressing your knees. Use a quick-release or Allen key to make adjustments.
Check for saddle wear. A torn or compressed saddle is uncomfortable and won’t support you properly. Replace it if it’s seen better days.
Tools and Equipment
You don’t need a full shop to do basic maintenance, but the right tools make everything easier. A multi-tool, tire levers, and a patch kit handle most roadside emergencies. A floor pump with a pressure gauge is a must-have at home.
If you’re getting more serious about wrenching, consider a repair stand. It holds the bike at working height so you’re not hunched over on the garage floor. They range from thirty bucks to a few hundred, depending on how fancy you want to go.
Troubleshooting Common Issues
- Chain slipping: Adjust the derailleur or swap out a stretched chain.
- Brake squealing: Clean the rims and pads, or lightly sand the pad surface.
- Flat tires: Patch small holes or replace the tube for bigger punctures.
- Stiff gears: Lubricate the cable and check derailleur alignment.
- Drivetrain noise: Clean and lube the chain, then inspect for worn teeth on chainrings or cassette.
Seasonal Maintenance
Winter riding demands extra attention. Use fenders to keep mud and slush off your components. Switch to wider, grippier tires if conditions are slippery. Lubricate more frequently because wet conditions wash lube away faster than you’d think.
Spring is your reset button. Clean off everything that accumulated over winter. Check for rust, especially on bolts, screws, and cable ends. Give the whole bike a thorough once-over before your first warm-weather ride.
In summer, keep an eye on tire pressure — heat makes air expand, so you might need slightly less pressure than usual. Stay hydrated on rides and carry extra water. Your bike doesn’t need the water, but you absolutely do.