How to Fix a Bike Chain
Fix a Bike Chain has gotten complicated with all the myths flying around. As someone who destroyed a drivetrain by ignoring basic chain maintenance, I learned everything there is to know about fix a bike chain. Today, I will share it all with you.
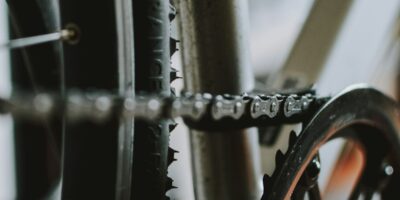
Understanding Bike Chain Basics
Before diving into repairs, it’s crucial to understand the basic components of a bike chain. Each chain consists of a series of interconnected links. The width and size can vary depending on the type of bike, such as road bikes, mountain bikes, or single-speed bikes.
Probably should have led with this section, honestly.
Types of Bike Chains
- Single-Speed Chains: Common in bikes with only one gear. They are thicker and less prone to breaking due to their design.
- Multi-Speed Chains: Used in bikes with derailleurs. They are narrower to accommodate closely spaced gears.
- Derailleur Chains: Specifically designed for bikes with derailleur systems. They are flexible and allow the chain to shift smoothly between gears.
Knowing your bike’s chain type will assist in selecting the proper tools and replacement links if needed.
Common Chain Issues
Several issues can arise with a bike chain. They often result from regular use, impacts, or improper maintenance. Identifying the problem is the first step towards fixing it.
Dropped Chain
A dropped chain occurs when the chain slips off the gears. This is common and usually happens during gear shifts or after a hard bump. It’s often easily fixed by manually placing the chain back onto the gears.
Chain Wear
Over time, chains wear down. This wear can lead to poor performance and potential damage to the bike’s drivetrain. Worn chains slip more easily and require more frequent adjustments or replacements.
Broken Chain
A broken link or pin means the chain needs immediate repair. This typically requires tools to remove and replace the damaged section. Using spare links or a chain repair kit can make repairs quicker.
Tools You’ll Need
A few essential tools are necessary for bike chain maintenance and repair. Investing in these tools will make the process simpler and more efficient.
That’s what makes chain endearing to us cyclists.
- Chain Tool: Used for removing and installing links.
- Master Link Pliers: Helpful for removing and installing master links, if your chain uses one.
- Chain Wear Indicator: Assists in determining if a chain is too worn and needs replacement.
- Lubricant: Keeps the chain running smoothly and prevents rust.
Having these tools on hand prepares you for both routine maintenance and unexpected breakdowns.
Step-by-Step Guide to Fix a Bike Chain
Fixing a Dropped Chain
To fix a dropped chain, first shift the gear to the smallest chainring. This reduces tension and makes it easier to maneuver. Lift the chain and carefully place it back onto the chainring. Rotate the pedals to ensure the chain is correctly aligned.
Repairing a Broken Chain
Start by removing the broken link using a chain tool. Position the chain tool pin over the chain pin you need to remove and turn the handle to push the pin out. Remove the damaged link. Connect the remaining ends of the chain. If your chain uses a master link, align both ends and snap it into place. Use the master link pliers to ensure it’s secure.
Checking for Chain Wear
Using a chain wear indicator, insert it into the links of the chain. If the indicator suggests excessive wear, replacing the chain is the best course of action. Riding with a worn-out chain can damage other components.
Chain Maintenance Tips
Regular Cleaning
Keeping the chain clean prevents premature wear. Use a degreaser to clean the chain thoroughly. Wipe down with a rag and apply fresh lubricant. Regular cleaning also helps you notice any potential problems early.
Proper Lubrication
Lubricate the chain regularly, especially after cleaning. Apply lubricant to each link and wipe off excess. This prevents dust and dirt from accumulating and ensures smooth operation.
Checking Chain Tension
Ensure the chain has proper tension. For single-speed bikes, adjust the rear wheel to increase or decrease tension. For multi-speed bikes, check the derailleur’s position to maintain the correct tension.
Following these maintenance practices prevents sudden breakdowns and extends the lifespan of the chain.
Troubleshooting Common Chain Problems
Even with good maintenance, issues may still arise. Knowing how to troubleshoot these problems will save time and keep your bike in good condition.
Chain Skipping
If the chain skips, check for worn-out gears or a stretched chain. Replacing the chain or the cassette may resolve this issue. Also, check for stiff links that can cause skipping.
Chain Suck
Chain suck happens when the chain fails to release from the teeth, jamming the drivetrain. This is often due to a dirty or dry chain. Cleaning and lubricating the chain can prevent this from happening.
Noisy Chain
A noisy chain can be caused by improper lubrication or misalignment. Make sure the chain is well lubricated and properly aligned with the gears. Noise may also indicate a need for tightening or replacing the chain.
With these techniques, you’ll maintain a smooth and reliable cycling experience. Regular attention to your bike chain minimizes the risk of accidents and unexpected repairs, allowing you to enjoy the ride.
Recommended Cycling Gear
Garmin Edge 1040 GPS Bike Computer – $549.00
Premium GPS with advanced navigation.
Park Tool Bicycle Repair Stand – $259.95
Professional-grade home mechanic stand.
As an Amazon Associate, we earn from qualifying purchases.