Advanced Bicycle Maintenance
I spent an entire Saturday afternoon trying to index my rear derailleur last year. Three hours. My wife walked into the garage, watched me click through gears for the hundredth time, and said “you know bike shops exist, right?” She wasn’t wrong. But there’s something about getting your bike dialed in yourself that just hits different. Advanced maintenance isn’t for everyone, but if you’re the kind of person who wants to really understand how your bike works, this is where it gets interesting.
Wheel Truing
A true wheel spins straight without any side-to-side wobble. Sounds simple, but getting there takes patience. First, check your spoke tension — you want it distributed evenly around the wheel. Flip the bike upside down or mount the wheel in a truing stand if you’ve got one. Spin it and watch for lateral movement. When you spot a wobble, tighten the spokes pulling away from the wobble and loosen the ones on the same side. Small adjustments, quarter turns at most. Rushing this is how you end up with a wheel that’s worse than when you started.
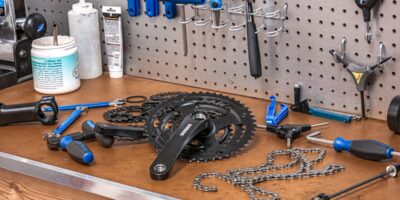
Drivetrain Cleaning and Lubrication
The drivetrain collects grime faster than any other part of the bike. Your chain, cassette, and chainrings are constantly exposed to road dirt, dust, and whatever your lube picks up. Clean the whole drivetrain regularly with a degreaser and a stiff brush. Get into the gaps between cassette cogs — that’s where the worst buildup hides. Once everything’s dry, apply a light coat of lubricant to each chain link. Then wipe off the excess. Probably should have led with this, but cleaning before lubing is non-negotiable. Putting fresh lube on a dirty chain is just making expensive mud.
Brake Adjustment
- Rim Brakes: Check your brake pads for wear — the grooves molded into the pad surface are your wear indicators. Once those grooves disappear, swap the pads out. Align each pad so it hits the rim flat and square, not angled or rubbing the tire. Both pads should contact the rim simultaneously with even spacing on each side.
- Disc Brakes: Inspect the rotor for warping or scoring. A warped rotor causes pulsing when you brake and can be trued with a rotor truing tool or carefully with an adjustable wrench. Adjust the caliper position so there’s an even gap on both sides of the rotor. If you’re running hydraulic brakes, bleed the system periodically to remove any air bubbles that make the lever feel spongy.
Gear Indexing
Bad shifting drives me crazy. If your gears skip, hesitate, or refuse to click into place, the indexing is off. Start by checking the cables — frayed or kinked cables are a common culprit. If the cables look fine, use the barrel adjuster on the shifter to dial in the tension. Turn it a quarter turn at a time and shift through the gears after each adjustment. You’re looking for crisp, immediate shifts with no hesitation or overshoot. It takes patience, but nailing it feels great.
Hub Bearings
Hub bearings should spin smooth and free. If you feel grinding, roughness, or any side-to-side play, it’s time to service them. Pull the wheel, remove the axle, and inspect the bearings. Clean out old, dirty grease and check for pitting or damage on the bearing surfaces. If they look good, repack with fresh grease. If they’re damaged, replace them. Be careful with the cone nut adjustment on cup-and-cone hubs — too tight and you create friction, too loose and you get wobble.
Bottom Bracket
The bottom bracket connects your cranks to the frame, and it takes a beating every single ride. Creaking or clicking when you pedal is usually the first sign something’s up. Pull the crank arms off, remove the bottom bracket, and inspect. Clean the threads in the frame and on the bottom bracket shell. Re-grease everything before reinstalling. If the bearings feel gritty or there’s noticeable play, it’s replacement time. Don’t put this off — a failing bottom bracket can damage your frame threads.
Cassette and Chainrings
Take a close look at the teeth on your cassette and chainrings. Worn teeth develop a shark-fin shape that causes the chain to skip under load. If you’re seeing that profile, it’s time for new parts. When reinstalling chainrings, make sure they’re properly aligned — misaligned rings cause poor chain engagement and noisy pedaling. And if you’re replacing a cassette, consider doing the chain at the same time. A new chain on a worn cassette often doesn’t mesh well.
Cable and Housing Care
Old cables and housing are one of the most overlooked causes of poor performance. Frayed cables don’t pull smoothly, corroded housing adds friction, and both make your shifting and braking feel mushy. Replace cables and housing together when they show wear. Use quality housing with a low-friction liner. Route cables in smooth curves — sharp bends add drag and accelerate wear. It’s a relatively cheap upgrade that transforms how the bike feels.
Suspension Maintenance
Suspension forks and rear shocks need regular service to keep performing. Follow the manufacturer’s recommended intervals — they’re there for a reason. Between services, keep the stanchions clean by wiping them down after every ride. Check for oil seeping past the seals, which indicates the seals need replacing. Dial in your air pressure and rebound settings to match your weight and the terrain you ride. A well-tuned suspension makes rough trails feel manageable and smooth trails feel effortless.
Inspect Frame for Cracks
This is the big one. A cracked frame can fail without warning, and that’s about as dangerous as it gets on a bike. Check the entire frame carefully, focusing on welds, joints, the head tube area, and the bottom bracket shell. Aluminum frames can develop stress cracks around welds. Carbon frames can crack from impacts that don’t leave visible dents. After any crash or significant impact, do a thorough inspection. If you find something concerning, stop riding and get a professional opinion. That’s what makes frame inspection endearing to safety-conscious riders — it’s not glamorous work, but it might save you from a catastrophic failure.
Headset Adjustment
A loose headset makes the bike feel vague and twitchy in the front end. Check for play by squeezing the front brake and rocking the bike forward and back. If you feel a clunk, the headset needs tightening. Loosen the stem bolts, snug up the top cap bolt until the play disappears but the bars still turn freely, then re-tighten the stem bolts. Make sure the stem is aligned straight with the front wheel. If the bearings feel notchy when you turn the bars, they probably need replacing.
Tire and Tube Care
Inspect your tires regularly for cuts, embedded glass or thorns, and worn tread. Sidewall damage is especially worth watching for — a compromised sidewall can blow out under pressure. Keep your tires at the recommended pressure, which you’ll find on the sidewall. Check tubes for slow leaks by inflating them and listening or feeling for air. Patch small punctures with a proper patch kit, but replace tubes that have multiple patches or damage near the valve stem.
Handlebar and Grips
Loose handlebars are genuinely dangerous. Make sure the stem bolts are properly torqued. Inspect the bars for cracks, bends, or any deformation, especially after crashes. Replace worn grips or torn bar tape — they affect your control and comfort more than you’d think. When wrapping new bar tape, start from the ends and work toward the center, overlapping evenly. A good wrap job looks clean and feels consistent.
Chain Wear
Chains stretch over time (technically, the pins wear and the links get longer). A worn chain doesn’t engage the cassette and chainring teeth properly, causing skipping and accelerating wear on those more expensive components. Use a chain checker tool regularly — they’re cheap and easy to use. Replace the chain when it reaches 0.75% elongation (or 0.5% for 11 and 12-speed drivetrains). Staying on top of chain wear saves you money in the long run.
Pedal Inspection
Pedals should spin smoothly with no wobble or grinding. If they feel rough, the bearings need attention — either repacking with grease or full replacement. For clipless pedals, check cleat wear and spring tension. Worn cleats make it hard to clip in and can release unexpectedly. Inspect the pedal body for cracks, especially around the spindle. And grease the threads every time you remove and reinstall pedals to prevent them from seizing in the crank arms.
Handlebar Tape
Worn or slippery bar tape makes your hands tired and reduces control, especially in wet conditions. Replace tape when it gets compressed, torn, or grimy beyond cleaning. Clean the bars thoroughly before applying new tape. Start wrapping from the bar ends, stretch slightly as you go, and overlap by about a third of the tape width. Finish with a clean wrap around the clamp area and secure with electrical tape or the finishing strips included with the tape.
Brake Fluid
Hydraulic brake systems use fluid to transmit force from the lever to the caliper. Over time, brake fluid absorbs moisture from the air, which lowers its boiling point and can cause brake fade on long descents. Check fluid levels in the reservoir and top up if needed. Bleed the system periodically — once or twice a year for most riders — to remove air bubbles and refresh the fluid. Use the correct fluid type specified by your brake manufacturer. DOT and mineral oil are not interchangeable.
Derailleur Hanger Alignment
A bent derailleur hanger is one of the sneakiest causes of bad shifting. Even a small bend can throw off your indexing and make the rear derailleur shift poorly. You can check alignment with a derailleur hanger alignment gauge — it threads into the hanger and lets you measure how far off it is at multiple points around the wheel. Straighten it carefully. Hangers are designed to bend (and even break) to protect the frame and derailleur, so they’re easy to tweak. Keep a spare hanger in your toolkit — they’re specific to your frame.
Torque Specifications
Every bolt on your bike has a specific torque setting, and ignoring those numbers is how you strip threads, crack components, or have things come loose. Get a decent torque wrench — they’re not expensive and they save you from expensive mistakes. Carbon components especially need careful torquing. Check the markings on each component for the specified values, or look them up in the manufacturer documentation. A few extra seconds with a torque wrench beats a ruined part every time.
Environmental Factors
Where and when you ride affects how much maintenance your bike needs. Riding in rain, salt, sand, or mud accelerates wear on everything. If you ride in bad conditions, clean your bike more often. Rinse off salt and mud right after the ride — letting it dry on the bike compounds the damage. Lubricate moving parts more frequently in wet conditions. And if you ride near the coast, pay extra attention to corrosion. Salty air is surprisingly hard on components.
Seatpost Inspection
A slipping seatpost is annoying; a broken seatpost is dangerous. Check your seatpost regularly for scratches, scoring, or any signs of fatigue. For carbon seatposts, use carbon assembly paste instead of grease — it provides grip at lower torque values, protecting the carbon. For alloy posts in alloy frames, use regular grease to prevent galvanic corrosion from bonding the two together. Tighten the clamp to the recommended torque — snug but not gorilla-tight.
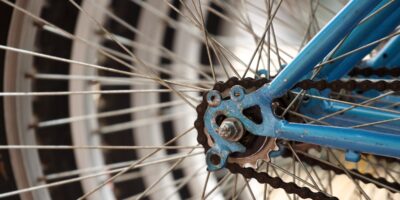
Wheel Bearings
Worn wheel bearings increase rolling resistance and can affect handling. You can check them by lifting the bike and spinning each wheel — it should rotate freely and coast for a while. Grab the rim and try to wiggle it side to side. Any play means the bearings need adjusting or replacing. Service them by cleaning out old grease, inspecting for damage, repacking with fresh grease, and adjusting the preload. Smooth bearings make a noticeable difference in how the bike rolls.
Lubrication Points
Regular lubrication reduces friction and extends component life. Focus on the chain (obviously), but don’t forget brake pivots, derailleur pivot points, jockey wheel bearings, and cable entry points. Use the right lubricant for each application — chain lube for the chain, light oil for pivots, and grease for bearings. Over-lubing attracts dirt, so apply sparingly and wipe off excess. A well-lubed bike is a quiet, efficient bike.
Accessories Check
Don’t forget the stuff bolted onto your bike. Lights, racks, fenders, bottle cages, computers — all of it can work loose over time from vibration. Check mounting bolts regularly. Make sure lights work and batteries are charged. Inspect rack mounts for fatigue, especially if you carry heavy loads. A loose accessory rattling around is annoying. A loose accessory falling off at speed is a hazard.
Tools and Equipment
Having the right tools makes advanced maintenance possible and a lot less frustrating. At minimum, you want a good set of hex wrenches, a torque wrench, chain tool, cassette lockring tool, bottom bracket tool, cable cutters, tire levers, and a floor pump with a gauge. A bike repair stand is a game-changer if you do a lot of work — hunching over a bike on the floor gets old fast. Buy quality tools and take care of them. They last for years.
Proper Setup
A well-fitted bike rides better and causes less wear on components. Set your saddle height so there’s a slight bend in your knee at the bottom of the pedal stroke. Position the saddle fore-aft so your knee is over the pedal spindle. Handlebars should be at a comfortable height and reach. And make sure all your controls — brakes, shifters — are positioned where your hands fall naturally. Small adjustments to fit can make huge differences in comfort and efficiency.
Inspection Routine
Build a routine and stick to it. Regular inspection catches small problems before they become expensive ones. Quick checks before each ride, deeper inspections monthly, and thorough overhauls seasonally. Keep a mental (or actual) checklist and work through it consistently. The riders who have the fewest mechanical issues on the road are usually the ones who spend the most time looking things over in the garage.
Bike Storage
Where you store your bike affects its condition. A dry, cool space out of direct sunlight is best. UV degrades rubber and paint over time. Moisture causes corrosion. If you have to store outside, use a quality bike cover. Hang the bike or use a stand to keep weight off the tires. For long-term storage, consider backing off the brake cable tension and deflating the tires slightly to reduce stress on components.
Riding Techniques
How you ride affects how much maintenance your bike needs. Shift under light pedaling load instead of grinding through shifts — it’s easier on the chain, cassette, and derailleurs. Avoid cross-chaining (big ring to big cog or small to small). Brake progressively instead of grabbing the levers hard at the last second. These habits reduce component wear and make everything last longer. Good technique is the cheapest maintenance there is.
Customization and Upgrades
Upgrading components can improve performance, but do it thoughtfully. Match parts to your riding style and needs. A lighter wheelset makes climbing easier. Better brakes improve confidence on descents. Wider tires add comfort and grip. Whatever you upgrade, install it correctly and according to specs. And remember — a well-maintained mid-range component often outperforms a neglected high-end one.
Manufacturer Guidelines
Manufacturers design their service intervals and torque specs based on extensive testing. Follow them. Register your frame and components to get recall notices and service bulletins. Keep the documentation that comes with your bike and parts — it’s the best reference for maintenance procedures and specifications. When in doubt, the manufacturer’s guidelines are always a good starting point.