
Bicycle Repair Guide
I got into bike repair the hard way — my rear derailleur snapped off mid-ride about ten miles from home, and I had exactly zero tools with me. Walked the whole way back in cycling shoes, which is about as fun as it sounds. After that, I made it a point to actually learn how to fix things myself. Bikes are a fantastic way to get around and stay in shape, but knowing how to handle repairs can save you from those long, embarrassing walks home.
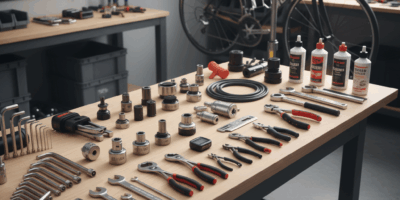
Tools You’ll Need
- Allen wrenches
- Screwdrivers
- Tire levers
- Spoke wrench
- Chain tool
- Lubricant
- Pump
- Patch kit
- Torque wrench
Don’t let the list intimidate you. Most of this stuff fits in a small toolbox, and you can build the collection over time. Start with a decent multi-tool and a patch kit, and add the rest as you tackle new repairs.
Fixing a Flat Tire
Every cyclist deals with flats. It’s not a matter of if, it’s when. Pop the wheel off, use your tire levers to pry one side of the tire off the rim, and pull the tube out. Give it a little air and listen — you’ll hear the hiss where the puncture is. Or run the tube past your cheek, which is weirdly effective. Patch it up or swap in a new tube. Slide the tube back in, work the tire bead back onto the rim (go easy here — pinching the tube will just give you another flat), inflate to the pressure printed on the tire sidewall, and remount the wheel. The whole thing takes maybe ten minutes once you’ve done it a few times.
Adjusting Brakes
Spongy brakes are annoying and, more importantly, dangerous. First, check your brake pads. If they’re worn thin, just replace them — no amount of adjusting will fix worn pads. If the pads are fine, find the barrel adjuster on the brake lever and turn it counterclockwise to tighten the cable. Check the response. Still not right? Use an Allen wrench to adjust the cable tension at the caliper itself. Make sure the pads hit the rim squarely — not rubbing the tire, not sitting too low on the rim.
Tuning the Derailleurs
Shifting issues are super common and usually fixable at home. Start with the rear derailleur. Shift to the smallest cog and look at the cable tension — the barrel adjuster on the shifter is where you fine-tune this. If the chain won’t move smoothly between cogs, the limit screws might need adjusting. They’re usually marked “H” for high (small cog) and “L” for low (big cog). Set them so the chain can’t fall off either end. Probably should have led with this, but the front derailleur follows the same basic logic — align it with the chainrings, set the limits, and adjust cable tension for clean shifts. If you can tune one, you can tune the other.
Lubricating the Chain
A clean, lubed chain makes everything work better. Shifting is smoother, there’s less noise, and your cassette and chainrings last longer. Wipe the chain down with a rag and some degreaser first — you want to get the old gunk off before adding fresh lube. Then put a drop of bike-specific lube on each link and wipe off the excess. Excess lube on the outside of the chain is just a dirt magnet.
Truing a Wheel
If your wheel wobbles when it spins, it needs truing. Lift the bike so the wheel spins freely, give it a spin, and watch where it deviates. Grab your spoke wrench and tighten the spokes on the side the rim is wobbling away from. Make tiny adjustments — quarter turns — and recheck after each one. Wheel truing takes patience, but it’s oddly satisfying once you get the hang of it.
Adjusting Saddle Height
Getting your saddle height right is one of those things that seems minor but makes a huge difference. Too low and your knees take a beating. Too high and you’re rocking your hips on every pedal stroke. Loosen the seat post clamp, set the height so your leg has a slight bend at the bottom of the stroke, and tighten it back up. That’s it. Takes thirty seconds and can transform your comfort on the bike.
Fixing a Skipping Chain
A chain that skips under load is maddening, especially when you’re climbing. Most of the time, it’s because the chain or cassette (or both) are worn out. Grab a chain checker tool and measure the wear. If the chain is stretched, replace it. Inspect the cassette teeth too — if they’re looking like shark fins instead of symmetrical bumps, the cassette needs to go as well. Always make sure your new chain and cassette are compatible with each other. That’s what makes proper chain maintenance endearing to experienced riders — catch the wear early and you save yourself from replacing the whole drivetrain at once.
Maintaining Suspension Forks
If you ride a mountain bike, your suspension forks are doing a ton of work. Wipe down the stanchions after every ride — dirt on them gets pushed past the seals and contaminates the oil inside. Check your manufacturer’s manual for service intervals (most forks need a lower leg service every 50 hours or so). If you notice the fork feeling sluggish or see oil leaking around the seals, it’s time for a service. You can do basic lower leg services at home, but full rebuilds are usually better left to a shop.
Checking and Tensioning Spokes
Loose spokes affect your ride quality and can lead to wheel failure if ignored. Squeeze pairs of spokes together — they should all feel similarly tight. If one’s noticeably loose, snug it up with a spoke wrench. But be careful: tightening one spoke affects the ones around it, so check the wheel’s trueness after making adjustments.
Inspecting and Replacing Bearings
Bearings live in your hubs, bottom bracket, and headset, and they wear out over time. If you notice roughness when spinning a wheel, grittiness when turning the handlebars, or play in the cranks, the bearings probably need attention. Pull the affected component apart, clean the bearing seats, and press in new bearings. Make sure they’re fully seated — a crooked bearing will fail fast.
Cleaning Your Bike
Regular cleaning keeps everything running well and helps you spot problems early. Use a bike-specific cleaner or mild soap — nothing too harsh. Stay away from high-pressure hoses; they blast water into bearings and pivots where it doesn’t belong. Scrub the drivetrain with a brush and degreaser, rinse with gentle water, dry everything with a soft cloth, and lube the chain and moving parts when you’re done.
Replacing Brake Cables
Brake cables stretch and wear over time. When braking starts feeling mushy even after adjustments, it’s probably cable time. Loosen the anchor bolt at the caliper, pull the old cable out through the housing and lever, thread the new one in, and tighten it down. Adjust tension and test. Fresh cables make a surprising difference in how your brakes feel.
Patching a Tube vs. Replacing It
Patching works fine for small punctures and gets you home. But if a tube has multiple patches, a big gash, or a puncture near the valve stem, just replace it. New tubes are cheap, and peace of mind on a long ride is worth the few bucks.
Repairing a Bent Derailleur Hanger
A bent hanger causes ghost shifting and weird chain behavior that no amount of barrel adjuster tweaking will fix. If you suspect the hanger is bent, pull the rear derailleur off and check with an alignment tool. Gently bend it back into line, reattach the derailleur, and re-tune your shifting. Some hangers are so bent they need replacing — they’re designed to be sacrificial parts, so spares are worth keeping around.
Installing and Adjusting Clipless Pedals
Clipless pedals look intimidating if you’ve never used them, but they’re straightforward to install. Grease the threads, screw them into the crank arms (remember: left pedal is reverse-threaded), and tighten. Set the release tension low when you’re starting out so you can clip out easily. Practice clipping in and out while holding onto a wall or fence before heading out on the road. Everyone falls over at least once. It’s a rite of passage.
Regular Maintenance Schedule
- Weekly: Check tire pressure, inspect brakes and chain.
- Monthly: Thoroughly clean bike, inspect drivetrain and cables.
- Quarterly: Inspect and lubricate bearings, true wheels.
- Annually: Professional inspection and service.
Tips for DIY Cable Routing
Internal cable routing can be a real headache. A magnet is your best friend here — tape a small magnet to the cable end and use another magnet on the outside of the frame to guide it through. Alternatively, tie a piece of dental floss or thin string to the old cable before pulling it out, then use that string to pull the new cable through. Just make sure cables aren’t kinked or twisted inside the frame.
Understanding Gear Ratios
Gear ratios determine how hard or easy each pedal stroke feels. A lower gear ratio (small chainring, big cog) gives you easier pedaling for climbs. A higher ratio (big chainring, small cog) is harder to push but covers more ground per revolution. Understanding this helps you choose the right cassette and chainring combo for how you ride — hilly terrain calls for wider range gearing, while flat riding lets you get away with tighter ratios.
Replacing a Broken Spoke
A broken spoke throws your wheel out of true and weakens it. Get the right length replacement (measure a neighboring spoke from the same side if you’re not sure). Remove the tire, tube, and rim tape to access the nipple hole. Thread the new spoke through the hub flange with the correct lacing pattern, screw it into the nipple, and tension it to match the surrounding spokes. Retape the rim, reinstall the tube and tire, and true the wheel.
Greasing and Inspecting the Bottom Bracket
The bottom bracket takes a beating. Pull the crank arms off, remove the bottom bracket with the right tool (there are several standards, annoyingly), clean the shell threads, and inspect the bearings. If they spin rough or have play, replace the unit. Grease the threads on reinstallation and torque to spec. A creaky bottom bracket is one of those noises that’ll drive you crazy on every ride until you fix it.
Preventing and Fixing Chain Suck
Chain suck is when the chain sticks to the chainring and gets pulled up into the frame instead of releasing cleanly. It’s messy and can jam things up badly. The usual culprits are a dirty or dry drivetrain, worn chainrings, or a stiff chain link. Keep your drivetrain clean and properly lubed, and inspect the chainring teeth for wear. If the teeth are hooked or asymmetrical, it’s replacement time.


Stay in the loop
Get the latest wildlife research and conservation news delivered to your inbox.