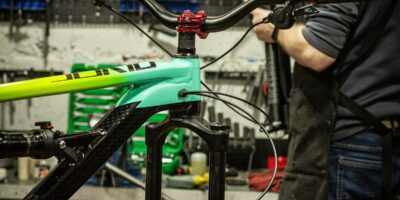
DIY Bicycle Repair
I’ll be straight with you — the first time I tried to fix my own bike, I somehow made the problem worse. I was dealing with a skipping chain, and by the time I was done “fixing” it, the derailleur was bent and the chain was off entirely. But I learned from that disaster, and now I actually enjoy working on my bikes. There’s something satisfying about diagnosing a weird noise and solving it yourself. If you’re looking to get into DIY repairs, here’s what I’ve picked up along the way.
Tools You’ll Need
Before you start turning wrenches, you’ll want a basic set of tools. You don’t need to spend a fortune — just get the essentials and build from there:
- Allen Wrenches (various sizes)
- Screwdrivers (Phillips and flathead)
- Tire Levers
- Chain Tool
- Bike Pump with Gauge
- Pliers
- Lubricant
- Cleaning Brushes
Tire Maintenance
Check your air pressure regularly — the right range is printed right on the tire sidewall. A pump with a built-in gauge makes this easy. Keep tire levers handy for when you inevitably need to pull a tire off. And always, always carry a spare tube and a patch kit. Learning to fix a flat on the side of the road is basically a rite of passage for cyclists. Probably should have led with this: the number one reason people end up walking their bike home is a flat they weren’t prepared for.
Chain Care
A clean, lubricated chain is a happy chain. Dirt and road grime grind away at the metal and speed up wear. Use a brush and degreaser to scrub it down, then apply a proper bicycle lubricant and wipe off the extra. If you need to remove or replace links, that’s where the chain tool comes in. Keep an eye on chain stretch too — a worn chain chews up your cassette and chainrings, and replacing all three at once gets pricey fast.
Brake Adjustment
Brakes are your most important safety feature, so don’t skip this one. Check your brake pads regularly for wear. If they’re down to the indicator lines, they’re done — swap them out. Adjust the cables so the pads hit the rims evenly on both sides. Test the brakes before each ride. It takes five seconds. Also check that the cables aren’t frayed and the levers feel smooth when you squeeze them. That’s what makes well-maintained brakes endearing to every rider — they just work when you need them, no surprises.
Derailleur Alignment
When your shifting feels off, the derailleur is usually the culprit. The barrel adjuster on the cable is your first stop — a quarter turn at a time can clean up sloppy shifting pretty quickly. If that doesn’t do it, check the derailleur hanger. A bent hanger throws everything off, and straightening or replacing it solves most persistent shifting headaches. It’s a common issue that’s easy to fix once you know what to look for.
Wheel Truing
Wobbly wheels aren’t just annoying — they mess with your handling and can cause brake rub. Use a spoke wrench to adjust tension on individual spokes. Spin the wheel, find where it deviates, and tighten the opposite-side spokes to pull it back in line. A truing stand makes this a lot easier, but you can manage with the bike flipped upside down. The key is making small adjustments and checking often. Even tension across all the spokes is what keeps a wheel strong and straight.
Headset and Bearing Maintenance
The headset and bearings work quietly in the background until they don’t. To check for headset play, grab the front brake and push the bike back and forth. Feel any clunking? Tighten it up. Bearings in the headset (and elsewhere) benefit from periodic cleaning and fresh grease. If they feel gritty or rough, it’s time for a replacement. Smooth steering starts with a healthy headset.
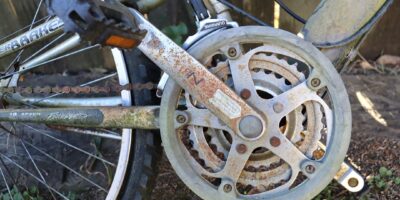
Basic Frame Inspection
Make a habit of looking over your frame, especially around the joints where tubes connect. Clean the frame regularly to ward off rust and corrosion. Listen for unusual noises while riding — creaks and clicks can signal cracks you can’t see easily. The frame is the foundation of everything. Catching a problem early can literally prevent a crash.
Pedals and Crankset
Make sure your pedals are tight in the crank arms. Loose pedals click with every stroke and will eventually destroy the threads. Put a dab of grease on the pedal threads when you install them — this prevents seizing and makes future removal much easier. Check the bottom bracket periodically too. If you feel any side-to-side play in the cranks, the bottom bracket needs tightening or replacing.
Saddle Position and Comfort
Saddle height and position affect everything from comfort to power output to knee health. Set the saddle so your leg is almost fully extended at the bottom of the pedal stroke. Keep it level — a nose-up or nose-down tilt causes problems in different ways. Tighten the bolts that hold everything in place, because a saddle that shifts around mid-ride is distracting at best and dangerous at worst.
Cable and Housing Care
Inspect all your cables and housing for frays, kinks, and wear. Replace anything that looks sketchy. A little lubricant on the cables keeps them sliding smoothly through the housing. Well-routed, maintained cables reduce friction and make your braking and shifting feel noticeably crisper. It’s one of those small things that makes a big difference in how the whole bike feels.
Picking up these skills doesn’t happen overnight, but each repair you tackle builds your confidence and deepens your connection with your bike. You’ll start noticing little things during rides — a slight noise here, a minor shift there — and you’ll know exactly what to do about it. That kind of self-sufficiency is one of the best parts of cycling.