How to Repair Your Bicycle
I got into bike repair the hard way — standing in my garage with a busted tube, no patch kit, and a vague memory of watching someone fix a flat once. Two hours and a lot of swearing later, I’d figured it out, but I also realized that knowing a few basics ahead of time would’ve saved me a lot of frustration. Bikes need maintenance. That’s just reality. But learning to handle the common stuff yourself saves money and keeps you rolling instead of waiting for a shop appointment. Here’s a practical rundown of the repairs every rider should know.
Tools You Will Need
- Wrenches (set of Allen keys and a crescent wrench)
- Screwdrivers (Phillips and flat-head)
- Tire levers
- Patch kit or spare tubes
- Bike pump
- Chain tool
- Lubricant
- Cleaning supplies (rag and brush)
- Grease
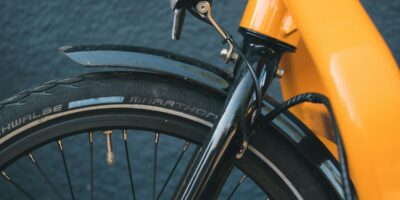
Fixing a Flat Tire
First, flip your bike upside down so it rests on the seat and handlebars. Remove the wheel by loosening the nuts or popping the quick-release lever. Use tire levers to pry one edge of the tire off the rim. Pull out the tube. Give it a little air and dunk it in water — bubbles show you exactly where the hole is. Dry the tube and slap a patch on it.
If the tube is shredded beyond saving, just put in a new one. Inflate the replacement tube just enough that it holds its shape. Tuck it into the tire, seat one bead into the rim, then the other. Make absolutely sure the tube isn’t pinched between the tire and rim — that’s how you get a flat immediately after fixing a flat, which is incredibly annoying. Inflate to the correct pressure and bolt the wheel back on.
Adjusting the Brakes
Worn or misaligned brakes are a safety problem you don’t want to ignore. Check the pads first — if they’re thin, replace them. The pads should contact the rim flat and square, not at an angle. Loosen the pad bolt, position things correctly, and retighten.
Next up: cable tension. If brakes feel too grabby or too soft, the barrel adjuster at the lever is your friend. Clockwise loosens the cable, counterclockwise tightens. For bigger adjustments, loosen the cable anchor bolt at the caliper, pull the cable to where you want it, and retighten. Make sure both sides engage at the same time — uneven braking pulls you to one side and that’s no fun.
Lubricating the Chain
Probably should have led with this because chain lube is the single easiest thing you can do to keep your bike feeling good. Clean the chain first — a rag and brush get the dirt and old grime off. Then put a drop of lube on each link while turning the pedals backward to spread it around. Don’t drown the chain in oil. More isn’t better here. After applying, wipe off the excess with a clean cloth. You want the lube inside the links, not all over the outside attracting dust.
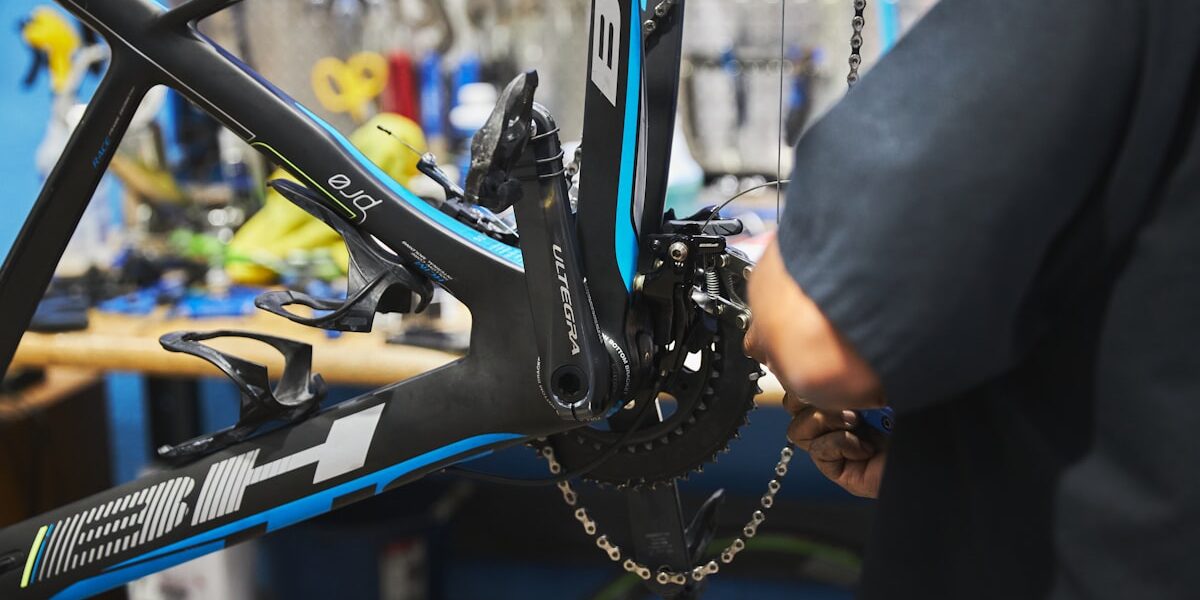
Adjusting the Gears
Shifting problems usually come down to cable tension or alignment. Start by checking the cables — replace any that are frayed or kinked. Then use the barrel adjuster on the derailleur for fine-tuning.
For the rear derailleur, shift to the lowest gear and check that it lines up with the smallest cog. The high-limit screw controls this. Then shift to the highest gear and check alignment with the largest cog — that’s the low-limit screw.
For the front derailleur, shift to the smallest chainring and make sure the cage is lined up properly. The low-limit screw dials this in. Shift to the big ring and adjust with the high-limit screw. It’s fiddly work, but once you get the hang of it, you can sort out shifting issues in a few minutes.
Fixing a Slipped Chain
A dropped chain is one of those things that seems catastrophic when it happens but is actually a quick fix. Shift to the smallest chainring and smallest rear cog. Then just put the chain back onto the chainring by hand and slowly pedal forward while clicking through the gears. That’s it. Takes about thirty seconds once you’ve done it a couple of times.
Replacing Brake Pads
Brake pads wear out — it’s just what they do. Loosen the bolts holding the old pads, pull them out, and pop in the new ones. Line them up so they sit flush against the rim surface. Tighten the bolts. Test by squeezing the levers and making sure everything engages evenly. That’s what makes fresh brake pads endearing to riders who’ve been living with worn-out ones — the stopping power difference is night and day.
Truing a Wheel
A wobbly wheel throws off your handling and can cause brake rub. Grab a spoke wrench and find where the wheel deviates by spinning it slowly. Tighten the spokes on the opposite side of the wobble to pull the rim back into line. Make small adjustments and check frequently. Over-tightening is worse than under-tightening. A truing stand helps a lot, but you can do decent work with the bike flipped upside down.
Ensuring Proper Saddle Height
Getting your saddle height right affects comfort, power, and knee health. Sit on the bike and put one pedal at the bottom of the stroke. With your heel on the pedal, your leg should be nearly straight with just a slight bend at the knee. Loosen the seat post clamp, slide the saddle to the right height, and retighten. Small changes here make a big difference on longer rides.
Checking Tire Pressure
Keep your tires at the right pressure and you’ll ride faster, flat less, and have better control. The recommended PSI is printed on the tire sidewall. Use a pump with a gauge — guessing by squeezing the tire is unreliable at best. Check before long rides especially, because tires slowly lose air even when they’re perfectly fine.
Maintaining Cables and Housings
Brake and gear cables need to slide freely through their housings. If they’re sticky, your shifting and braking suffer. Add a little lubricant periodically and replace any cables that show fraying or rust. Make sure the housings are seated properly in their stops — misaligned housing creates friction and can prevent cables from moving correctly.
Fixing Loose Pedals
Loose pedals click with every stroke and will eventually strip the threads in your crank arm. Tighten them with an Allen key or pedal wrench. Here’s the thing most people forget: the left pedal has a reverse thread. You turn it counterclockwise to tighten. The right pedal is normal — clockwise to tighten. Get them snug and you’re good.
Replacing Handlebar Grips
Worn grips get slippery and uncomfortable. To remove old ones, cut them off or use compressed air to break the seal and slide them off. For installation, put a small amount of rubbing alcohol on the handlebar and inside the new grip. Slide it on, position it where you want it, and let the alcohol evaporate. Once it dries, the grip locks in place. Easy.
Inspecting Your Frame
Give your frame a regular visual check for cracks, dents, or anything that doesn’t look right. Small issues can grow into serious safety problems over time, especially with aluminum and carbon frames. If you find significant damage, take it to a professional. Don’t ride a compromised frame — that’s one gamble that’s not worth taking.
Cleaning Your Bicycle
Regular cleaning prevents the slow destruction that dirt causes. Soapy water and a brush handle most of it — scrub the frame, wheels, and drivetrain. Stay away from harsh chemicals that can eat into rubber and paint. Rinse with regular water, dry with a clean rag, and you’re done. It doesn’t need to be a spa day for your bike — just enough to keep the grime from building up.
Setting Up a Maintenance Schedule
Having a routine beats trying to remember what you checked last. Weekly, hit the basics: brakes, tire pressure, chain lube. Monthly, do a deeper inspection — cables, gears, wheels, bolts. Fix problems when you find them instead of letting them pile up. A little bit of regular attention keeps your bike reliable and prevents those annoying mid-ride breakdowns that always seem to happen at the worst possible moment.