Mixing brake fluids will destroy your hydraulic system. It’s not a “probably” or “eventually”—it’s a certainty. Understanding DOT 5.1 versus mineral oil isn’t optional knowledge for anyone servicing modern disc brakes. Get it wrong, and you’re buying new calipers, levers, and hoses.
The Two Camps
DOT fluid systems (Shimano, SRAM, Hayes, most others): Use glycol-based DOT 5.1 or DOT 4 fluid. This is the same fluid type used in automobiles and motorcycles. It’s hygroscopic—meaning it absorbs water from the atmosphere over time.
Mineral oil systems (Magura, some older Shimano): Use petroleum-based fluid that’s chemically incompatible with DOT. Mineral oil is not hygroscopic and typically has longer service intervals.
The critical rule: Never, ever mix these fluid types. DOT fluid in a mineral oil system (or vice versa) destroys seals within hours. The chemical incompatibility causes seal swelling, degradation, and complete system failure.
Why DOT 5.1 Specifically
DOT ratings indicate boiling points. DOT 5.1 has the highest dry boiling point (500F+) of the glycol-based fluids, making it ideal for bicycle applications where prolonged descending generates significant heat.
DOT 4 works but has a lower boiling point. DOT 3 is generally not recommended—boiling point is too low for aggressive riding. And DOT 5 (not 5.1) is silicone-based and incompatible with most bike systems despite the similar name.
When in doubt, check your brake manufacturer’s specification. SRAM specifies DOT 5.1. Shimano specifies mineral oil. This isn’t negotiable.
The Bleed Process: DOT Systems
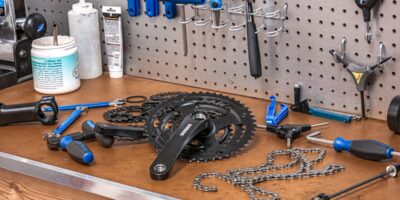
Tools needed: manufacturer’s bleed kit, correct fluid, isopropyl alcohol, clean rags, safety glasses, nitrile gloves.
Step 1: Position the bike. Handlebars level or tilted so the lever is the highest point of the system. Air rises; you want it to exit at the lever.
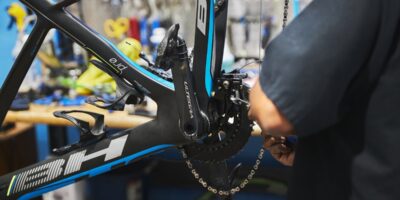
Step 2: Remove the wheel and pad. DOT fluid destroys brake pads on contact. Protect them or remove them entirely. Insert a bleed block between pistons.
Step 3: Attach the bleed syringe. Most systems have a bleed port at the caliper. Fill the syringe with fresh fluid, eliminate air from the syringe, and attach it to the caliper port.
Step 4: Open the lever bleed port. Remove the lever bleed screw and attach the empty syringe or bleed cup.
Step 5: Push fluid through. Slowly depress the caliper syringe, pushing fresh fluid up through the system. Old fluid and air bubbles exit at the lever. Continue until fluid runs clear with no bubbles.
Step 6: Pressurize and seal. With both syringes attached and fluid full, create slight positive pressure, then close the caliper port first, then the lever port. Remove syringes carefully.
Step 7: Clean immediately. DOT fluid attacks paint and finishes. Wipe every surface with isopropyl alcohol. Any spill on the frame needs immediate attention.
The Bleed Process: Mineral Oil Systems
The process is similar but with key differences:
- Use only the manufacturer’s specified mineral oil
- Mineral oil won’t damage paint, but clean up remains important
- System design varies; some use gravity bleeding, others pressure bleeding
- Follow manufacturer’s specific procedure—Magura and Shimano mineral systems differ in detail
When to Bleed
Signs your brakes need bleeding:
- Lever pulls to the bar without firm engagement
- Spongy feel that doesn’t improve with pad adjustment
- Inconsistent braking power (strong, then weak, then strong)
- Any time the system was opened (pad change, hose replacement, caliper service)
Scheduled intervals: DOT systems every 12-24 months due to moisture absorption. Mineral oil systems every 24-36 months, or when performance degrades.
Common Bleed Mistakes
Air introduced during syringe connection: Always fill syringes completely and tap out bubbles before connecting.
Rushing the process: Slow, steady syringe pressure moves fluid without creating turbulence that breaks air into smaller bubbles.
Skipping the bleed block: Without a block between pistons, you’ll push them out during bleeding, requiring reset.
Reusing old fluid: Fresh fluid costs a few dollars. Use new fluid for every bleed.
The Pad Contamination Problem
Got brake fluid on your pads? They’re garbage now. No amount of sanding, baking, or cleaning reliably removes contamination from pad material. Accept the loss, install fresh pads, and clean your rotors thoroughly with isopropyl alcohol.
Prevention: remove pads before bleeding, cover them if removal isn’t practical, and work carefully. The $20 saved by protecting your pads is worth the extra minute of preparation.