
Why Bottom Bracket Creaks Are So Hard to Diagnose
Bottom bracket diagnosis has gotten complicated with all the bad advice flying around. Every forum thread points straight at the BB. Every YouTube comment says “just replace it.” And almost every time, that’s wrong.
As someone who spent three years wrenching at a shop, I learned everything there is to know about chasing mystery creaks. Today, I will share it all with you.
Here’s what took me an embarrassingly long time to accept: the creak you hear almost never originates where you think it does. I’d have riders roll in convinced their BB was shot. I’d pull the whole assembly — crank off, cups out, spindle inspected — find nothing. Reinstall everything. Creak still there. Then I’d snug up their pedals or crank bolts and the sound would vanish completely. That was humbling, honestly.
The bottom bracket sits where your frame, crank, and pedals all converge. Vibration travels through every one of those contact points simultaneously. Under pedaling load, if anything is loose — pedal threads, crank bolts, chainring fasteners, saddle rails — that vibration routes straight through the BB area and gets blamed for the noise. Your ears locate the creak at the center of the bike and your brain fills in the rest.
The three most common false culprits? Pedals — the threads wear and the connection loosens over time. Crank bolts — those pinch bolts work themselves free from constant vibration. And saddle rails — a creaking seatpost clamp mimics BB noise almost perfectly because the frequencies are so similar. Chainring bolts cause this too. More often than most people realize.
That’s what makes systematic elimination so endearing to us shop types. Start with what takes five minutes. Work toward what takes an hour. Ninety percent of the time, you’ll solve it before a BB wrench ever enters the picture. So, without further ado, let’s dive in.
Start Here — Check These Before Touching the BB
Probably should have opened with this section, honestly. This is where most creaks actually get solved. Most home mechanics skip straight past it. Don’t make my mistake.
Tighten Your Pedals
Pedal threads wear faster than almost any other connection on the bike. Small threads, massive load, constant exposure to road salt and moisture. It’s a rough life for an M14 bolt.
Grab a 15mm pedal wrench — that’s the standard size, though some pedals take a hex key on the back of the axle, so check yours before you start. Torque each pedal to 35 Nm. That’s roughly 26 foot-pounds if you work in imperial. Use an actual torque wrench here. Don’t guess. A pedal that’s even slightly loose will creak on every single stroke, and you’ll hear it right at the crank-to-frame junction.
Do this now. If the creak stops, you just saved yourself an hour of work and around $40 in parts you didn’t need.
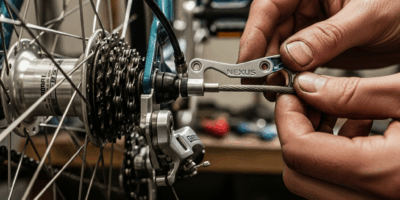
Check Crank Bolts
Most modern cranks use a pinch bolt system — typically two bolts pressing against a taper interface. The taper is what actually locks the crank to the spindle. Those bolts back off gradually from pedaling vibration, sometimes within a few hundred miles on a new bike.
Find the two bolts on the non-drive side arm — the left side, no chainring. Spec is usually 12 to 14 Nm depending on manufacturer. Shimano says 12 to 14 Nm. SRAM says 8 Nm for their DUB system. Check your manual. Tighten them in alternating quarter-turns — a bit on one, a bit on the other, repeat. This matters. Fully tightening one bolt first shifts the crank slightly on the taper and the joint won’t seat correctly.
Check the drive-side pinch bolts too if your crank has them. Not all do.
Chainring Bolts
Five bolts hold your chainring to the spider. They take around 12 Nm. They loosen from vibration just like everything else on this list. A chainring that’s even slightly loose vibrates against the crank spider and produces a creak that sounds like it’s coming from deep inside the BB shell. Get them snug.
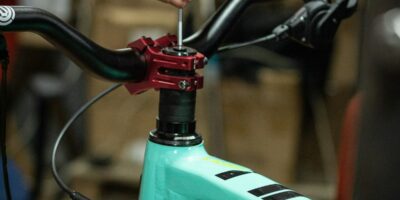
The Saddle and Seatpost
Seatpost clamp bolts and saddle rail bolts both creak at frequencies that travel down through the seat tube and land right in the bottom bracket neighborhood. Your ears genuinely cannot tell the difference. Tighten the seatpost clamp to whatever your frame manual specifies — usually 4 to 6 Nm, these are small bolts, don’t muscle them. Saddle bolts usually want 10 to 12 Nm each.
Run through all four of these checks in order. Write down what you torqued and to what value. Then ride the same surface where the creak first appeared — rough chip-seal or potholed pavement isolates noise better than smooth asphalt because it actually loads the frame.
Creak gone? Go ride your bike. You’re done.
Still creaking? Keep reading.
How to Remove and Inspect the Bottom Bracket
Now we’re actually dealing with the BB. This assumes a threaded BSA bottom bracket — the kind with 1.37-inch threads — which covers the vast majority of road and mountain bikes sold in the last thirty years. Press-fit BBs get their own section below because they creak differently and need a different approach.
Tools You’ll Need
- A BB wrench or splined removal tool matched to your specific BB shell — Shimano Hollowtech uses a different tool than Campagnolo or Chris King, so photograph your BB and confirm before you buy anything
- A torque wrench with a range covering at least 50 Nm
- A stiff brush — an old toothbrush works fine for thread cleaning
- Fresh grease — standard lithium grease works, waterproof marine grease if you ride in wet conditions regularly
- A clean rag
Removing the BB
Shift to the small chainring before you start — it keeps the chain out of your way. Pull the crank bolts all the way out. Slide the crank off the spindle. It should come free without force. If it won’t budge, don’t hammer it — soak the spindle interface with penetrating oil, wait an hour, then try again.
The drive-side cup (right side, chainring side) removes counterclockwise when viewed from that side. The non-drive cup removes clockwise from its side. Both are normal right-hand threads relative to the bike’s forward direction — this trips people up. Apply steady pressure. These can be genuinely stuck, especially if they haven’t moved in five years.
With both cups out, pull the spindle from the shell. Inspect the bearing races for pitting — small indentations or corrosion marks in the metal — and look for any discoloration or grinding tracks. Spin the bearings by hand. Smooth and quiet means they’re probably fine. Any roughness, grinding, or lateral play means replacement.
What You’re Looking For
Clean bearings don’t creak. That’s not an exaggeration — it’s just true. Pitted races are damaged permanently. No amount of fresh grease repairs metal that’s already compromised. If the bearing surfaces look rough or corroded, you’re replacing the unit.
But smooth bearings that spin freely? They’re almost certainly not your noise source. This is the moment most people realize they’ve been chasing the wrong problem entirely.
Grease or Replace — How to Decide
Smooth bearings, no visible damage, spindle spins without any play? Clean the BB shell threads with your brush, wipe them dry, apply a thin layer of fresh grease to the threads, and reinstall. Drive-side torque is typically around 50 Nm — non-drive side runs 35 to 40 Nm. Your BB manual will have the exact figure. Use it.
Reinstall the crank. Torque those pinch bolts again. Reinstall pedals to 35 Nm. Test ride.
Pitted races, corrosion, roughness, or any play in the spindle? Replace the BB. For threaded BSA shells, any sealed cartridge unit in the correct shell width (68mm road, 73mm mountain in most cases) will do the job. I’m apparently a Shimano person — their UN300 at around $25 works for me while fancier options never seemed to hold up any better. FSA and Phil Wood are also solid. Don’t overspend here. A $40 sealed cartridge outlasts a $120 unit in real-world conditions more often than not. What matters is a good seal, not the brand name on the cup.
Install the new BB to spec. Crank back on. Pedals to 35 Nm.
The Press-Fit Problem
But what is press-fit creak, exactly? In essence, it’s the BB shell itself flexing under load. But it’s much more than that — it’s often a fundamental mismatch between frame material behavior and bearing cup design.
Press-fit shells are thinner than threaded shells. They flex measurably under hard pedaling. A bearing cup that’s even slightly loose in that shell will creak on every stroke because the frame is moving around it. Clean bearings, tight bolts, no visible damage — and still creaking constantly. That’s the press-fit signature.
A threaded insert conversion fixes this permanently but requires specific installation tooling and sometimes an adhesive press-fit during installation. That’s shop work. If you’ve got a press-fit frame, clean bearing inspection, and the creak is still there — take it in. While you’re there, mention the possibility of a hairline shell crack. That’s a different problem, but it presents identically.
After the Fix — How to Confirm the Creak Is Gone
Ride the same route where the creak first appeared. Same surface, same day you made the repair if possible. Rough pavement loads the frame properly — smooth roads don’t reveal much. Climb something. Load the pedals hard. Really try to bring the noise back.
Gone? Good. You’re done.
Creak comes back within a week? That tells you something important — it’s not the BB, and it probably never was. Either you’ve got press-fit shell flex or a hairline crack in the BB shell that opens and closes under pedaling load. Both require professional diagnosis. A crack can be invisible to the eye and still creak audibly on every hard pedal stroke. Don’t ride it and wait. Ride it directly to a shop.
Creak solved for good? You just saved yourself a shop visit and probably $150 in labor. More importantly, you now understand exactly what’s happening mechanically when you push down on those pedals. That knowledge is worth more than the money, honestly.

Stay in the loop
Get the latest bike maintenance pros updates delivered to your inbox.