Your chain is hanging slack and slapping against the chainstay every time you hit a bump. The fix depends on what kind of bike you’re riding — singlespeed chains and geared bike chains go loose for completely different reasons, and the solutions are not the same.
How to Tighten a Bike Chain by Bike Type
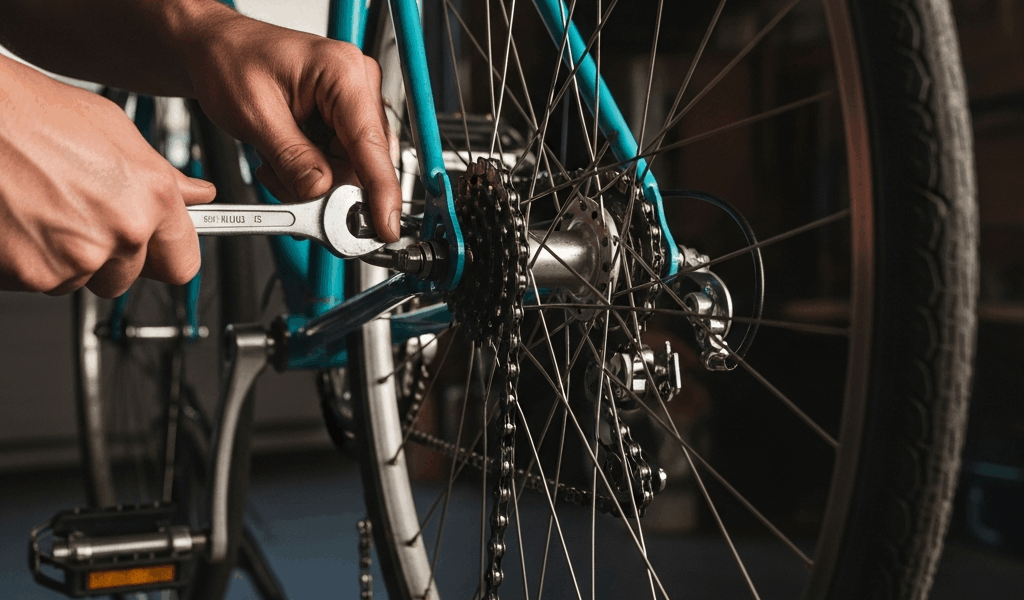
Singlespeed, fixie, or BMX: These bikes use horizontal dropouts, which means you can slide the rear wheel backward to take up chain slack. Loosen both rear axle nuts (usually 15mm), pull the wheel straight back until the chain has about half an inch to one inch of vertical play at the midpoint between the chainring and rear cog. Make sure the wheel stays centered in the frame — eyeball it from behind. Tighten the axle nuts firmly (80-100 Nm if you have a torque wrench) and spin the wheel to check that the chain isn’t too tight. A chain with zero slack on a singlespeed will bind, accelerate wear on both cog and chainring, and feel terrible to pedal.
Geared bike with a rear derailleur: Here’s the thing — your chain shouldn’t be loose. The rear derailleur is a spring-loaded tensioner specifically designed to take up chain slack automatically as you shift between gears. If your chain is hanging loose on a geared bike, something is actually wrong, and sliding the wheel back won’t fix it. Read the next section.
Why Is My Chain Loose on a Geared Bike?
A loose chain on a derailleur-equipped bike means one of three things, and each requires a different response:
The chain has stretched past its wear limit. Chains elongate as the pins and rollers wear against each other. A chain wear checker tool (like the Park Tool CC-3.2 — costs about $10) tells you instantly: 0.5% stretch means replace soon, 0.75% stretch means replace now. A stretched chain is effectively longer than it should be, and the derailleur can’t compensate for the extra length. This is the most common cause of a loose chain on a geared bike, and it’s the one most people miss.
The derailleur spring is weak or broken. The spring inside the rear derailleur cage is what pulls the chain taut. If that spring has lost tension — from age, a crash, or just years of use — the derailleur won’t take up slack properly. You’ll notice the chain sagging even in the smallest cog. On older derailleurs, you can sometimes disassemble the cage and retension the spring. On newer ones, it’s usually easier to replace the derailleur entirely ($30-80 depending on the model).
The chain is too long. If someone recently replaced your chain without measuring against the old one or using the big-big-plus-two-links sizing method, the chain may simply have too many links. The derailleur takes up what it can, but there’s a limit to how much excess chain the cage can absorb. Remove the chain, size it against the old chain (link for link), or route it through the big chainring and big cog with the derailleur bypassed, then add two links. That’s your correct length.
Singlespeed Chain Keeps Getting Loose
You tightened it last week and it’s already slack again. This recurring problem usually has one of three causes:
The axle nuts aren’t tight enough. If the rear wheel creeps forward under pedaling force, the chain goes slack. This is especially common on steel-frame bikes where the dropout surfaces are smooth. Tighten the axle nuts to proper torque — 80-100 Nm for track nuts. If you’ve been hand-tightening, that’s probably the issue right there. A cheap 15mm wrench and some actual force will solve it.
The chain is worn out. A stretched chain will feel tight when you first set it and then loosen up as it settles back into its worn state on the cog teeth. If you’re adjusting the same chain more than once a month on a singlespeed, it’s telling you it needs to be replaced. Singlespeed chains are $8 to $15 — don’t burn hours adjusting a chain that’s done.
The chainline is off. If the front chainring and rear cog aren’t aligned (the chain runs at a slight angle rather than straight), the chain will work itself loose faster as lateral forces push against the cog teeth. Check your chainline by sighting down from above — the chain should run straight from chainring to cog with no visible angle. Chainline issues usually come from incorrect spacer placement on the rear hub or a bottom bracket with the wrong spindle length.
When to Replace the Chain Instead of Tightening It
A $10 chain wear gauge is the single best investment you can make for drivetrain longevity. Here’s why: a stretched chain wears out your chainring teeth and cassette cogs faster. The rollers no longer sit correctly in the tooth valleys, so they grind against the tooth profiles and reshape them. If you ride a worn chain long enough, replacing just the chain won’t fix the skipping — you’ll need a new cassette ($25-60) and possibly a new chainring ($15-40) too.
Check your chain once a month or every 500 miles. At 0.5% stretch on the wear gauge, start shopping for a replacement. At 0.75%, stop riding on it — every mile past that point is accelerating damage to the rest of your drivetrain. Replacing a $12 chain on time saves you a $60 cassette replacement down the road. That math works out every single time.
On a geared bike, if the chain is skipping under load even after replacement, the cassette is already worn to match the old chain’s stretch pattern. Replace the cassette and chain together for a clean start. On a singlespeed, the same logic applies to the rear cog — if the teeth look hooked or shark-finned, the cog is done.


Stay in the loop
Get the latest bike maintenance pros updates delivered to your inbox.