Advanced Bike Repair Tips
Bike repair is an art and a science. Mastering the basics is essential, but advancing your skills can save you time and money. Here, we’ll delve into some advanced bike repair tips. These tips are not commonly discussed, yet they can significantly enhance your biking experience.
Wheel Truing
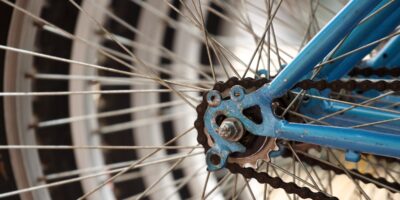
Truing a wheel means adjusting the tension of the spokes to bring the wheel into proper alignment. Begin by setting up your bike on a workstand. Spin the wheel and identify any wobble. Use a spoke wrench to adjust the spoke tension on the side of the wobble. Make small adjustments; between a quarter to a half-turn at a time. Check the wheel again; repeat until the wheel spins true.
Crank Arm Installation
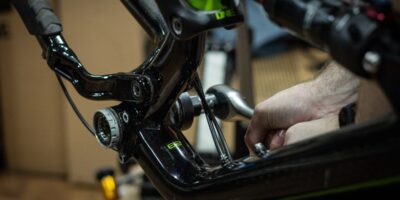
Check that the bottom bracket is clean and properly greased. Slide the crank arm onto the spindle. Make sure it goes all the way to the bottom bracket shell. Use a torque wrench to tighten the crank arm bolt to the manufacturer’s specifications. Over-tightening can damage the components, while under-tightening can cause the crank arm to come loose.
Derailleur Adjustment
Start with the rear derailleur. Shift to the smallest cog and adjust the high limit screw until the jockey wheel lines up with the smallest cog. Shift to the largest cog and adjust the low limit screw until the jockey wheel lines up with the largest cog. Fine-tune the indexing by adjusting the barrel adjuster. Shift through all the gears to ensure smooth operation. Apply the same process to the front derailleur, starting with the lowest gear and working up.
Brake Bleeding
Essential for hydraulic disc brakes. Remove the wheel and brake pads to prevent contamination. Attach a bleed block in place of the brake rotor. Connect a syringe filled with brake fluid to the bleed port on the caliper. Open the port and push fluid through the system to remove air bubbles. Close the port, replace the wheel and pads, and test the brakes.
Headset Bearing Replacement
Remove the handlebars and front fork. Carefully remove the old bearings from the headset cups. Clean all components thoroughly. Apply a thin layer of grease to the new bearings and insert them into the cups. Reassemble the front fork and handlebars. Ensure that the headset is properly adjusted to avoid play or binding.
Chain Maintenance
Clean your chain regularly. Use a chain cleaner tool or a simple brush and degreaser. Lubricate the chain with the correct type of lube for your riding conditions—wet lube for wet conditions and dry lube for dry conditions. Remove excess lubricant with a clean cloth. A well-maintained chain can significantly extend the life of your drivetrain.
Suspension Tuning
Dialing in your suspension settings can greatly improve ride quality. Start with the manufacturer’s recommended settings for your weight. Adjust the air pressure in your fork and rear shock to set the sag. Fine-tune rebound and compression settings based on your riding style and terrain. Periodically service your suspension components, including changing the oil and inspecting seals.
Tubeless Tire Setup
Ensure your rims and tires are tubeless-compatible. Apply tubeless rim tape to seal the rim. Install the tubeless valve stem. Mount the tire onto the rim, leaving one side of the tire bead loose. Pour tubeless sealant into the tire before fully mounting the other side. Inflate the tire to seat the bead. Shake and rotate the tire to spread the sealant evenly; check for leaks.
Brake Rotor Truing
Spin the wheel and observe the rotor. Look for any wobble. Use a rotor truing fork to gently bend the rotor back into place. Check for proper alignment with the brake pads. A true rotor provides consistent braking performance and prevents noise.
Pedal Installation
Clean and grease the pedal threads. Determine the correct pedal for each side—left side pedals have reverse threading. Hand-tighten the pedal into the crank arm, then use a pedal wrench to fully secure it. Avoid over-tightening, which can damage the crank arm threads.
Cassette Replacement
Remove the wheel and the quick-release skewer or thru-axle. Use a chain whip to hold the cassette in place and a cassette lockring tool to remove the lockring. Slide off the old cassette, clean the freehub body, and install the new cassette. Reapply the lockring and tighten to the specified torque. Reinstall the wheel and check shifting performance.
Bottom Bracket Service
Remove the crankset to access the bottom bracket. Use the appropriate bottom bracket tool to remove the bottom bracket from the frame. Clean the shell and threads thoroughly. Inspect the bearings; replace if necessary. Apply grease and reinstall the bottom bracket to the manufacturer’s torque specifications.
Hub Overhaul
Remove the wheel from the bike. Take off the dust caps, cones, and bearings from the hub. Clean all components thoroughly. Inspect for wear; replace if necessary. Regrease the bearings and reassemble the hub. Ensure correct bearing preload to avoid play or binding.
Shift Lever Maintenance
Remove the shift cable from the lever. Clean and inspect the internal components. Apply a small amount of grease to any moving parts. Reassemble the shifter and reinstall the cable. Adjust the derailleur as needed to ensure smooth shifting.
Spoke Replacement
Identify the length and type of spoke needed. Remove the tire, tube, and rim tape. Use a spoke wrench to remove the damaged spoke. Thread the new spoke into the hub and rim, ensuring proper orientation. Tension the spoke to match the surrounding spokes. Reinstall the rim tape, tube, and tire. True the wheel if necessary.
Rear Shock Bushing Replacement
Remove the rear shock from the frame. Press out the old bushings using a bushing removal tool. Clean and inspect the shock eyelets. Press in the new bushings, ensuring they are fully seated. Reinstall the shock and torque the mounting bolts to the manufacturer’s specifications.
Brake Cable Replacement
Remove the old brake cable and housing. Measure and cut the new housing to the correct length. Insert the new cable into the housing and install it onto the bike. Attach the cable to the brake caliper and adjust the tension. Test the brakes and make any necessary adjustments for proper braking performance.
Internal Cable Routing
Use a magnet or internal routing tool to guide the cable through the frame. Insert the cable into one end of the frame and use the tool to pull it through to the exit point. Ensure the cable is not kinked or damaged during installation. Secure the cable to the components and adjust as needed for smooth operation.
Seatpost Maintenance
Remove the seatpost from the frame. Clean the seatpost and the inside of the seat tube. Apply a thin layer of grease or assembly paste to the seatpost. Reinstall the seatpost, adjusting the height to your preference. Tighten the seatpost clamp to the specified torque.
Brake Lever Adjustment
Loosen the brake lever clamp bolt. Position the lever at a comfortable angle for your riding style. Tighten the clamp bolt to secure the lever in place. Adjust the reach of the lever, if possible, to ensure easy access while riding.
Wheel Bearing Replacement
Remove the wheel from the bike. Take off the axle nuts or quick-release skewer. Use bearing pullers to remove the old bearings from the hub. Clean the hub and inspect for damage. Press in the new bearings using a bearing press tool. Reassemble the wheel and check for smooth rotation.
Chainring Replacement
Remove the crankset from the bike. Use a chainring bolt tool to remove the old chainring. Clean the crank arms and bolts. Install the new chainring, ensuring correct orientation and bolt tightness. Reinstall the crankset and check for proper chain alignment.
Rear Derailleur Hanger Alignment
Use a derailleur hanger alignment tool. Attach the tool to the hanger and check its alignment against the wheel rim. Gently bend the hanger into alignment if needed. Accurate hanger alignment ensures precise shifting and prolongs component life.
Cable Lubrication
Remove the cable from its housing. Apply a thin layer of lubricant to the cable. Reinsert the cable into the housing and install it back onto the bike. Lubricated cables reduce friction and improve shifting performance.
“`


Subscribe for Updates
Get the latest articles delivered to your inbox.
We respect your privacy. Unsubscribe anytime.