Dropper Post Won’t Return — The Air Pressure Fix
Dropper posts have become harder to navigate with all the diagnostic noise flying around. Everyone’s got a theory. Replace the internals. Bleed the hydraulics. Buy a new post entirely. As someone who’s been wrenching on mountain bikes for twelve years, I figured out how to handle stuck droppers — mostly through embarrassing trial and error. And here’s what I can tell you: the fix is almost never what riders think it is.
This article includes affiliate links. We may earn a commission at no extra cost to you.
The dropper post won’t return issue lands on my repair stand at least twice a month. Post drops fine, then just hangs there — completely ignoring the return signal from the lever. Sometimes it creeps up slowly. Sometimes it doesn’t budge at all. Riders show up already mentally pricing replacements. Nine times out of ten, I have them back on the trail in under five minutes.
Try This First — Check Air Pressure
But what is a variable-pressure dropper post, really? In essence, it’s a seatpost with an internal air chamber that powers the return stroke. But it’s much more than that — it’s also one of the most pressure-sensitive components on your bike, and the one most riders completely forget to maintain.
RockShox Reverb, Fox Transfer, OneUp Components, Cane Creek Thudbuster — they all run on the same principle. Release the lever, and air pressure shoves the post back up. Drop that pressure too low, and the return mechanism just… gives up. No dramatic failure. No warning. It simply can’t generate enough force anymore.
Worth flagging before going further — because I’ve watched experienced riders waste two hours troubleshooting when they could’ve solved it in two minutes flat.
Grab a shock pump. A decent one runs $35 to $50 — the Lezyne Alloy Floor Drive or Topeak JoeBlow are what I keep on the workbench. You need a pump with an actual gauge. No eyeballing this.
Pull out your dropper manual and find the correct PSI range. These numbers matter:
- RockShox Reverb AXS (2020 and newer): 195 PSI nominal
- RockShox Reverb (older generation): 150–160 PSI
- Fox Transfer (all models): 190 PSI nominal
- OneUp V2: 200 PSI nominal
- Cane Creek Thudbuster LT: 180 PSI nominal
These aren’t suggestions. They’re the pressure at which the post is actually designed to function. Too low — you lose return speed and force. Too high — you’re torching internal seals. Side-step the error I made. I once cranked a Reverb to 220 PSI thinking more pressure equals better performance. Blew out the seal in three weeks. Expensive lesson.
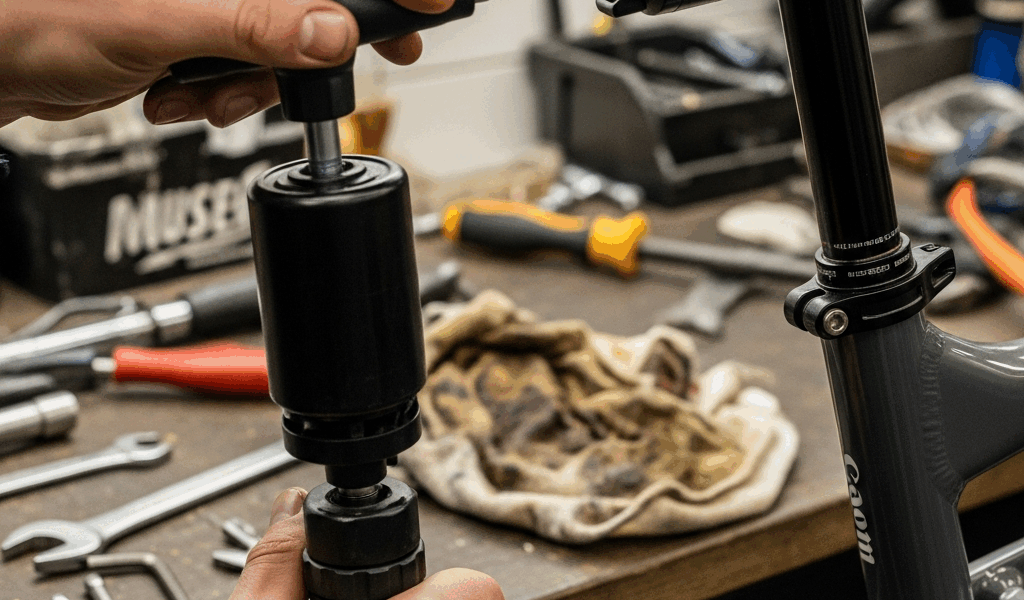
Remove your seatpost from the frame. The air valve sits at the base — usually hiding under a small rubber cap. Unscrew that cap. Connect the shock pump. Check the current pressure. Write it down. I’m serious about this step, because you need a baseline before you start adding air.
More than 10 PSI below spec? That’s your problem. Add air slowly — five PSI at a time — until you hit the manufacturer’s number. Reinstall the post. Test the return with gentle hand pressure first, then take it around the block.
That’s what makes air pressure endearing to us mechanics — it’s the fix that feels too simple to be real, until it works perfectly every single time.
Why does pressure drop in the first place? Seals age. Small internal leaks develop over months of hard use. Heat cycles push air in and out constantly. Rain and mud find their way into everything — apparently that’s unavoidable no matter how much you baby your gear. Losing 15–20 PSI over a full season is completely normal. Not a defect. Just maintenance.
Check air pressure every three months if you ride regularly. Every month in wet conditions. Most shops charge $15 to $25 for a top-up if you’d rather not buy a pump — still cheaper than a new post by a significant margin.
Seatpost Clamp Too Tight
Frustrated by a post that wouldn’t budge despite perfect air pressure, a shop regular named Derek discovered his entire problem using a 2mm Allen key and about thirty seconds of patience. The clamp was crushing the post so hard it physically couldn’t move upward through the frame.
This is the second thing I check. People assume tighter equals better — they crank the clamp bolt until the Allen key feels like it’s about to snap. The lever works fine. The hydraulics are fine. The air pressure is textbook. But the post is being held in a vice grip.
The fix is counterintuitive: loosen the clamp.
That’s it. Most manufacturer specs call for 4–6 Nm of torque — that’s finger-tight with an Allen key. Not arm-tight. If you’re putting serious body weight behind the tool, you’ve already gone too far.
Find the seatpost clamp on your frame — usually a single bolt facing sideways or downward, standard 6mm or 8mm. Loosen it one quarter turn. Just one-quarter. Not a full rotation. Test the dropper return. Moving now? Good. Tighten gradually until the post feels secure — then rock the saddle side to side, front to back, and try to twist the post. No movement in any direction means you’re done.
The correct tightness feels genuinely weird at first. You’ll be convinced it’s about to slip mid-climb. It won’t. Seatpost clamps are efficient — they don’t need brute force to do their job.
I made this exact mistake early on. Tightened a customer’s clamp down hard after a repair, pure muscle memory. Customer came back two days later. Post wouldn’t return. I loosened it one-quarter turn and it worked perfectly. Cost me an hour of unnecessary troubleshooting and, honestly, some embarrassment I probably deserved.
Cable Drag and Routing Issues
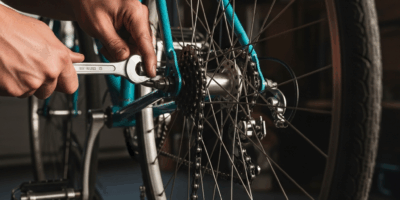
Follow the cable from your dropper lever all the way down to the post. Trace the whole path. Sharp kink anywhere? Does it wrap around frame tubing at a 90-degree angle? Is there a spot where the housing looks like someone folded a paperclip and called it good?
Mechanical dropper posts rely on cable tension to activate the return valve. Too much friction from bad routing — the return signal never arrives. The lever feels mushy. Post drops, stays dropped.
Check specifically for:
- Cable housing routed too close to frame tubing with no clearance
- Housing bent at angles sharper than 30 degrees
- Visible moisture dripping from either end of the cable housing
- Housing crushed or dented from impact damage
- Housing twisted or spiraled around itself
Water ingress is particularly nasty — and apparently more common than most riders expect. Ride in the rain, and the cable housing interior can fill with moisture. The cable inside moves like it’s dragging through mud. You’ll see water at either end of the housing if this is happening. Fix requires pulling the cable entirely, drying everything out, and rerouting with better protection going forward.
For most routing problems, you can improve things immediately — wide, smooth turns throughout the run, no sharp bends anywhere. The cable should slide freely inside the housing when you wiggle it gently. Use frame tape or adhesive clips to hold the line in position. Cable stops should sit at least two inches from the lever and post connection points.
While you won’t need a full cable replacement every time, you will need a handful of basic supplies to do this properly. First, you should clean the entire cable assembly — at least if you’ve been riding in any kind of wet or muddy conditions. Wipe down exposed sections with a degreaser rag. Let it dry completely. Then apply a thin coat of lightweight lubricant — SRAM Cable Butter or Finish Line Dry Lube work fine here. Avoid thick chain lube. That’ll attract dirt and slow everything down fast.
A quality lined cable housing might be the best option, as dropper post routing requires low-friction movement throughout the full stroke. That is because even minor resistance compounds across the cable run and prevents the return valve from receiving a clean signal.
Work through air pressure, clamp tension, and cable routing — in that order — and you’ll solve roughly ninety-five percent of dropper post return issues without spending a dollar. The remaining cases usually involve internal seal failure, which means professional service or replacement. But check these three things first. You’ll save yourself real time, real money, and the particular misery of a stuck post halfway down a descent you were actually looking forward to.


Stay in the loop
Get the latest bike maintenance pros updates delivered to your inbox.